I have a new hobbie, and no, it’s not of the crafty variety.
Ever since visiting the Martin Guitar factory in July and learning about the ukuleles they make (I had no idea!), I’ve had a longing to learn to play one. They’re not as intimidating to learn as a guitar, and with Chris absolutely enamored with the mandolin I bought him for his 33rd birthday, it made me want to learn to play a stringed instrument so we could play songs together (however, he’s been playing guitar for over 20 years…I have some catching up to do…)
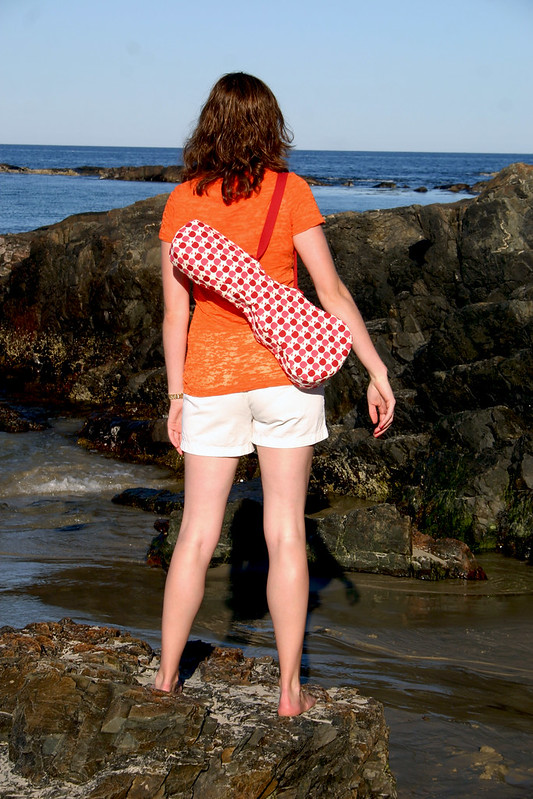
Playing the ukulele is So. Much. Fun. I’ve had my little guy for about two weeks now and can stumble my way through a handful of chords and some songs like Somewhere Over the Rainbow, Octopus’s Garden, Hotel California, and Both Sides Now. Since we were leaving to go on vacation to Ogunquit, ME shortly after my ukulele arrived, and I didn’t want to lose out on a week of practice, I whipped up a carrying case from some fabric in my stash so I could take my uke to the beach.

To make a pattern, I traced around the body and neck of the ukulele on pattern paper, adding seam allowances and wiggle-room to make it easy to take the uke out of the case and put it back in. I also measured the depth of the ukulele, so I knew how wide to make my side panels.
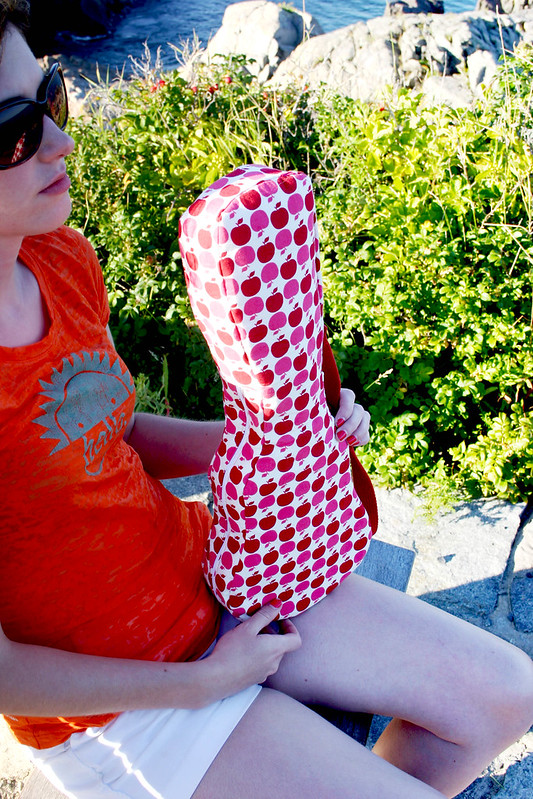
Even though this is a cheap uke I bought online, I wanted the case to be durable enough to protect my instrument from bumps and scratches. The case is made up of leftover quilting cotton from a few years ago, a layer of stiff interfacing, craft fleece, and a flannel lining. If I was to make a uke case again, I’d use a different fusible interfacing than the craft kind I found, maybe a woven fusible. The interfacing creases around the neck and isn’t as stiff as I’d like it to be. I’d also use fusible fleece instead of the regular fleece I had kicking around, it’d be much easier to work with.
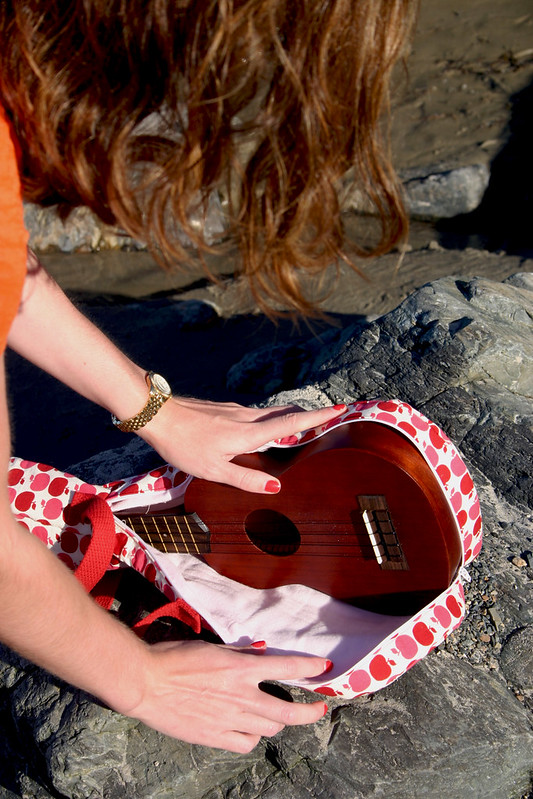
The zipper I used was a 36″ robe zipper, so I cut two 36″ rectangles half the width of the side panels and attached the zipper to the middle of the two pieces to create the zipper portion of the case side panel. Then, I measured around the ukulele to see how long I needed to make the other side panel piece, cut it out, and sewed the short ends of the zippered panel to the new, shorter panel, forming a loop.
The easiest way I could figure out to sew the webbing strap on was to do it by hand before attaching the lining. I pinned the strap onto the side of the case, playing around with the placement of the strap so the body would balance when holding the strap like a handle. The nice thing about the length of the strap is that it can be worn on the shoulder, and it’s not too long that I can’t hold the strap in my hand if I feel like it.
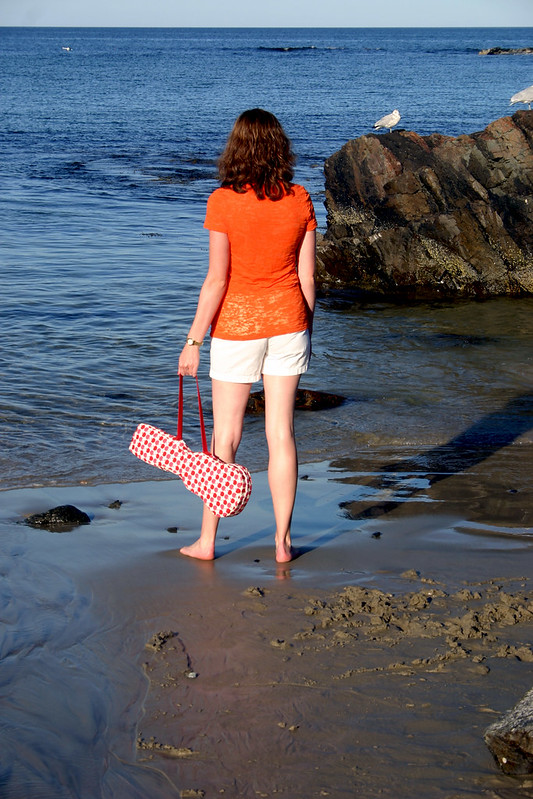
I carted my ukulele down to the beach every day on vacation last week to get my practice sessions in without worrying about it getting scratched or banged up, thanks to this little case. Funny enough, a guy on a blanket next to us one day also brought his ukulele to the beach – his was much nicer and more expensive looking than mine, but had a boring black case. I think I definitely trumped him there with my apple-print case!
Now please excuse me, I need to practice learning Stairway to Heaven…
