You’ve been warned…there’s some serious geeking out about tailoring in this post! I’ve been using Evernote on my iPad as a brain-dump to keep track of all of my thoughts and the different methods used in this tailoring process, and I’d like to share them with you, dear readers, in case you’d like to make a tailored Yona Coat of your own.
I alluded to this in one of my earlier coat posts, but there’s a lot to consider when you’re working on a tailoring project on this scale – do you custom, machine, or fuse tailor, or a combination of the methods to achieve the desired result? What types/weights of interfacing are best for the fabric you’re using? Do you interline or underline, since you can’t do both? And if you’re interlining, will you have enough wearing ease after the fact? These questions just skim the surface of the types of things to think through before cutting out a coat, it all starts with having a clear plan in mind of the processes you’ll use before you begin.
If you’ve ever sewn a blazer or a jacket, the basic construction of the Yona Coat is pretty straight-forward. I quickly skimmed over the instructions to get the general gist of construction, but heavily relied on the book Tailoring: The Classic Guide to Sewing the Perfect Jacket for all methods of tailoring and construction outlined in this post.
The Coat Front
Pockets – those patch pockets had to go, I want to sink my hands into some nice welt pockets when I wear this coat. I drafted a pattern for an angled welt and pocket bag (7″ deep) and inserted it before sewing any seams. I also interfaced the welt pocket opening with fusible tricot interfacing for stabilization (this was before sewing any of the welt and cutting open the pocket).
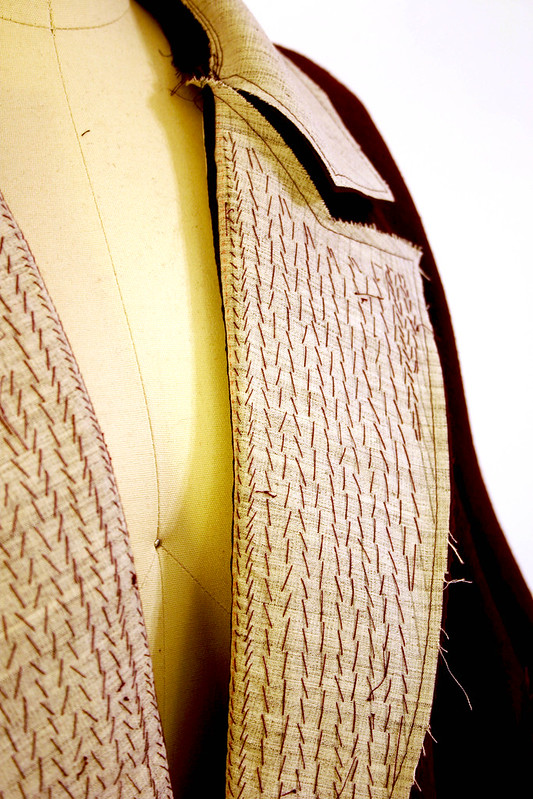
Interfacing – I opted for a partial front interfacing with lightweight hair canvas. The reason for not interfacing the entire coat front is because I was afraid that the hair canvas would make the coat too stiff and bunchy when closed with the belt, and it’s also what the tailoring book recommended for coats, lol. To attach the interfacing to the coat front, I basted it by machine in the seam allowances.
Lapels – As much as I liked the idea of custom tailoring the front and lapels all by hand, I just couldn’t bring myself to spend that much time hand-sewing all of the hair canvas in place (I don’t enjoy hand-sewing very much, to be honest). Using the machine tailoring method, I applied the twill tape on the roll line by machine, and then marked my pad-stitching lines with pencil and pad-stitched the lapels. I believe it took me about two nights total to finish all of my pad-stitching, and then I steamed the heck out of the lapels and let them dry overnight. I’m glad I didn’t skimp on the hand sewing on this part, the pad-stitching makes such a big difference in the lapels rolling out and staying in perfect place. It was so cool to see this process happen as I stitched!
The Sleeves and Coat Back
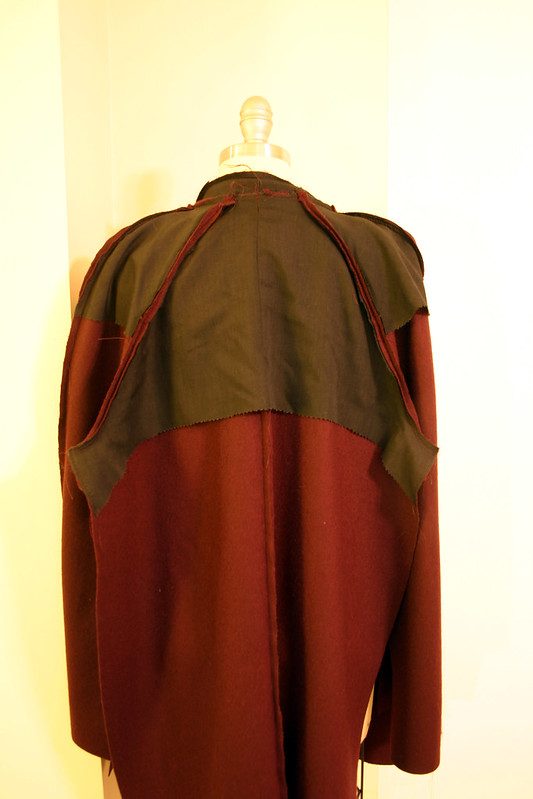
Sleeves – raglan sleeves require neck and shoulder stays to keep the shape and drape of the coat uniform and prevent the coat from looking droopy in these areas. Plus, if you’re using shoulder pads (not sure if I will or not yet…), the stay disguises them from showing through to the front. I used a lightweight sew-in interfacing from Steinlauf and Stoller – the stays were drafted off of my sleeve pattern and extended down 8″ from the top of the sleeve cap, cut on the bias.
Back – a back stay is also important to prevent the upper back from collapsing. The drafting process was the same as the sleeves, I used the back pattern piece as my guide and drew a curve about 3″ below the armhole for the bottom of the stay pattern piece. This piece was also cut on the bias out of the sew-in interfacing.
The Collar
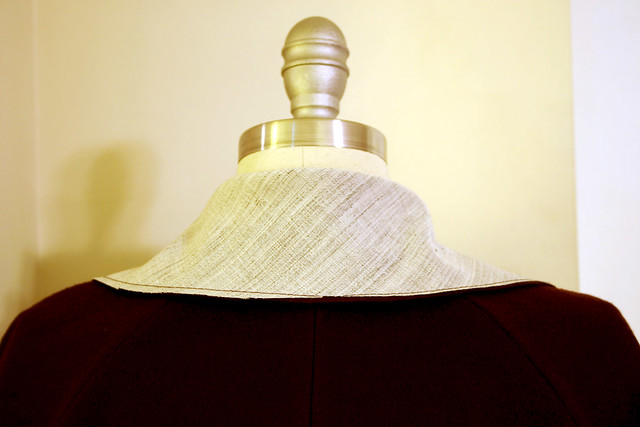
This was a little tricky to figure out how to execute. The traditional tailored collar consists of an undercollar and top collar, with the undercollar including the collar stand in the pattern piece. Then, the undercollar is padstitched to create and shape the roll line of the collar stand. However, for the Yona Coat, there are separate pieces for the undercollar and the collar stand. I was torn with how to proceed: do I try to redraft the undercollar with the collar stand attached? Do I just throw caution to the wind and cross my fingers it will work, drafted as is?
The Threads article about Armani jacket interfacings mentioned how to handle this type of collar construction and interfacing weights to use, so I cut the undercollar on the bias, hair interfacing for the undercollar on the bias, the collar stand on the straight grain, and lightweight sew-in interfacing on the straight grain. Cutting the undercollar and interfacing on the bias helps the undercollar roll under when it’s attached to the top collar.

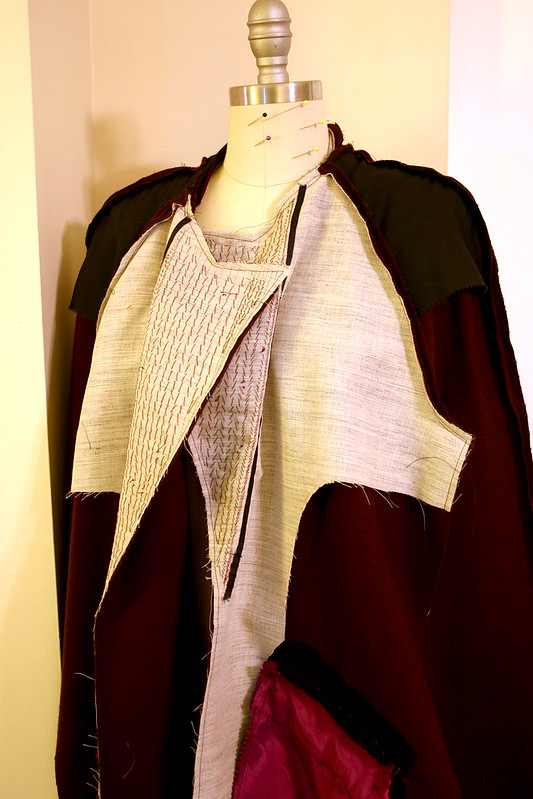
Now you can see what the collar looks like with the top and undercollar joined together at the neck. There was some significant turn of cloth that I needed to adjust before sewing the two units together along the collar seam.
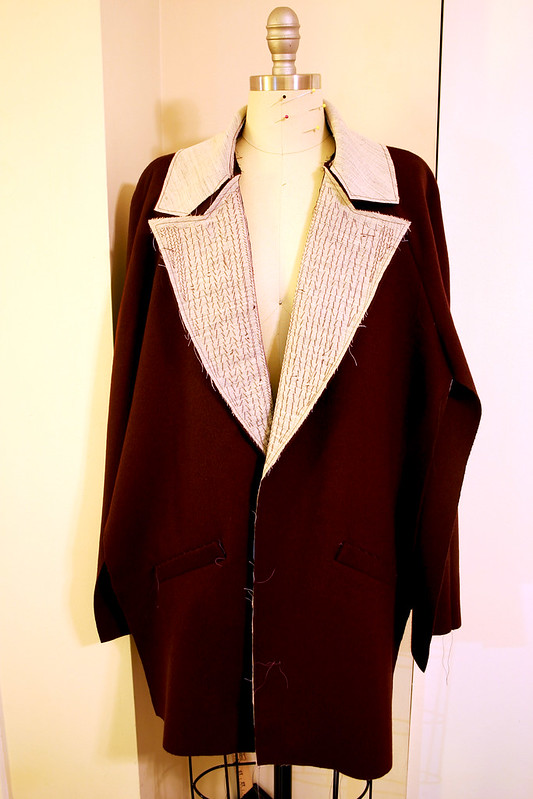
And here’s what the front of the coat looks like before sewing the side seams! I waited to sew them up until I applied interfacing to the hems, which I did the other night. Again, not wanting to do more hand-sewing than necessary, I thought it would ok to use fusible weft interfacing cut on the bias for the hems. It’s not such a critical area that it would be detrimental if the fuse application didn’t hold well, like in the lapels, but it seemed to fuse nicely with no problems.
As a side note – yes, this is a notched collar, and it’s not sewn correctly in these photos. This was before I realized that, d’oh! The collar and lapel weren’t connected at that critical seam at this point. I went ahead and sewed the collar and lapel facings and graded the seam allowances before realizing this, and I got a really funny looking coat afterwards! It wasn’t anything a little seam ripping and hand-basting couldn’t fix, and now my coat collar is correct, whew.
All that’s left is the lining, and if Mother Nature decides to not dump more snow and let UPS deliver my flannel interlining, I’m hoping to complete the coat by the end of the week. My ultimate goal is to have a new coat to wear by Valentine’s Day (no particular reason, it was a month out from when I started planning all of this in January) and I think that may be a reality!

I am so excited to see this coat finished!!!!!!! This is giving me a major itch to make another coat!!!
Really interesting. I'm afraid my yona coat has nothing like this work in it! All fusible interfacing, perhaps next time!