Finished Garment: I Made My Wedding Dress (NBD)

Lucinda+Chris-2521
Photo Credit: Maria Burton Photography

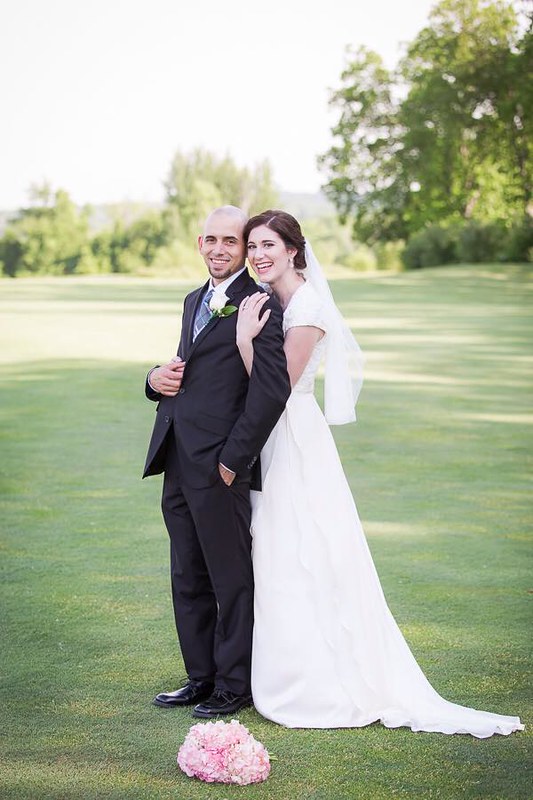
This is a long overdue post – heck, I’ve been married for exactly two months!  I made my wedding dress from scratch and lived to tell the tale.  Get ready, this is a long post of everything I went through in the last year of making my dress with a lot of photos.

First, I’ll get this right out of the way: making my wedding dress was 100% the right decision for me.  I never was one of those little girls that “dreamed” about what kind of wedding I’d have one day, I honestly wanted to get married at City Hall and save the cash for a house.  However, I always knew that I’d make my wedding dress – sure, the thought was daunting at first, especially with everything that comes with planning a wedding, but I felt that to not make my wedding dress would be to ignore who I am as a person – I’m a creator.

My Parent's Wedding
 

On top of that, I also liked the idea of starting a tradition out of making my wedding dress; my mom made hers when she married my dad in Tucson, AZ in 1972.  I’d like to think that if I have a daughter, she’d make her wedding dress as well.

Lucinda+Chris-2242
Photo Credit: Maria Burton Photography
THE DETAILS

Fabric (all bought in The Garment District in NYC):
Monique Lhuillier French Alencon Lace – Sposabella Lace
Reem Acra Silk – Mood Fabrics
Silk Georgette – Metro Textiles (thank you, Kashi!)
Rayon Lining – Metro Textiles

Belt
Silk Ribbon – M&J Trimming
Silk Flower – M&S Schmalberg, made from my leftover Reem Acra silk fabric

Other Odds and Ends
Faux Bridal Buttons – Joyce Trimming
Zipper – Pacific Trimming
English Netting (for veil) – Vogue Fabrics
Silk thread used for all handwork, cotton/poly thread use for construction

Dress Pattern
Marfy S568


Lucinda+Chris-4730
Photo Credit: Maria Burton Photography

BLOG POSTS

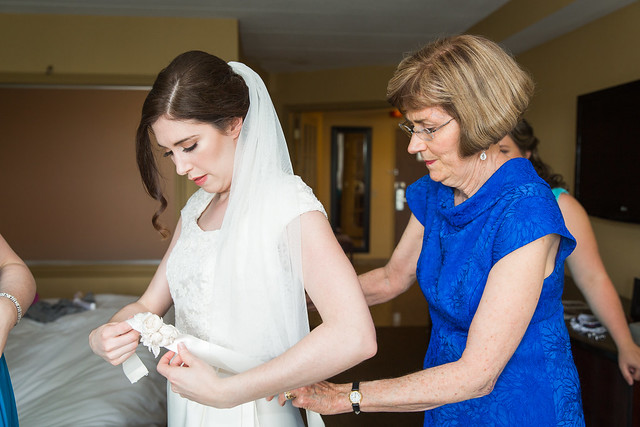
In the past year, I posted several updates on my progress as I went through trial and error figuring out how exactly I was going to make a wedding dress from a pattern that was one size only, had no instructions except for some vague and roughly translated notes here and there on the pattern pieces, and working with fabric I never used before (all of the above I don’t recommend for the faint of heart thinking about making their wedding dress!).  I also made some YouTube videos to show the dress in more detail and talk through my thought-process.

Are Wedding Dress Patterns Turning Off Brides?
Starting My Dress
Fitting the Bodice
Getting the Fit Right (Video Post)
Cutting Out My Dress Fabric (Video Post)
Attaching the Skirts (Video Post)

THE DRESS

Lucinda+Chris-4150
Photo Credit: Maria Burton Photography
 

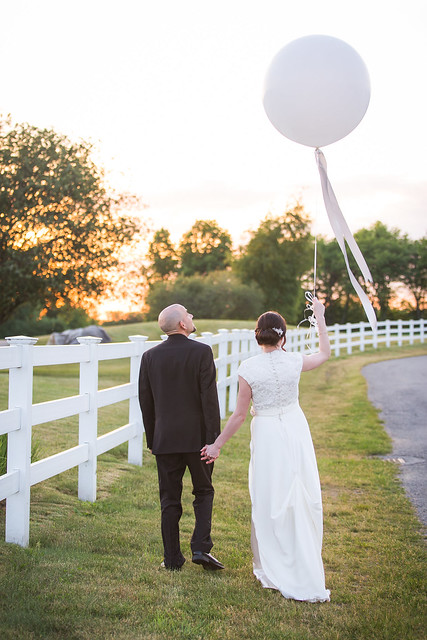
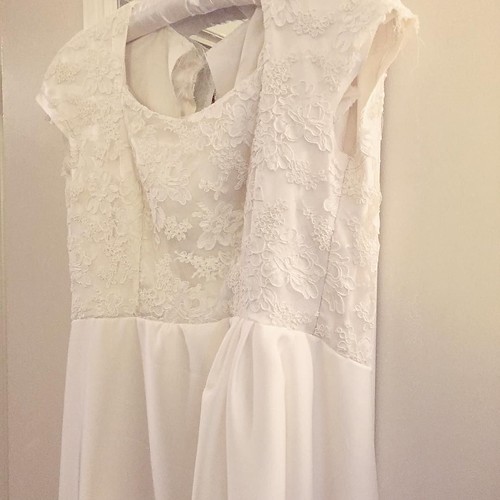
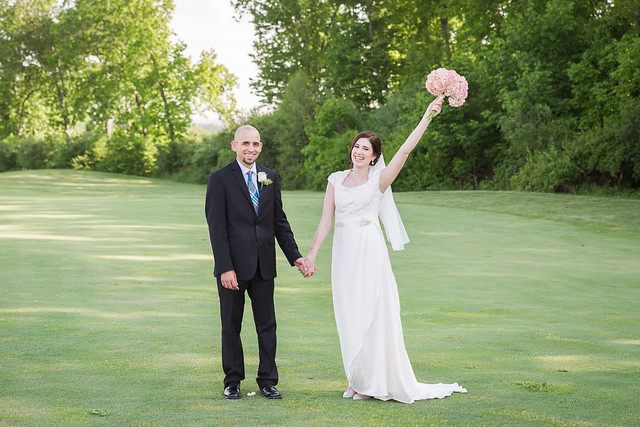
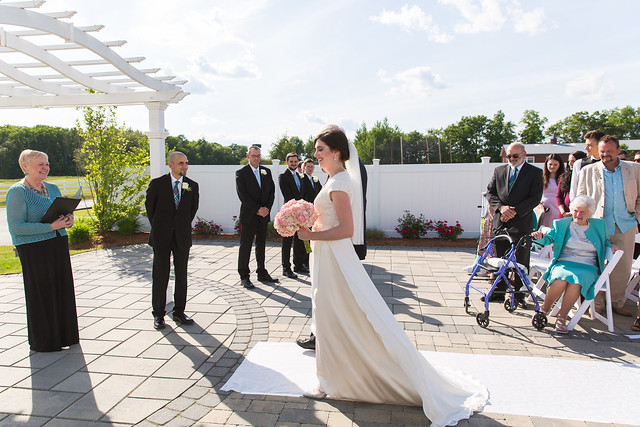
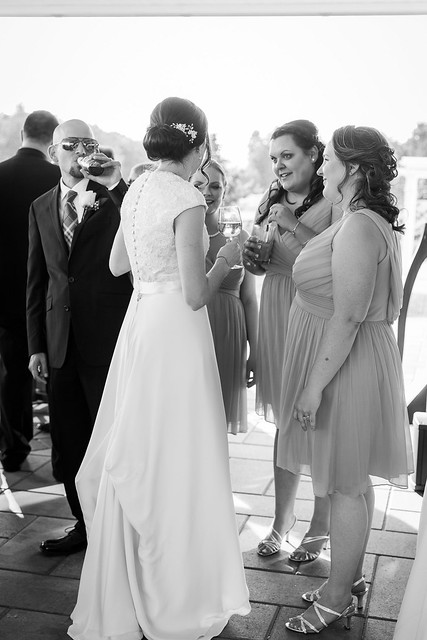
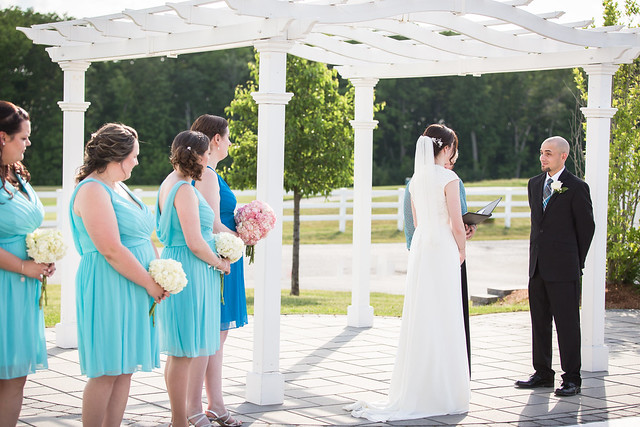
The dress is a flowy dress with a flared skirt that sits at the waist with a sweetheart neckline and kimono capped sleeves.  The lace bodice is underlined with silk – I opted to underline each piece individually and then construct the bodice instead of sewing the lace together with appliqué seams for a seamless look, sew the underlining pieces together, and then joining the two layers to make the bodice.  There are three layers for the skirt – the silk underskirt, and then two rounded overskirts of silk georgette that open at the side and are gathered with small pleats.  The entire dress is lined in a coordinating rayon lining.

Lucinda+Chris-4279
Photo Credit: Maria Burton Photography
 

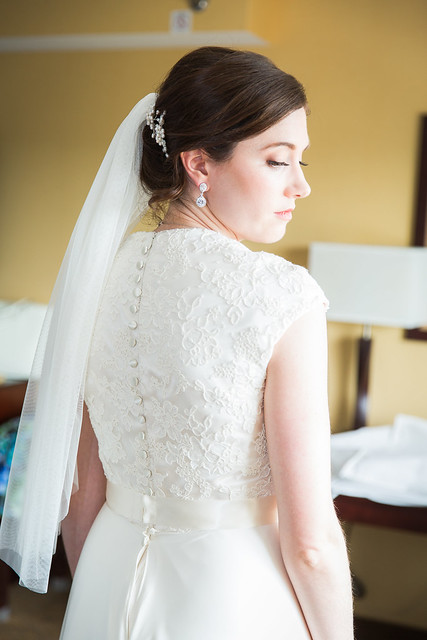
I wanted to add some kind of visual interest to the back of my dress, so I sewed tiny faux bridal buttons down one side of the zipper seam (they have a fabric shank, not a real shank, which allows the button to be sewn closer to the garment).

You can also see a bit of an opening in my overskirts in the above photo.  Because of the flowy nature of the shape of the skirts and the fabric, I didn’t want the overskirts to be anchored down as part of the zippered center back seam so they could move freely and naturally.  I used a tutorial at Grainline Studio to make the layers free hanging; they didn’t turn out as well as I hoped since you can see the openings in the back, but I think it resulted in a better look than having a zipper go through my silk georgette.  I also used a small clear snap to close up the opening a little more between the two sides of the skirts.

Lucinda+Chris-2187
Photo Credit: Maria Burton Photography
 

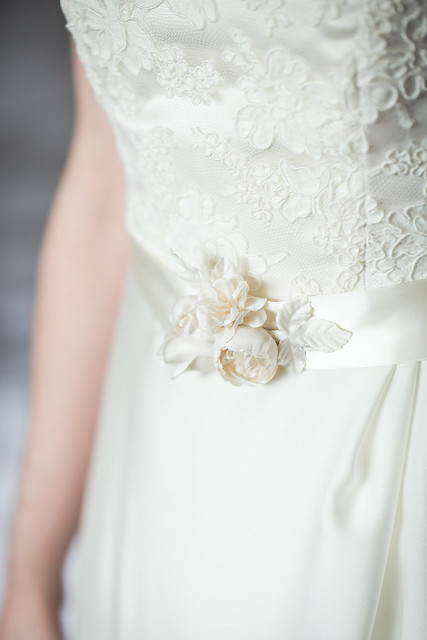
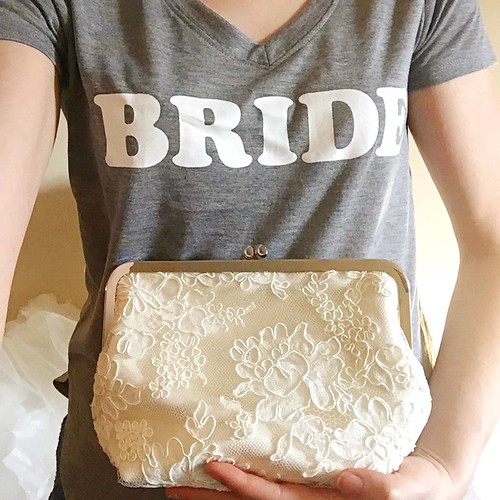
The belt was a tricky element for me to figure out since I wasn’t sure how I wanted to decorate it.  I knew it needed a motif or something at the side where the skirts gather at the side opening, but I couldn’t find anything that I liked or would compliment the design of the lace.  After stumbling upon this belt at BHLDN, I knew it was the look I wanted to have for my dress…but when I saw the price at $500, I burst out laughing.  No way!!

M&S Schmalberg (also known as Custom Fabric Flowers) came to the rescue.  I called them up to find out how to place a custom order, sent over the photo of the belt I was trying to recreate at a smaller scale, and they said they were very familiar with the original belt – hello, awesome!  I had just enough leftover silk from my dress (about a yard) to send to their facility in NYC, and within a week they sent back the finished floral arrangement.  I secured the blooms and leaves to the silk ribbon with a few small stitches and presto – a custom, coordinating bridal belt at a fraction of the cost of the inspiration belt.

Lucinda+Chris--6
Photo Credit: Maria Burton Photography
 

The belt secures in the back with two ivory hooks and eyes instead of tying in a bow like some bridal belts.  The hooks got stuck on the lace throughout the evening, which was a little annoying at times.

Lucinda+Chris-4204
Photo Credit: Maria Burton Photography
 

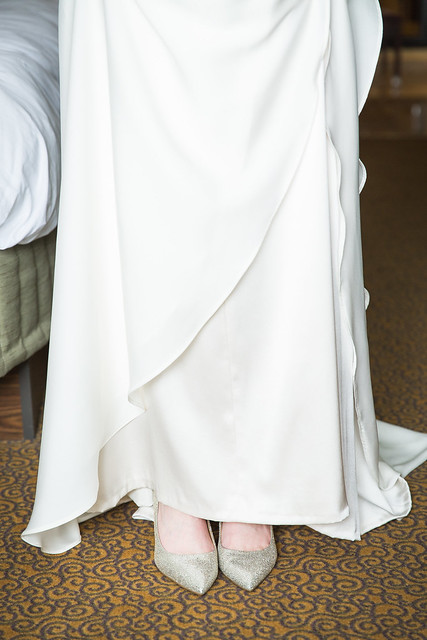
Oh, the hems!  How I agonized over the best way to sew the hems so the dress wouldn’t look “homemade.”

First, I had to figure out the correct amount to turn the hem up on the silk layer.  I jacked up my dress form to the height I would be wearing my heels (originally I was going to wear flats but they looked plain awful with my dress!) and turned up the hem slightly at the center front and tapered the hem as I got to the sides of the skirt.  I actually goofed this up the first time I turned up the hem and had a nasty crease in the front from pressing the hem in place; I spent a lot of time steaming out that crease with a hand steamer.

The first attempt at hand sewing the silk hem also failed – for one, I used regular poly thread to sew the hem, which made the tiny hem stitches in the fabric very visible since the weight of the thread was heavier than the weight of the fabric. So, I ripped it all out and used silk thread instead, as I should have from the beginning.  The hem was also pretty flimsy and needed a little extra “oomph” so the skirt would hold its shape and flow nicely.  The solution to that was to cut long 1/2″ strips of lightweight sew-in interfacing, stitch together the strips into a loop the same measurement as the circumference of the silk skinny layer, and encase the interfacing loop in the fabric of the hem as I hand-stitched the hem in place.  Problem solved!

For the silk georgette layers, I originally thought I was going to sew the hems by hand.  Hah!  Those skirts were a mile long and I would have pulled my hair out stitching all of those tiny stitches and the time it would take to do so.  Plus, when I tried a test swatch of sewing a hem by hand, it looked wonky and not as crisp as I wanted since the fabric isn’t very stable.  After lots of research online, watching Youtube videos, and asking Jen at Grainline Studio for some advice (thank you so much, Jen!), I figured out a way to hem my dress on my machine using my regular ol’ presser foot, no fancy rolled hem foot or spray stabilizer required.  You can see in the above photo that the hems turned out nicely!  There was a wavy effect of the rounded edge after I sewed the hems due to the bias nature of those parts of the skirts, but I kind of liked how it turned out.

Lucinda+Chris-4637
Photo Credit: Maria Burton Photography
It’s pretty easy to see here how the skirts flowed open as I walked, which I absolutely loved.

Lucinda+Chris-4826
Photo Credit: Maria Burton Photography
To bustle the skirts, I treated each layer separately instead of bustling them all together.  Because the fabric of this dress didn’t have the body of a heavy silk and the shape of the skirt was very fluid instead of full, the best type of bustle to use was a single-point bustle (believe me, I played around with all sorts of different types and numbers of points and they just didn’t work).  For the silk underskirt, the heaviest of the layers (by comparison), I used a thread chain loop and a leftover faux button for my bustle point, and for the silk georgette layers I used a white hook and eye on each layer.  I initially was concerned that the hook and eye would be visible to everyone when my dress wasn’t bustled since there was no way to hide it in a pattern on my skirt, but it’s really true what you read in all of those wedding dress articles – no one will notice!  Even when I stood back and looked at my dress on my dress form at home, I didn’t see the hook and eye unless I was really searching for it.

Lucinda+Chris-5211
Photo Credit: Maria Burton Photography
 

Lucinda+Chris-5256
Photo Credit: Maria Burton Photography
Dancing in this dress, especially doing a conga line, was a little tricky!  I ended up hiking up my skirts as necessary and boogied on down all night for every.  Single.  Song.  No joke.

And yes, as soon as dinner was over I kicked off my heels and donned a pair of flip flops.  Comfort over fashion, my friends.

Lucinda+Chris-4158
Photo Credit: Maria Burton Photography
Not wedding dress related, but I made matching clutches for my bridesmaids so they could carry their essentials with them, and I even had enough lace leftover to make a clutch for myself.

Lucinda+Chris--19
Photo Credit: Maria Burton Photography
I also mentioned earlier in this post that I made my veil.  If making your own wedding dress is too daunting of a task, I recommend all brides try to make their veils, even if you don’t feel comfortable with your own level of sewing.  It’s stupid easy!  I used English netting for a more fluid-looking veil a la Catherine Middleton, since the one I made out of bridal illusion felt too goofy to me, and attached it to a plastic comb that stayed in my hair the entire time.  Make sure to check out the Modern-Inspired Veils class on Craftsy if you’re thinking about making your own, it was really helpful.

Lucinda+Chris-4665
Photo Credit: Maria Burton Photography
It’s so weird to be finished with something that’s consumed our lives over the last 16 months.  We have our free time back to ease into our hobbies again, cook dinners together on a regular basis, and just enjoy spending time with each other without discussing wedding decorations and and every bit of minutia that comes with planning a wedding.  I’m even starting business school this fall to work towards getting my MBA.

Well, that was a pretty exhaustive post!  Like I mentioned at the beginning of this post, making my wedding dress was the absolute right decision for me on my wedding day, and there’s not a single thing I would have done differently.  It definitely was a journey that challenged me mentally at times, as well as my technical skills, but after making my own freaking wedding dress, I feel like I can tackle any sewing project that comes my way now.


Lucinda+Chris-2663
Photo Credit: Maria Burton Photography

Follow:

From Miss to Mrs

Photo Booth
 

Oh, hey there – it’s been awhile!

The last two and a half months were a whirlwind of wedding preparation and festivities, hence the radio-like silence since my last dress post in March. But not to fear – yes, I finished my wedding dress with time to spare, and it was probably the hardest sewn project to date that I made.  Yet, it was so rewarding to walk down the aisle wearing a dress that was special and meaningful.  All of the planning, time, sourcing fabric and materials, sore back from cutting out every single layer of fabric over three days, pricked fingers from tiny little sewing needles, figuring out how to make the dress with absolutely no instructions (it’s a Marfy pattern), trial and error of finding the right construction techniques, even the absolute *frustration* and tears at times while making my wedding dress was completely worth it. I wouldn’t have done anything differently over the past 10 months.

clutch
 

Everything we DIY’d for the wedding came together pretty easily, much to my surprise.  A few nights before, as we were assembling all of the decorations we needed to take to the venue, I got to thinking about how much stuff we made and what all of our friends helped us with for the wedding.  It takes a village to pull off a wedding, especially one on a budget:

1. My wedding dress
2. Belt to go with my dress
3. My veil – two different ones made out of different material because I couldn’t decide on which one to wear, but I ended up going with the English netting version.  The bridal illusion was too poofy.
4. Coordinating clutch from leftover lace and silk
5. Matching clutches for my bridesmaids
6. Photo backdrop for a “Photo Booth” during the reception
7. Signs for all of the tables, designed in Photoshop – cake table, guest book sign, gift table
8. Labels for our favors, designed in Photoshop
9. “Reserved” seating tags for the ceremony
10. 40 crepe paper flowers for the centerpieces
11. Tissue poofs – assembled from a Martha Stewart kit
12. Hand-written place cards

sisters
 

Fortunately, we had really great weather for the big day – it was a nail-biter since it looked like we were going to get rain Friday and Sunday, and our wedding day was smack-dab in the middle on Saturday.  It ended up being super sunny and hottttt – by the time the ceremony took place in the evening, it cooled down to around 80 but there was no shade and our guests were roasting.  At least our ceremony was super fast!


wedding

Photo credit – Maria Burton Photography

I don’t have a lot of photos yet that really show my wedding dress, so I’ll have to wait to share more on here until the end of the month when we’ll receive all of our photos back from our photographer.  I’ll leave you with the above, one of my favorites so far!

Follow:

A Complete Wedding Dress Tour

Want to see my entire wedding dress, head-to-toe so far? I finally put together the complete video I made a few weeks ago with some commentary on the construction process, some obstacles I ran into, and what the next steps will be in completing my dress.  This is a bit of a longer video but I think it illustrates better what I’m trying to do versus writing a long post with a lot of photos.

Let me tell you – choosing a pattern (Marfy) with no instructions has been quite the challenge, but I’m honestly enjoying it.  Using such a pattern for a garment like a wedding dress is not for the faint of heart!


Follow:

Sewcation! And a Sneak-Peek of My Wedding Dress

I’m really looking forward to the next four days – I’m taking a few days off from work to just sew sew sew – a well-needed break from daily responsibilities to spend some time doing nothing but working on my wedding dress…and an outfit for my bachelorette party coming up next week, woo hoo!

This week on Broke Ass Bride, I shared a little video I made last weekend of how my wedding dress is looking right now; I’m so close to the end!  Stay tuned for a more in-depth video next week detailing the sewing process and what my next-steps are for completing this baby.

Happy early weekend!!

Follow:

121 Days Left

We have a dress! Pretty happy with the progress so far this weekend - zipper goes in next #wedding #weddingdress #sewing #diywedding #125days

I had my first wedding related “freak out” this past week – it’s crazy how time just sneaks up on you.  The Knot has a wedding countdown calendar, and when I logged in to update our budget tracker for our invitation expenses, I noticed that we were getting close to the 100 day mark and I didn’t really have much of my wedding dress sewn yet…kind of an important detail.  On top of the fact that I haven’t been able to land on a plan for how to decorate the venue with our small budget (flowers aren’t really an option), there definitely were some tears of frustration and stress last week.

The most obvious thing to do last weekend was to sit down and get that damn dress sewn together!  And I must say, I’m feeling a lot better about my dress now…the decorating, however, is another story (hello, Pinterest overload/paralysis).  The above picture is a quick little snap I posted on Instagram of how everything is coming together – all of the skirt layers are attached to the bodice and the bodice is now lined.  Next step is to install the zipper and sew up the center back seam, and then it’s on to the hems.  I also have a trip to NYC coming up in about two weeks, so the plan is to find some sort of embellishment for the pleating at the waist.  Now that everything is sewn together, I have a better idea of the size of the embellishment I need.

Funny enough, this skirt is heavy!  I didn’t think all of the layers of georgette and silk (plus lining) would add up to much, but I’m reaching the conclusion I’ll need to put in a waist stay to support the skirt.

In the end, I reached the sad realization that all of my energy from here on out, or at least until I get everything is a good place, needs to be on the wedding planning and dress sewing.  All of my coat sewing plans and course creation need to be put on hold until a later time this year when I can get back into content development for Wardrobe Academy, sadly.

121 days to go…


Follow: