Pattern: McCall’s 6711, view A
Fabric: Italian wool from Mood Fabric
Size: 10
Shirt: Gap
Jeans: Gap
Sunnies: Tommy Hilfiger
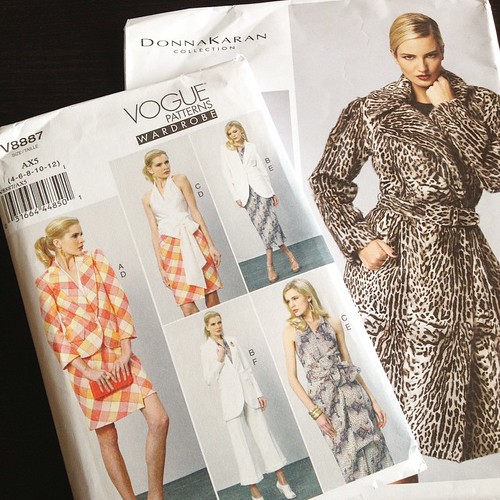
Remember my post from November about this fabric? I originally slated it for a Gerard Coat, but when the fabric arrived, I realized it was much too lightweight for a coat and more suited for a blazer. Then, I thought about using Vogue 8887, but the muslin I made had some fitting issues in the back I didn’t want to deal with, and the entire front and back was cut on the bias – something else I didn’t want to deal with.
The blazer from McCall’s 6711 was on my sewing list from fall, and seemed like a good alternative pattern. It has simple princess seams and a one-piece collar that would be easy to fit and sew, so I decided to take a stab at it – the muslin was perfect! Not a thing to alter.
With beautiful wool fabric like this, I wanted the blazer to turn out looking like a well-tailored, high-end blazer worthy of a designer label inside. If I do say so myself, I think I did a pretty good job! I owe all of it to Pam Howard’s tailoring classes on Craftsy, which I’ve been watching obsessively (and highly recommend!). A lot of the extra steps I took elevated this blazer from a quick-and-easy sew to a in-depth project with nicer, more professional results – here’s what I did.

Interfacing
Modern tailoring really comes down to choosing the right weights of interfacing in a jacket – you don’t use the same weight throughout. There’s a great article from Threads Magazine dissecting the innards of an Armani jacket and the different types of fusible interfacings used throughout. For the jacket front/lapel and collar, I used a weft-insertion fusible to give the front more structure, and a fusible tricot for the jacket side front. Typically, sewing patterns recommend that you only fuse the fronts and not the sides, but it’s necessary to fuse the entire front to get a nice shape and support the jacket. I noticed a big difference in the body the interfacing gave the wool after fusing the whole front.
Also, I steamed the crap out of the lapels to shape them and get them to lay as flat as possible instead of flopping around. The design of the pattern is pretty casual and there isn’t a roll -line (heck, the model has her lapels “popped” on the envelope…is that a thing?), but I wanted this jacket to be more structured.

Tailoring the Sleeves
When I made my Anise jacket last year, I was disappointed by the dent that formed at the top of the sleeve cap when I moved my arm, and also how the sleeve hung from the sleeve cap. This was probably cause by a few different factors, but it made me aware of the importance of supporting the sleeve cap in a jacket and masking the look of the jacket innards (sleeve seams, shoulder pads, etc). To solve this for my wool blazer, I interfaced the sleeve from the sleeve cap down to about two inches below the underarm with fusible tricot interfacing. This gave the sleeve a nice shape and supported the fabric beautifully:
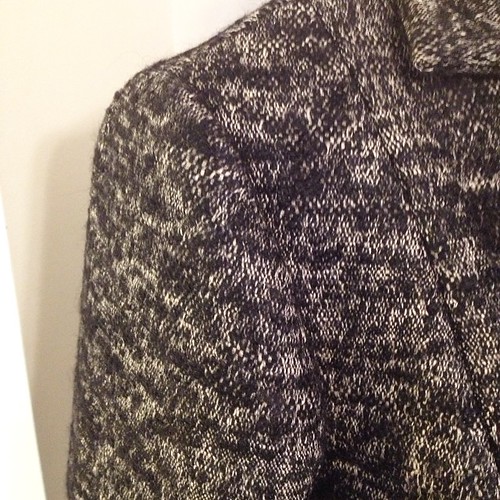
Isn’t that a yummy set-in sleeve?? It hangs absolutely straight with no dents or divets. I also eased the whole cap instead of just the section notated between the small dots on the pattern, and I think that helped me get a better result.

The Back and Hems
In retrospect, I should of used a back stay to get better support in the upper back since the fabric is floppy, but ahhhhh whaddayagonnado. Interesting fact: the more pieces in a jacket, the better the tailored result. Why? There’s more seams to tweak to get a better fit. A jacket pattern with a back like this that’s cut on the fold will not be as fitted as a jacket with a back center seam – there’s no way to really adjust the fit other than tweak the darts, which can be limiting.
The jacket and sleeve hems are all interfaced with a 1 1/2″ wide strip of weft-insertion interfacing cut on the bias. The bottom hems really keep their shape with the interfacing and it add a bit of weight, causing the hems to hang better.

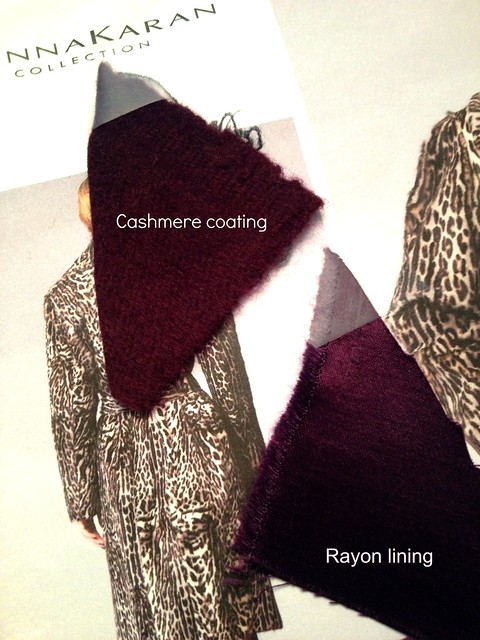
The Lining
And just to show you the last, final shot – the lining! I love color pops and surprises with my linings, so why not make that functional part of a garment a little bit more fun? When I was researching jacket patterns to sew, it was very hard to find a pattern out there that included a lining. Why guys, why? Linings really aren’t that hard to sew, I swear. And they make it so much easier to wear the finished jacket, they protect the inside and prolong the life of the jacket etc. Anyway, this was a well-drafted lining with a center back pleat, and I sewed a jump-hem in the bottom by hand.
Well, that’s my first project of 2015! It was definitely a good project to make as a way to ease myself into the coat project I’m up to my eyeballs in right now. Hands down, this is the best/nicest garment I’ve made thus far in my sewing career, and I can’t wait to sew more blazers and jackets.
PS: the snow in these photos is from the storm that hit Boston this past weekend…I’m bracing for #snowpocalypse #BOSnow right now!