Pattern Review: Butterick 5454 [DVF Dress]


DVF Wrap 1

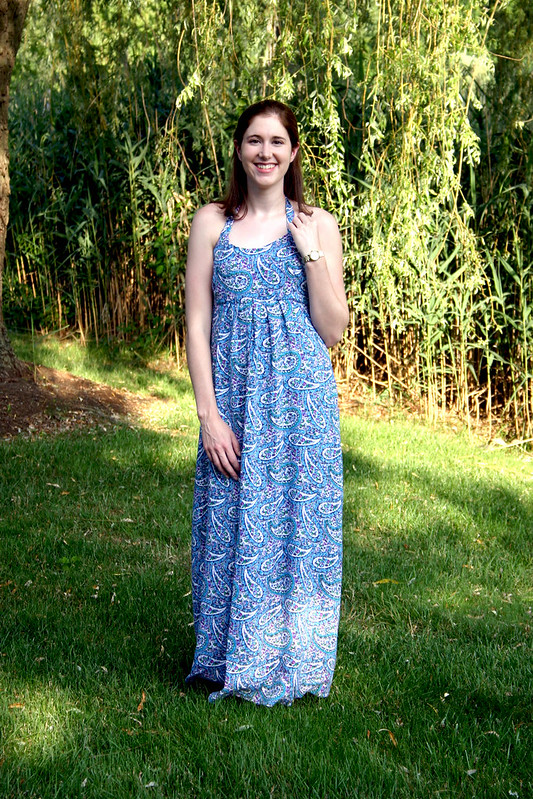
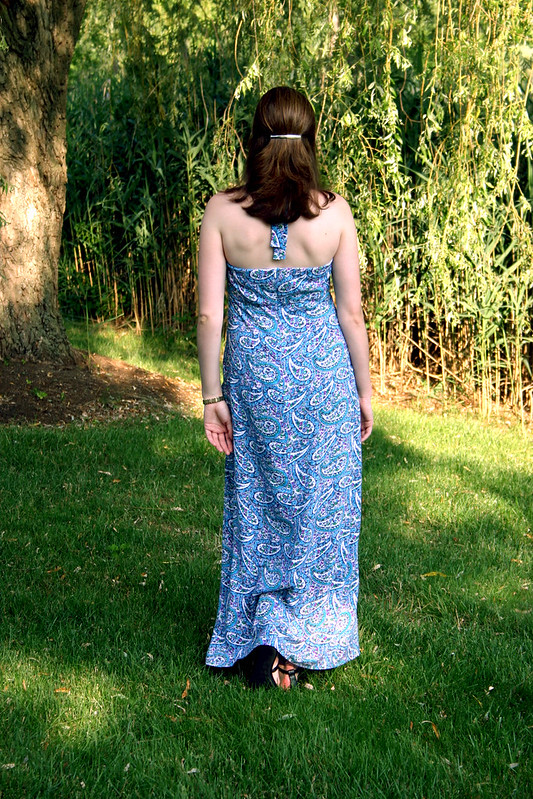
Pattern: Butterick 5454, view B
Fabric: ITY knit from Fabric Place Basement

Watch: Michael Kors
Boots: Bandolino
Lipstick: Nars Funny Face (my fave color!)

I wanted to call this post “flat girls can wear wrap dresses, too!” because yes, with a few alterations, it’s possible to get a wrap dress that fits and doesn’t gape open.  Originally, I attempted to make a version of this dress back in 2012 with no success and a lot of gaping – I just didn’t have the energy or motivation to fix yet another dress that was too big in the bust for me.  I wrote off wrap dresses as one of those cute dresses that only girls with a chest could wear and would never grace my closet.  However, after getting sucked into a marathon of “House of DVF” reruns and seeing all of the beautiful wrap dresses gracing the contestants, the idea of making a wrap dress consumed my sewing thoughts
and I needed to conquer my fitting challenges.


DVF Wrap 2

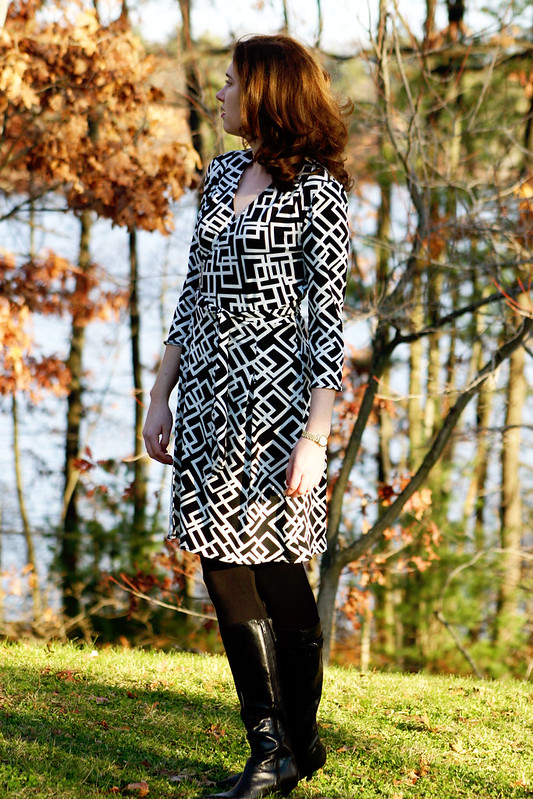
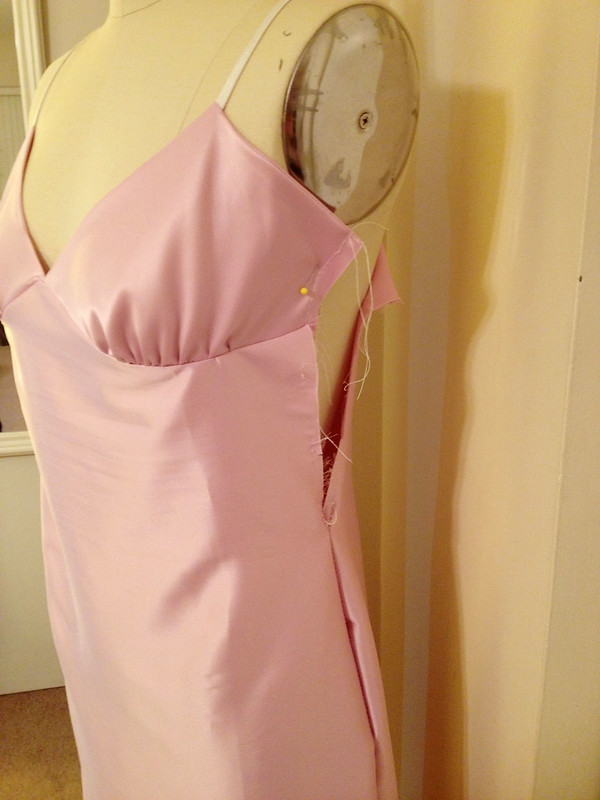
Ladies of the small-busted variety, here’s our fitting challenge when it comes to wrap dresses: the surplice length of the wrap is usually too long.  We don’t need a lot of fabric to cross over and cover our chest, which leads to the excess neckline length and extra fabric drooping near the tie.  Sure, we can try and tie the dress tighter, but we still don’t get the secure fit of a neckline laying close to the body, or we have to wear a cami underneath the dress for modesty.

Threads Magazine #168 from September 2013 is a great resource for fitting wrap dresses and really helped me get the fit of my dress correct.  Here’s what you do: on your pattern, make a small tuck along the neckline above the bust, and another small tuck below the bust – I made two 1/2″ tucks for a total length reduction of 1″.  That’s it – excess length is reduced.  For more modesty, I also gradually raised the neckline 1/2″ to ensure better coverage and that this dress would be work-appropriate. 


DVF Wrap 4

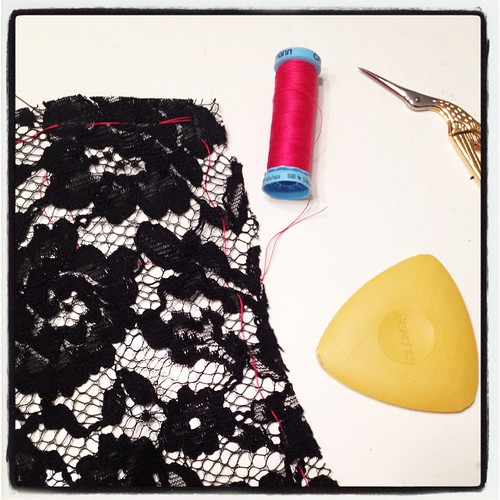
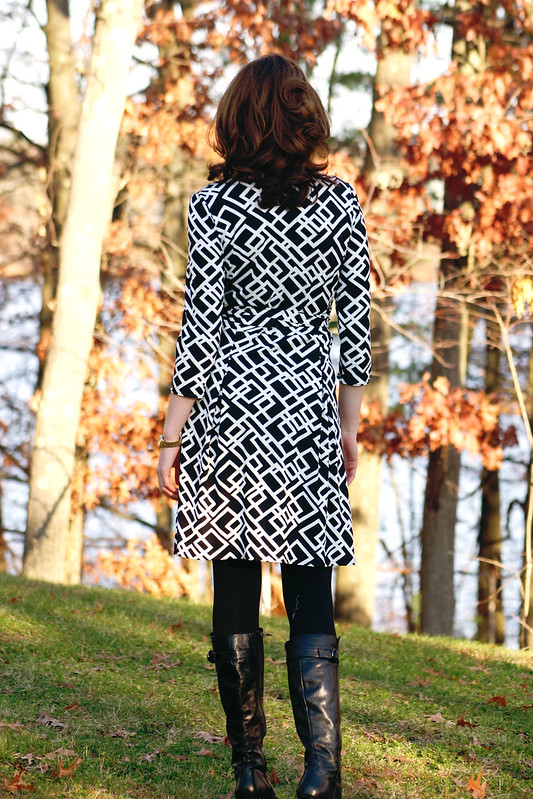
Bias can be tricky to work with, but when you have bias with a knit fabric, watch out – chaos can quickly happen if that sucker isn’t stabilized asap.  To get a stable neckline, I used a technique from Sandra Betzina’s Power Sewing book – 1/4″ twill tape.  I measured the neckline length on my altered pattern piece and cut two pieces of twill tape that exact length for each side of the neckline, plus one for the back neck (note: she recommends different lengths depending on your bust size).  Then, with the knit fabric against the feed-dogs of the machine and the twill tape on top, I eased the neckline onto the length of the twill tape on the wrong side of the bodice front.  I was pleased as punch when I tried the dress on, wrapped the neckline, and had zero gape.  I feel like I achieved the impossible!

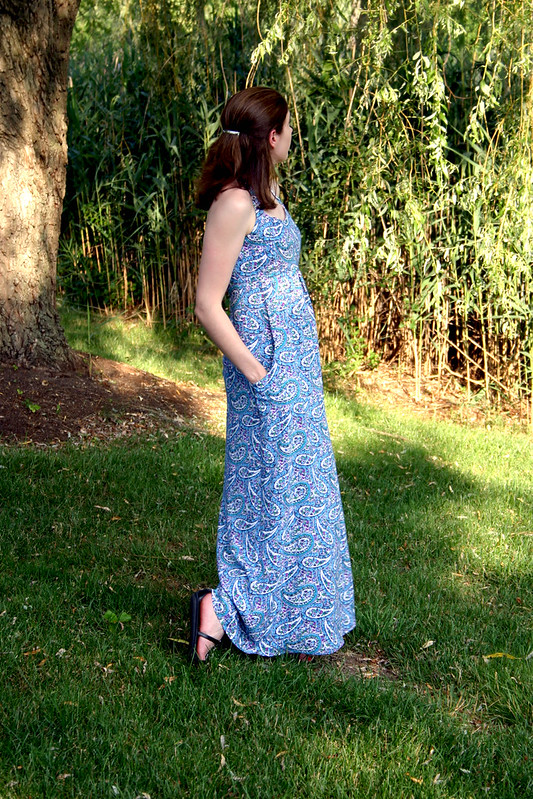
The other part about this pattern I liked, versus other wrap dress patterns that are out there, is the fact that there are no pleats underneath the bust near the ties like with Vogue 8379 or Vogue 8784.  With pleats comes extra volume and fabric, and I’m not sure how easy it would be to get that design element to fit on a small bust and not cause gaping.


DVF Wrap 3

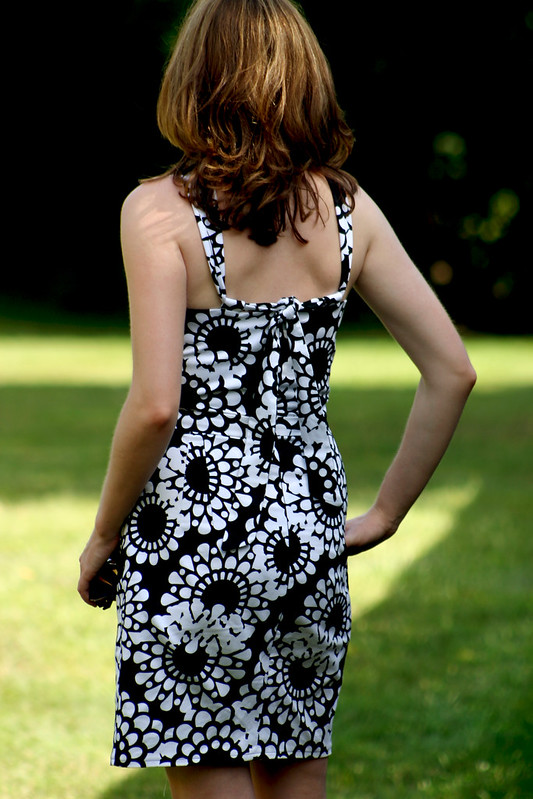
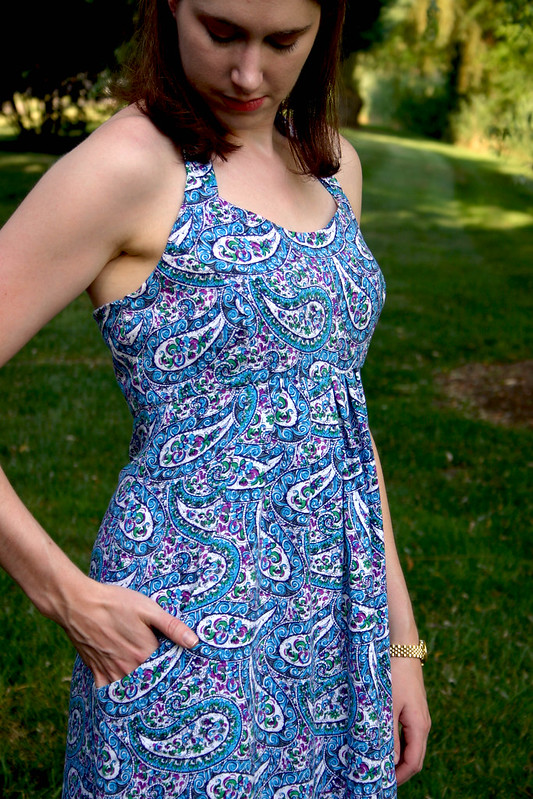
The skirt on this dress has a slight flare, but is more of a straight skirt style than an A-line skirt seen on some other wrap dresses.  There’s some pleats in the skirt in the front and the back, which I didn’t mind since you don’t see them with the pattern of the fabric.  Now that I got the bodice to fit, I want to try to match different wrap skirt styles to get different looking dresses – maybe even turn the pleats in the skirt and bodice into gathers?


DVF Wrap 5

There’s a whole world of dress options open now, this is just the beginning of wrap dress sewing!  I immediately earmarked some jersey fabric that’s been in my stash for a while as new wrap dress projects, and I cut out a turquoise merino wool knit fabric the other night for a winter-ized version.  Wrap dresses are like secret PJs: polished looking, but so comfy and easy to wear.

Follow:

Learning About Lace – How To Work With a Couture Fabric


Alisha Dress sneak peek

Pssst – here’s a sneak-peek of what I’ve been working on over the last few weeks.  When I decided to make a dress completely out of lace fabric for a friend’s upcoming wedding this weekend, I didn’t anticipate the challenges that would come along with working with such a, well, see-through and airy fabric! 

Ladies, there’s a reason why those lace wedding dresses on “Say Yes To The Dress” are wicked expensive – sure, the name on the label inflates the price of a wedding dress, but working with lace is very time and labor-intensive, and to achieve a seamless-looking garment, there’s a lot of couture sewing techniques that need to be used.  Of course, none of this occurred to me until I sat down with my sewing books and did a little reading about how to work with lace fabric.  Here’s what I learned and how I made my dress.

Lace needs to be cut in a single layer

To get a seamless look, each pattern piece needs to be a full pattern piece (no half pieces) and cut on a single layer of lace.  This allows you to match up motifs when planning out how to cut out your garment so the lace pattern can continue through the garment without any interruption at seam lines.  Then, cut around the motifs that extend beyond the edge of the paper pattern, which will be appliqued on top of the joining garment piece at the seam line (this only needs to be done on the garment front pieces, not both front and back.  You’ll see why later when we sew the seam).  My lace pattern was so busy that I didn’t need to worry about matching up motifs.

Also, did you know that lace doesn’t have a grainline?


Thread tracing on lace is hard work. #sewing #couture #fancypartydress

Mark all seam lines and notches with silk thread

After the garment pieces are cut out, seam allowances need to be thread-traced.  For my dress, I used hot pink silk thread and basted the 3/8″ seam allowance line.  Silk thread is great for lace since it slides smoothly through the fabric and is easy to remove after the machine stitching is in place.  I also used tailor’s tacks to mark darts and notches.  I tried to use tailor’s chalk, like in the picture above, but it was too difficult to accurately mark where I needed to mark because of the openness of the fabric.

Are you with me so far?  All of this prep work took about two nights to complete, whew!


A new technique for #bpSewvember - lace appliqué seams. No ugly seam allowances showing through on my lace dress! I was super nervous about working with lace, but this is pretty easy to sew. Plus, my print is pretty busy so I didn't worry about matching u

Applique seams for a seamless garment

Since lace is see-through, seam allowances showing through is not the most ideal look.  You could sew French seams, but the seam will still be visible through the lace, and some lace is too bulky for that kind of seam treatment.  To get the illusion of a seamless garment, like in the photos above, I used applique seams.


applique seam

To explain, I’m going to reference sewing a side seam in a dress.  Layer the right side of the dress front over the right side of the dress back, lining up the seam lines – this is where the thread tracing comes in handy!  There will be excess extending from the seam allowances on the top layer because of the motifs that we cut around beyond the seam allowance.  Then, using a narrow zig zag, sew around the motifs along the seam – you may end up sewing pretty far away from the original seamline, but that’s ok.  When you’re finished sewing the entire seam, use your applique scissors to cut away the excess fabric underneath on the wrong side, close to the seam line.  Voila – seamless looking seam!  I also needed to cut away some of the fabric on the right side of the garment, close to the stitching.  If you’ve ever appliqued in quilting, sewing applique seams is a very similar technique.

I found this video really helpful when I tried to wrap my head around applique seams.  The only seams that I didn’t applique for my dress were the sleeve seam, because it was so short and no one will see it unless I lift my arms up, and the armhole seam…because that would be way too hard.  If you don’t want the armhole seam to show through, you could bind it with a bias strip of silk close to your skin color.

Applique seams also helped me out of a bind – I thought my muslin for the dress fit me fine in the hips, but when I sewed the side seams in my lace garment, it was too tight.  Like, I couldn’t sit down!  I have my theories on why this happened (I think it had something to do with a tuck of fabric I took out in the bust/waist), but I cut open the side seam where I had fitting issues and appliqued what was essentially a lace gusset to get more room in the hips:


Untitled


I can tell where I inserted the gussets (and maybe you can, too!), but you have to admit, it’s pretty tricky to see where the seams are.  Applique seams totally saved this dress from being a tragic disaster.

Yes, you can insert an invisible zipper in lace

Don’t get me wrong, I was sweating bullets and so nervous when I sewed my invisible zipper in the back.  I mean, what if I screwed up and got the zipper twisted?  Spoiler alert: I did!  What saved me was that I basted the zipper in first and used a contrasting thread so it would be easier to see the stitches if I needed to rip them out.  Just taking some simple precautions beforehand makes it possible to sew a zipper in a lace garment.

Here’s the big question: would I ever sew with lace again?  Well now that you mention it, I have some lace in my stash for two simple blouses, but I don’t think I’d jump at the chance again to make a lace garment like this knowing all of the labor and time that goes into constructing a lace garment.  Lace is not for the faint of heart, my friends!

Have you ever sewn with lace? 

Follow:

What I’m Working On: Style Arc Alisha Dress


alisha collage

Hold me, I’m sewing Style Arc Patterns for the first time.  I’m making the Alisha dress, and I love the fabric I’m using for the garment (black scalloped edge lace over a wine charmeuse slip dress), but I’m nervous about making it.

Why the anxiety, you ask?  Style Arc Patterns are sold single size only, and I’m not a single-size kinda gal.  Sure, I could have bought two copies in different sizes and graded the two to get a perfect fit, but at $20 bucks a pop I wasn’t about to shell out $40 for a single dress pattern.  So, I went off of my hip measurement since it’s the largest body measurement and bought the size 8, thinking I can grade down the bust and waist to what I need it to be.  Still…I’m nervous about doing this.

I made a toile/muslin/mock-up garment last night using the same type of slip fabric I’ll be using that was leftover from another project.  Had I cut the fabric with the stretch going horizontally instead of vertically (d’oh!  Only way I could squeeze the pattern out of the fabric), I think this would have fit just fine right out of the envelope.


alisha slip1

Ummm….I had to take out part of the side seam to get this to fit over my head and shoulders, hahaha!!  Once I had it on, the bust fit just fine and there was enough ease in the waist and hips.  If I need to take in the waist and hip in the final version I’ll be ok, the bust was the most important part I was worried about fitting.  Anne at Clothing Engineer is right about the bust cups – they run very small and skimpy.  I used the B cup pattern (yes, there’s cup size options, a huge plus for fitting) and it didn’t cover my bra when I first tried it on.  Since I’m planning on wearing this sans bra and will be adding swim cups for coverage/support in the final version, this didn’t bother me.  So if you’re planning on making the slip, try out the different cup pieces to get the desired coverage you need.


alisha slip2

Had to share this photo – look how much I had to rip out to get the slip on my dressform!!  This little lady is built tinier than I am, so I found it humorous that I could squeeze myself into the slip but had to rip out so much more to get it on the form for pictures.

Also, rouleau straps – any tips on making these buggers?  I used adjustable spaghetti straps in my stash for the test fit garment because I didn’t want to be bothered with making real straps.  If I could find coordinating spaghetti straps for my final slip I’d use those, but the chances of that happening are slim.

Next up is test-fitting the outer dress.  I cut that out last night from a poly crepe de chine in my stash that I thought would make a cool fall dress.  Hopefully I can kick this cold this week so I can get that squared away and move on to sewing the final dress by the weekend.  I need this dress to be done in less than two weeks!

Follow:

Finished Project: Lonsdale Dress [Sewaholic Patterns]


lonsdale 2

Pattern: bodice Lonsdale by Sewaholic
              skirt By Hand London Charlotte Skirt
Fabric: stretch cotton sateen from Metro Textile
Size: bodice – 4; skirt – 8

Earrings: Charming Charlie
Sandals: Nine West
Sunnies: Tommy Hilfiger

That Sarai, she’s got some great ideas – did you see her white Lonsdale dress a few weeks ago?  Pure fabulousness, especially in all white for summer.  Sue gave me this pattern last year during the spring sewing swap and I’ve been saving it for just the right fabric; I thought my paisley rayon in my stash would be perfect, but realized just before cutting into it that the paisleys were directional.  Darn it!  But what I loved about Sarai’s version is how she changed the dress from a flowy skirted number to a form-fitting silhouette.  When I considered that design change, I discovered I already had the perfect fabric all along.


lonsdale 4

I make a point of going into Metro Textile with a focused shopping list of what I need to find, but always walk out with something unexpected that I’m not sure what I’ll end up using it for…such is the case with this fabric from my last shopping trip.  “Buy three yards, make a dress,” Kashi said.  Those three yards were exactly what I needed to make this dress, what luck!  I love the body and weight of this cotton sateen, and with the little bit of stretch, it doesn’t wrinkle at all and makes the skirt easy to sit and move in.


lonsdale 1

So how did I go about making this pattern hack?  Well, I didn’t have the confidence or pattern drafting abilities that Sarai has to alter the original skirt pattern for the Lonsdale dress – it was on the bias, a-line…didn’t want to touch that puppy and risk screwing up.  Instead, I turned to my trusty and beloved Charlotte skirt pattern.  The waist of the Charlotte skirt measured the same as the Lonsdale bodice in my size, so it was a no-brainer to go that route instead of drafting my own pencil skirt.  What I did end up drafting was the curved pocket, to emulate the pockets on the original Lonsdale skirt…I do love me some pockets in my skirts and dresses.

The pocket drafting was pretty simple: I copied the curve of the original Lonsdale pocket onto my Charlotte skirt pattern (traced, of course) to get a general shape, and tweaked it a little to fit the shape of the sides of the skirt.  I also took the original pocket pattern piece of the Lonsdale dress, altered the curve, and shrank it down slightly since I was worried that the original pockets would be too big for a tight fitting skirt.  Easy-peasy change, and now I can make my future Charlotte skirts with pockets!


lonsdale 3

With the fabric being a bit stiff, it’s easier just to knot the ties instead of tie them into a bow.  I think the straps are my favorite detail, they make the dress so different than other patterns out there and RTW dresses.  This is why sewing is awesome!!


lonsdale 5

Ok, I had to include this shot – Chris took pictures, unbeknownst to me, of me peeking through a crack in the fence at the horses next door and I couldn’t stop laughing!

Well, that’s my last garment of the summer.  I finished this a few week’s ago to wear to a party with Chris and his family, and now I’m tucking it away until our winter vacation somewhere warm in January (I hope!!).  So far for 2014, this dress just may be my favorite garment of the year…but I have a long list of garments to make for the balance of the year, so who knows!!

Follow:

Pattern Review: Simplicity 1800 [Oonapalooza!]


halter maxi1

Pattern: Simplicity 1800, view C
Fabric: rayon challis from Metro Textile
Size: 10 graded to a 12 at the hip

How have I not sewn a maxi dress until 2014??  I am so in love with this dress and how easy and elegant it is to wear.  If I could have a closet full of maxi dresses I would…well maybe not a whole closet, because I do like to show my legs in the summer, hahaha.

Sewing this dress coincided nicely with Oonapalooza month – you know, “What would Oona make?” (could we all get W.W.O.M. bracelets?).  Loud, bright colors and a funky print? Check.  Saucy silhouette that’s classy at the same time? check and check.


halter maxi2

This pattern is part of Simplicity’s Amazing Fit collection, which I’m a fan of – any pattern that offers different pattern blocks based on body type is a win in my book, especially when it comes to fitting the bust.  It’s hard to tell with the paisley print, but the bodice is constructed with princess seams that continue down into the skirt, which make bust fitting really easy.  I was very happy that I didn’t need to alter the bust when I tissue-fit the slim pattern block, woohoo!  That rarely happens.


halter maxi3

I’m planning on making the other views of this dress for the fall, with sleeves, and I have a feeling that the overall dress may fit better with those versions – here’s why.

The directions instruct to make an elastic casing at the top of the bodice back pieces, which I thought was odd for a halter dress, but the intention is for the elastic to support the back of the dress.  It didn’t work so well, even after tightening the elastic – the back bodice did not fit snuggle against my back.  In retrospect, I should have taken in the back bodice pieces and the side seams of the dress to get a better fit.  However, I just don’t think this piece was drafted correctly for a halter style dress, and instead was a cropped version of the regular back bodice piece.

I also had to make small tucks in the top of the bodice by the straps to prevent the top from gaping open – this wasn’t evident as I tried the dress on during the sewing process.  I ran into this problem before with another halter dress I made, and it was an easy (and invisible) solution to the fitting problem I had.  The problem stems from how the straps lie – they collapse and move in a bit when wearing and don’t support the top of the bodice, causing it to gape.  When they’re adjusted to lay in the correct position, the bodice is flat against my chest.  My theory is that if I make the other versions, the dress will lay correctly because of the sleeves supporting the neckline and fitting properly, and I won’t have a problem with gaping.


halter maxi4

The skirt is pleated in the front, which makes this dress great for eating a big meal…however it also makes me look a little preggo from the side!  A soft fabric is definitely best for a dress this style, anything stiff would make the skirt look like a tent.


halter maxi5

The way the pockets incorporate into the seam lines is genius, it’s like a little surprise, especially with a busy print.  They’re not too deep, but I can’t help putting my hands in them as I walk around.

Isn’t this fabric gorgeous???  I bought three yards with the intention to make a Sewaholic Lonsdale dress, but since the paisleys curve in one direction, and the Lonsdale requires a print that is mult-directional, it wasn’t meant to be.  No matter, I’m absolutely in love with the garment that this fabric turned into

Did you sew anything for Oonapalooza Month?

Follow: