Pattern Review: Minoru Jacket [Sewaholic Patterns]


minoru 1

Pattern: Minoru from Sewaholic Patterns
Fabric: Theory stretch twill from Mood Fabrics
     Zipper: Pacific Trimming
Size: 2

Jeans: Paige Denim
Boots: Nine West

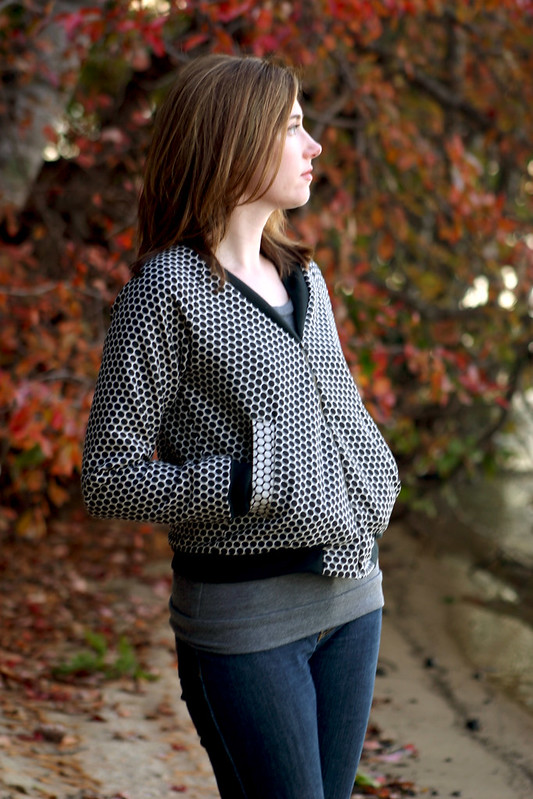
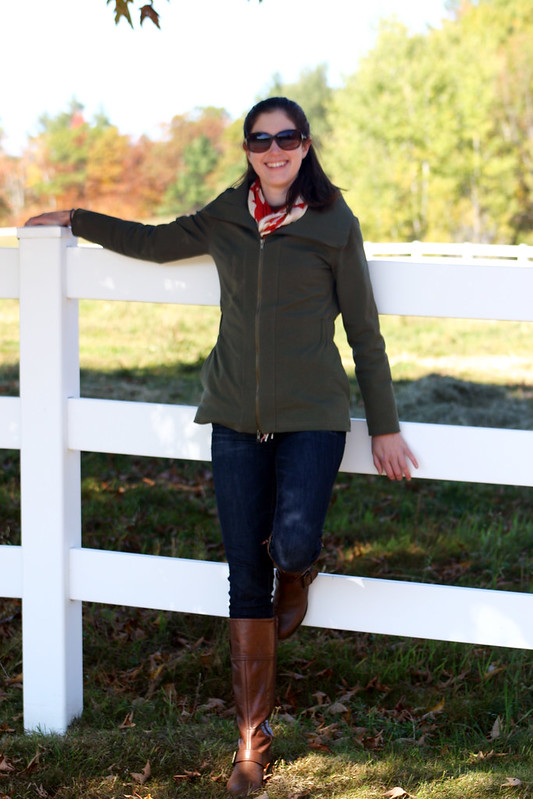
Finally, I now have the jacket everyone has already made – the Minoru jacket!  After seeing some versions in person this past March at the NYC Blogger Meetup, the idea of making one of these jackets this year was solidified in my mind.  Plus, have you seen Lauren’s fantastic orange version?  Yeah, I definitely needed to get on the Minoru bandwagon asap, don’t know what took me so long.

Throw in a last-minute trip to NH and I had even more reason to crank out this jacket in time for the cool fall weather.  These pictures were taken on our last day in the mountains at a place called Castle in the Clouds – we went horseback riding!  It was a great way to take in all of the fall foliage.


minoru 2


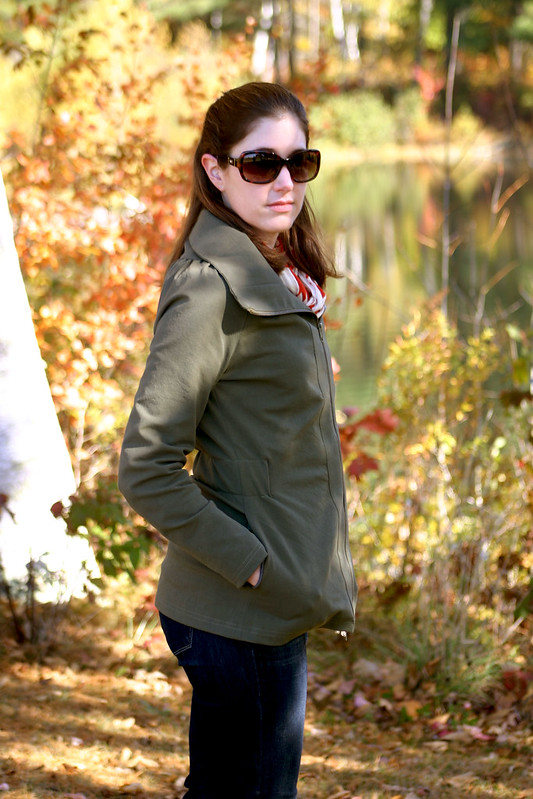
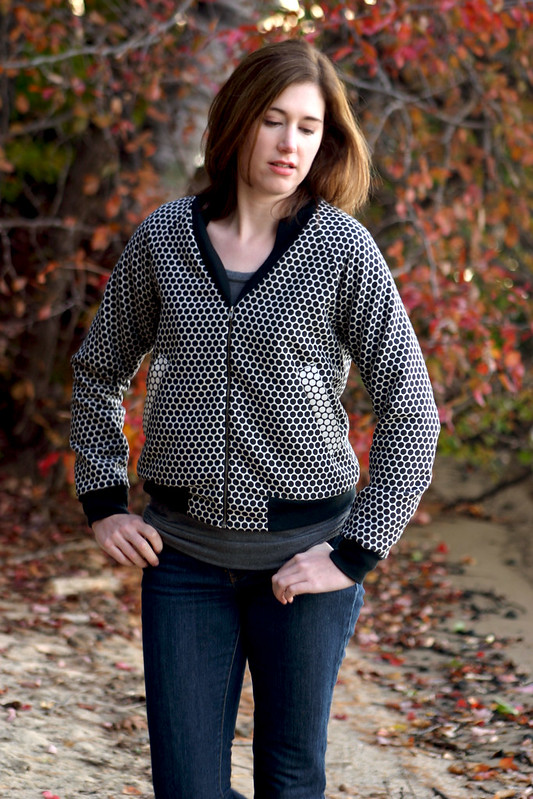
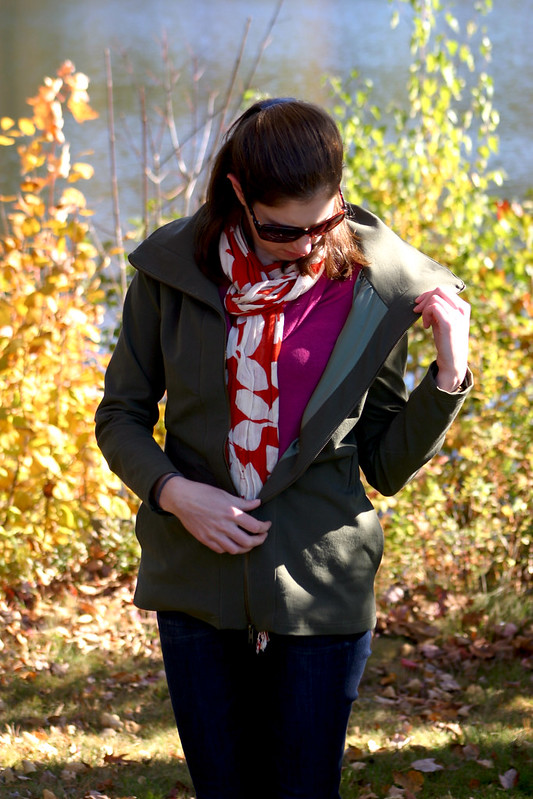
I like my outwear to be versatile and neutral enough that I can wear it with a lot of different clothes in my closet, so crazy colors or prints were not an option for the fall jacket I wanted to make.  Colors like black, grey, or brown would have been good picks, but too boring…something about the styling of the Minoru made me think of military jackets, so I settled on finding on olive green color at Mood Fabrics.  Plus the fact that it was a Theory stretch twill didn’t hurt either, I knew it was going to be great quality fabric for my jacket!


minoru 5

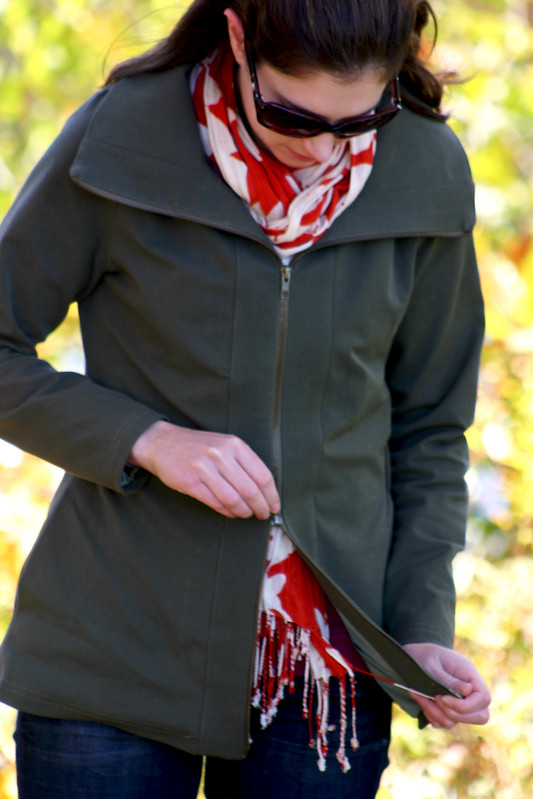
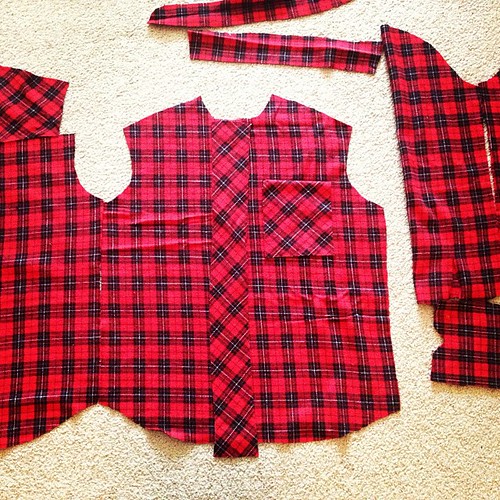
I made a few changes to the jacket, one being the double zipper I found at Pacific Trimmings.  I didn’t originally intend to use a double zipper for the jacket, but it was the zipper that matched my fabric the closest.  It’s really handy when I’m sitting (like on a horse!  Haha!) and makes it more comfortable instead of my jacket bunching up around my hips.

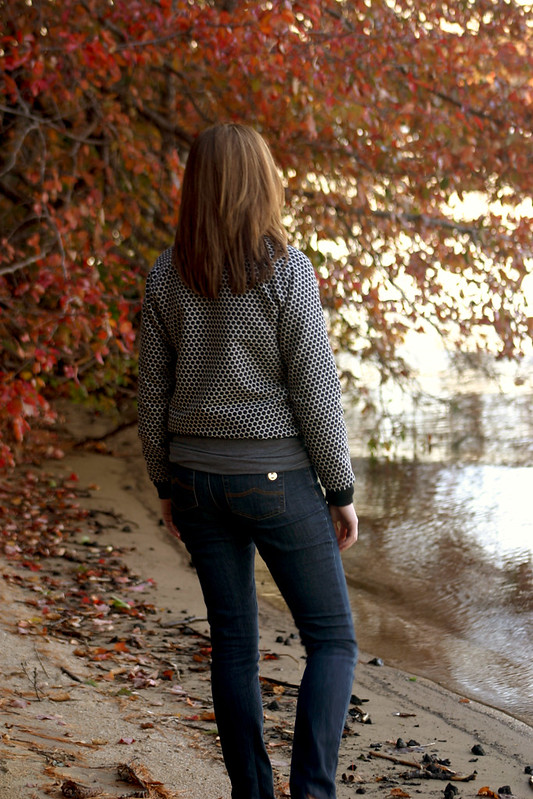
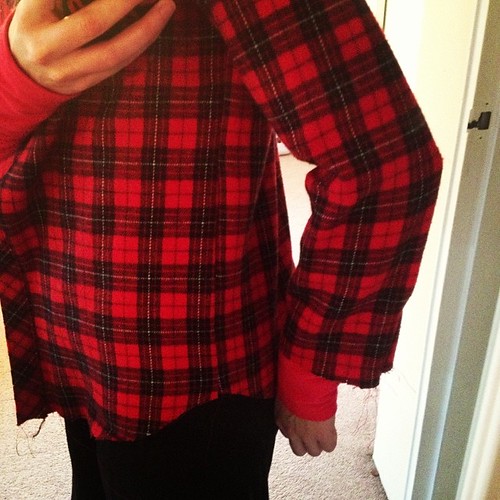
You may notice that my jacket is shorter than other Minorus…well, that’s due to the zipper being cut shorter than I asked at the store.  I had no idea it was too short until I began to install it in the jacket front and saw I was short about two inches.  So, the only real solution was to shorten the jacket so it wouldn’t look weird.  Also, I opted for no cuffs and lengthened the sleeves instead.

Which presented another problem: the pockets I added to the side seams became too long when I shortened the length of the jacket.  Once I sewed the lining shut it wasn’t a problem, they just bunch up a little.  In retrospect, had I known this was going to happen, I would have made the pocket bags shorter/smaller.  Also, how does this jacket pattern not have any pockets?? A little patch pocket in the inside (which I didn’t make) isn’t going to cut it, you know what I mean?


minoru 3

I cut this jacket smaller than the typical 6 I usually cut for Sewaholic Patterns – this is one of those instances of how picking out a size based on finished garment measurements is better than going by body measurements.  Had I picked the size 6 to make, I would have wound up with a very roomy, boxy jacket, and that wasn’t the look I was going for.  Also, I made the mistake of trying to pull the elastic too tight around the waist to make the jacket even more fitted, but ended up getting diagonal pull lines around the waist in the front.  After I cut a longer length of elastic and adjusted the fit, the lines went away.  So, if you’re experiencing that with your Minoru, the elastic length is probably why.


minoru 6

See? Fitted, but still room to wiggle around.  I wore this jacket at the driving range a few days earlier and hit two large buckets of golf balls and had no problem swinging my driver.


minoru 4

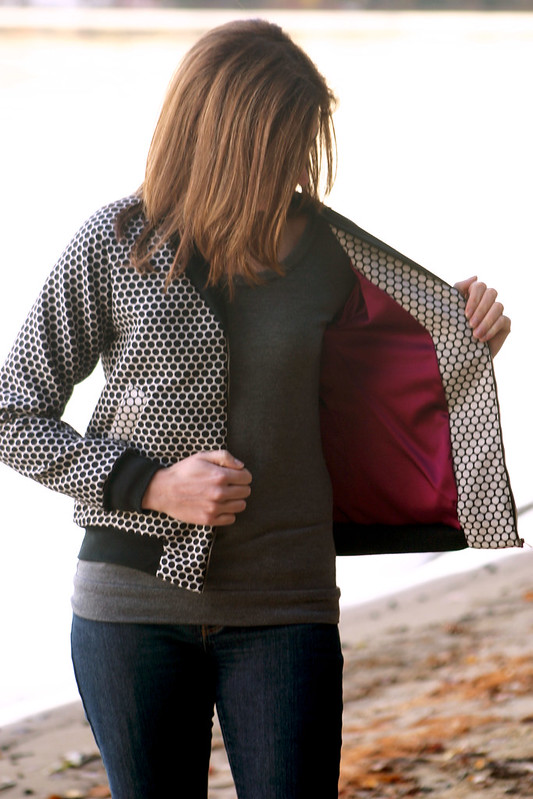
A quick peek at the lining – I ended up bagging this lining instead of however the instructions tell you to line the jacket.  The stretch in the poly charmeuse made it pretty challenging to hem the lining, and truth be told, I need to go back and fix how I sewed it.


We went horseback riding in the NH mountains today #latergram #longweekend #NH

I’ll leave you with a photo of Chris and I on horseback!  One of the guides was nice enough to take photos as we went along the trail.

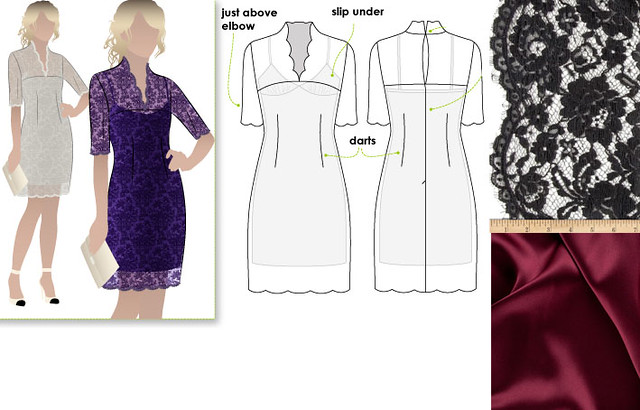
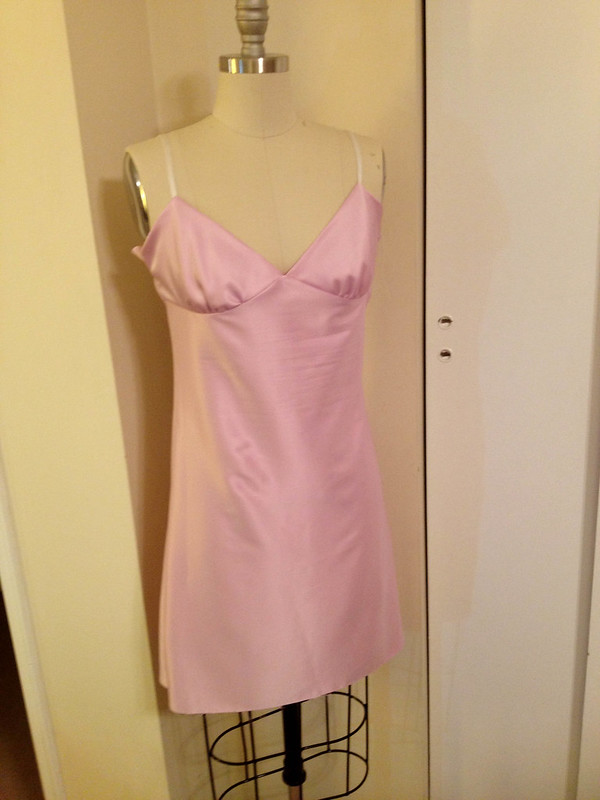
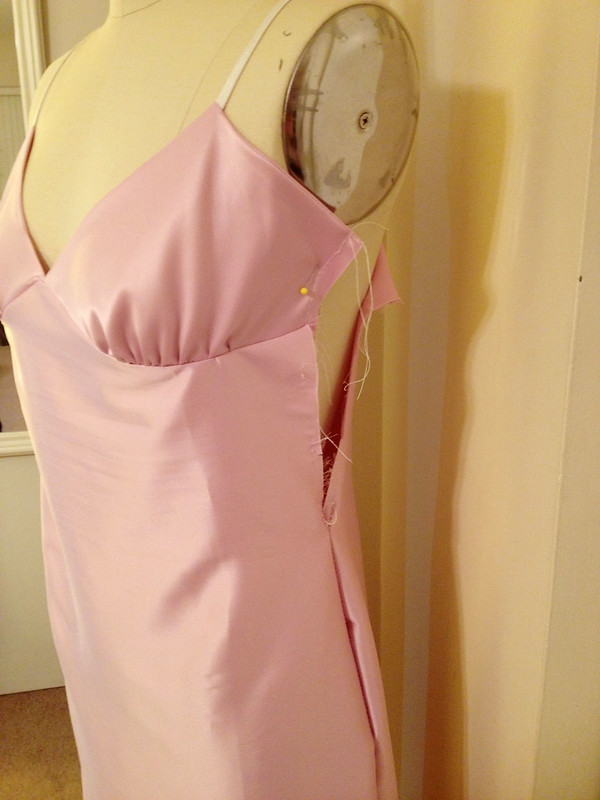
 Well that’s two jackets I made now for fall!  I’m currently working on a fancy lace dress for a wedding in less than two weeks (more on that to come later this week) and then I’m back on to sewing for fall.  My latest idea – an oversized leopard print wool coat.  Does fabric like that even exist?

Follow:

What I’m Working On: Style Arc Alisha Dress


alisha collage

Hold me, I’m sewing Style Arc Patterns for the first time.  I’m making the Alisha dress, and I love the fabric I’m using for the garment (black scalloped edge lace over a wine charmeuse slip dress), but I’m nervous about making it.

Why the anxiety, you ask?  Style Arc Patterns are sold single size only, and I’m not a single-size kinda gal.  Sure, I could have bought two copies in different sizes and graded the two to get a perfect fit, but at $20 bucks a pop I wasn’t about to shell out $40 for a single dress pattern.  So, I went off of my hip measurement since it’s the largest body measurement and bought the size 8, thinking I can grade down the bust and waist to what I need it to be.  Still…I’m nervous about doing this.

I made a toile/muslin/mock-up garment last night using the same type of slip fabric I’ll be using that was leftover from another project.  Had I cut the fabric with the stretch going horizontally instead of vertically (d’oh!  Only way I could squeeze the pattern out of the fabric), I think this would have fit just fine right out of the envelope.


alisha slip1

Ummm….I had to take out part of the side seam to get this to fit over my head and shoulders, hahaha!!  Once I had it on, the bust fit just fine and there was enough ease in the waist and hips.  If I need to take in the waist and hip in the final version I’ll be ok, the bust was the most important part I was worried about fitting.  Anne at Clothing Engineer is right about the bust cups – they run very small and skimpy.  I used the B cup pattern (yes, there’s cup size options, a huge plus for fitting) and it didn’t cover my bra when I first tried it on.  Since I’m planning on wearing this sans bra and will be adding swim cups for coverage/support in the final version, this didn’t bother me.  So if you’re planning on making the slip, try out the different cup pieces to get the desired coverage you need.


alisha slip2

Had to share this photo – look how much I had to rip out to get the slip on my dressform!!  This little lady is built tinier than I am, so I found it humorous that I could squeeze myself into the slip but had to rip out so much more to get it on the form for pictures.

Also, rouleau straps – any tips on making these buggers?  I used adjustable spaghetti straps in my stash for the test fit garment because I didn’t want to be bothered with making real straps.  If I could find coordinating spaghetti straps for my final slip I’d use those, but the chances of that happening are slim.

Next up is test-fitting the outer dress.  I cut that out last night from a poly crepe de chine in my stash that I thought would make a cool fall dress.  Hopefully I can kick this cold this week so I can get that squared away and move on to sewing the final dress by the weekend.  I need this dress to be done in less than two weeks!

Follow:

Pattern Review: Rigel Bomber [Papercut Patterns]


rigel 1


rigel 2

Pattern: Rigel Bomber by Papercut Patterns
Fabric: double sided cotton from Metro Textiles; wool ribbing from Mood Fabrics
Size: XXS

Sweatshirt: Sewaholic Renfrew
Jeans: Michael Kors

Words can’t describe how much I Love.  This.  Jacket.  It’s so versatile – I dressed it up with black pants to wear for an account meeting, and then wore it with jeans and a sweatshirt up in New Hampshire over the holiday weekend.  It’s just the right amount of weight for early fall weather, and I know it’ll be perfect when spring arrives next year.

The fabric also makes it – this is a medium weight cotton I bought at Metro Textile this summer, not knowing what I’d make from it.  My love for polka dots is unending, and this fabric is a double-sided woven with polka dots…swoon!!  How could I not bring this fabric home with me?


rigel 3

True to how Papercut Pattern sizing runs (way too big on me, that is), I cut out a XXS for the top of the jacket and graded to a XS from waist to hips.  What I can’t figure out for the life of me is why jacket patterns don’t come with linings by default (ok ok some patterns I can understand…but most, no).  I drafted my own, with a pleat in the center back, to attach to the facings because eww, I don’t want to see the pocket bags flapping around and exposed seams of my finished jacket.  Plus, linings help jackets stand up to wear much better.  It really wasn’t that hard to draft a lining, so I’m not sure as to why this wasn’t an obvious inclusion for the pattern.


rigel 5

See?  Pretty raspberry lining with the white polka dot side of the fabric, much better!  Also, you’d think I’d learn by now to not use stretch fabrics for linings.  This was a beeyatch to hem at the bottom and I had to make some small tucks in the lining fabric to get everything smooth and hemmed nicely.

If you’re planning on making this jacket, definitely take your time to get the zips to match up on either side – it’ll be really obvious at the neckline if the ribbing collar doesn’t match up.  I had to redo mine at least twice, but I’m glad I did.

Oh, this was my second time doing welt pockets – they were much easier on this fabric than the thick wool of my Anise!


rigel 4

The ribbing is a tubular wool ribbing I bought a while ago at Mood for a lightweight jacket project that fell through.  While sewing this project, I realized it probably wasn’t the best weight to use with the cotton, since the band at the bottom rolls up occasionally (like in the above shot) and the collars are a little floppy and don’t lay as flat as I’d like.

All of that aside, this jacket is going into heavy rotation for the remainder of fall.  On to sewing more jackets!

Follow:

Indiesew Fall Collection Blog Tour


indiesew fall collection 1

Summer is over, as much as the current temperatures want to disagree with me.  Kids are back in school, my beach vacation seems like a distant memory, and Indiesew just launched their new Fall Pattern Collection this week.

Oh yes, fall is here, my friends.

Indiesew, my new fave place for discovering independent sewing patterns, put together a curated collection of six patterns that can be mixed and matched to create the perfect outfit for fall, and asked me to create my perfect fall outfit from the collection.  This resonated with me because of the exercises I went through earlier this year with The Wardobe Architect and sewing a wearable wardrobe.  Depending on the fabric selection and styling, these patterns can truly fit any specific lifestyle.


indiesew fall collection 2

What I’ve learned this year through thinking about my personal style and lifestyle is that I need more casual pieces that work well with the sneakers because of the nature of my job and industry.  And with the amount of travelling I do for work, I also need these pieces to be comfortable and pack easily in a suitcase.  So, it’ seemed like a no-brainer to pair the Hudson Pants from the Fall Pattern Collection with the Lane Raglan, and throw in a chic carry-all bag like the Alice Book Bag.

Lane Raglan


baseball lane raglan1

I heart this raglan pattern so much and the way it fits.  My first version of this pattern was made to look more like a sweatshirt, and to differentiate this version, I went for a baseball tee version with contrasting sleeves.  The next time I make a long-sleeved version of this shirt, I’ll shorten the sleeves – they’re a bit long on me, but look cool pushed up and slouchy.  The rayon poly fabric is ridiculously soft, so I’m sure I’ll be reaching for this shirt a lot this fall.

Hudson Pants


hudson pants 1

The Hudson Pants are my favorite part of this outfit, because they’re so different than anything I have in my closet and a much “cooler” silhouette than I usually gravitate towards.  Since I wanted these to pass as ok to wear to the office or on the road, I picked a black cotton knit instead of a casual gray or printed knit – what makes the fabric special are the tonal polka dots knit into the fabric, aren’t they the cutest?  It honestly feels like PJs when I wear these, but these pants would be great for train trips to NYC or informal office meetings.  The only thing I should have done differently is grade down the waist.  I picked my size based on my hip measurement and the waist has a little too much fabric ease for my liking…I still love these pants though!

Also, you know that you’ve made something awesome when your boyfriend or husband hates it (Chris can’t stand these pants).  That’s just a sewing truth.

Alice Book Bag


alice bag 1


alice bag 2

I wanted this bag to be just as cool as the rest of the outfit, and almost bought a beautiful home dec fabric with birds woven all over, but it wouldn’t have fit the vibe I was going for.  Instead, I found this awesome ultrasuede fabric with a metallic underlay – yes, there’s holes punched in the ultrasuede for the metallic underlay to show through!  Thank goodness I had a coupon for this pricey beauty.

This bag was incredibly easy to make, it’s a bunch of rectangle pattern pieces you draft yourself based off of given measurements, and the bottom of the bag has boxed corners.  I opted for the convertible strap option so I can wear the bag on my shoulder or as a cross-body.


alice bag 4

The grommets are a really cool detail, they’re actually curtain grommets!  With the thickness of my fabric, it took a couple of tries to get them to fit, but they’re totally worth it.


indiesew fall collection 3

Thinking about starting your fall sewing?  The Indiesew Fall Collection is a great place to start.  All six patterns can be bought separately, but if you love all six like I do, the bundle can be purchased for 10% off.

Outfit Credits:
Lane Raglan via Indiesew – rayon poly knit from Joann Fabrics
Hudson Pants via Indiesew – cotton knit from Joann Fabrics
Follow:

On My Sewing Table – Plaid Archer [Grunge Sew-a-Long]


Matching plaids like a boss #grungesewalong

I’m conquering two of my biggest fears/challenges this month: matching up plaids (eek) and sewing another button-down shirt with a collar stand (double eek).  I had three yards of this red cotton plaid flannel hanging out in my stash for the past two years, thinking that I would make a cape from it (hello costume, I don’t think so) or maybe a dress (again…no).  Funny enough, when I decided to throw caution to the wind and cut out the plaid to make another Archer, there was conversation on Twitter about November being a Grunge Sew-a-Long month.  Perfect timing!  I think the Archer pattern is a great pattern to pair with plaid – it has a loose, but not too loose fit, and I think it’ll look adorable with skinny black pants and boots (not leggings, please, because leggings are NOT pants.  That’s your public service announcement for today).

Thanks to Lauren’s tutorial, I feel like I’m matching up plaids like a boss so far:


Heck yeah, side seam!

I was freaking ecstatic when I tried this on and saw the plaids matching up perfectly!  Sadly, I don’t think I cut the sleeves out correctly so they don’t match at the underarm seam, but I’m really happy how this is turning out so far.  Just cross your fingers for me, I’m about to tackle that collar…

Oh, if you want to participate in the Grunge Sew-a-Long this month, post your finished projects in the Sewcialists Flickr group.

Follow: