Yona Muslin [Coat Project 2015]


yona muslin 2

Hey hey, I had success with my Yona “muslin!”  On the day after my failed attempt at fitting Vogue 1365, I went out to pick up some more muslin fabric so I could try out the Yona pattern, but the idea hit me to try to make it out of some legit Malden Mills Polartec fleece I spotted at Fabric Place Basement.  It was so nice and soft, came in a heavier weight suitable for outwear (300 weight), and I thought it would closely emulate how the layers of my wool, interfacing, interlining, and lining would behave.  Plus, it would end up being a “wearable” muslin – what a nicer alternative to wearing my big red bathrobe to stay warm in my apartment!  A stylish house coat that I wouldn’t be embarrassed to be seen in when the FedEx guy drops off my boxes…whoops!


yona muslin 1

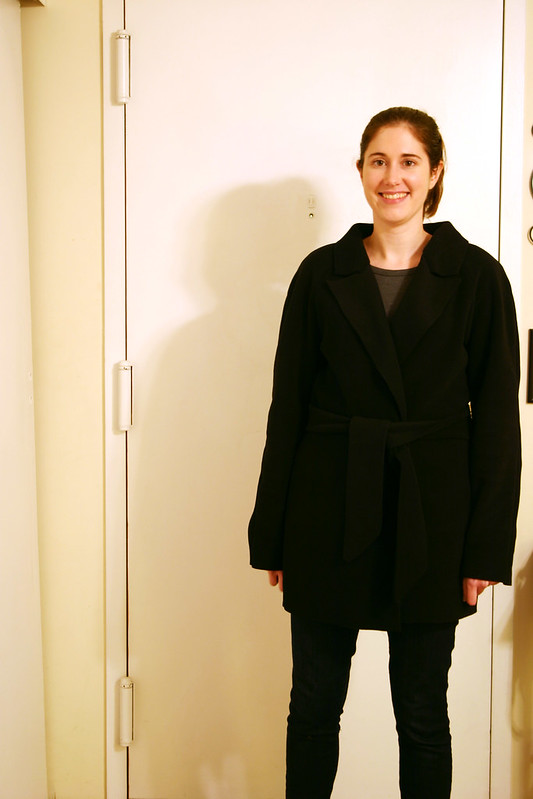
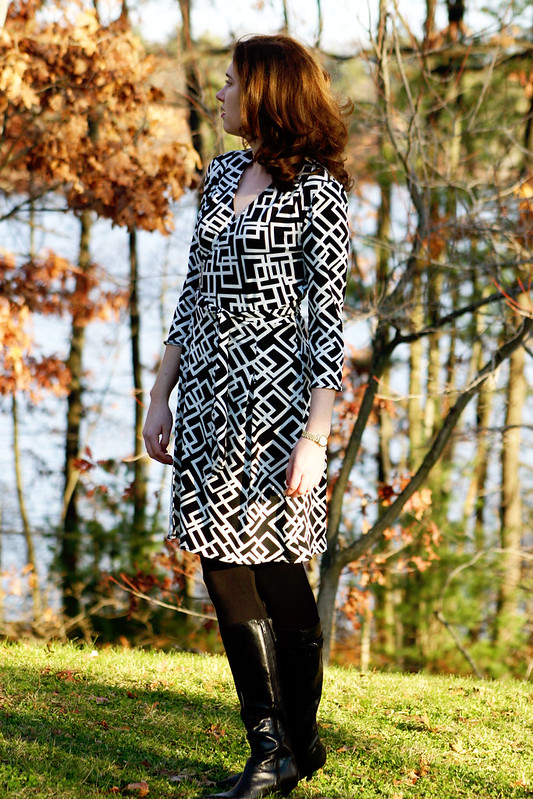
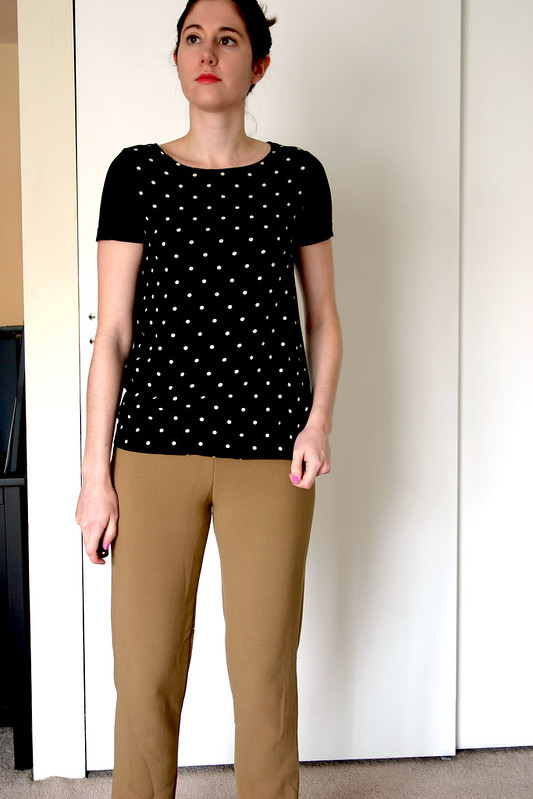
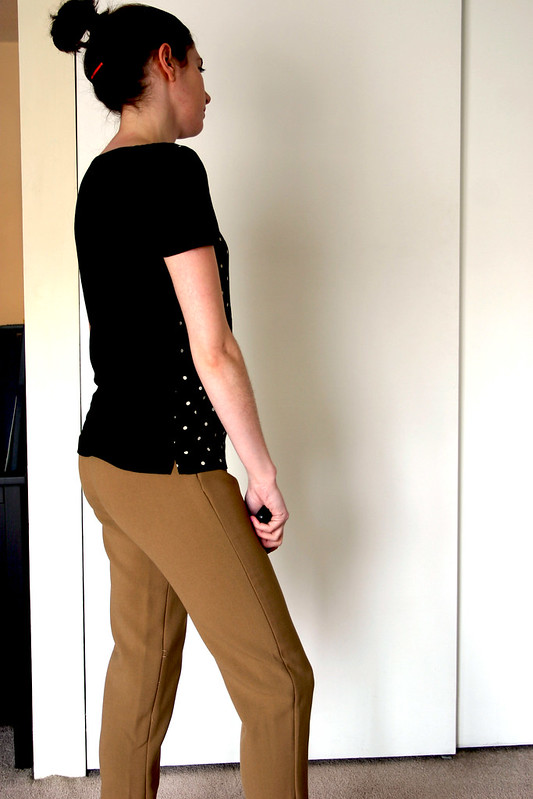
So yes, I’m very happy with how the fit turned out – it has the perfect amount of ease for a slouchy coat, and the subtle cocoon shape is perfect.  I cut out a size six, which was almost spot on with my measurements, and I really don’t need to adjust a thing – that’s the perks of making an oversized coat with an adjustable closure.


yona muslin 3

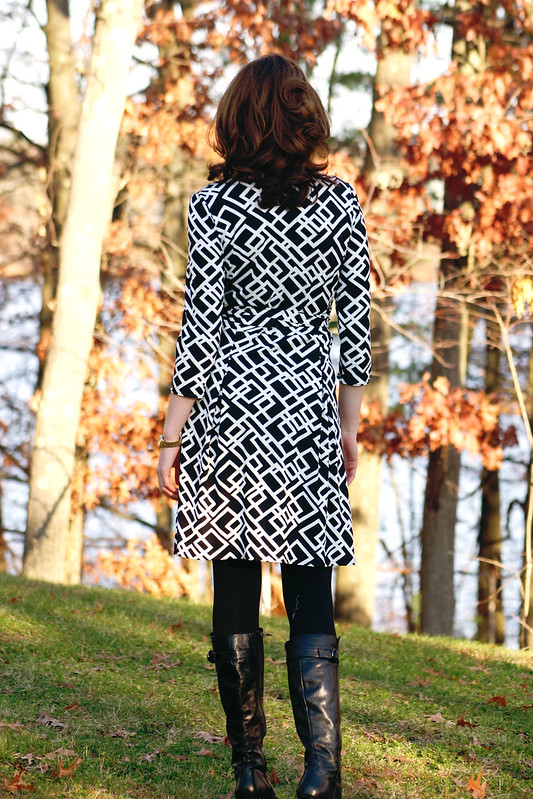
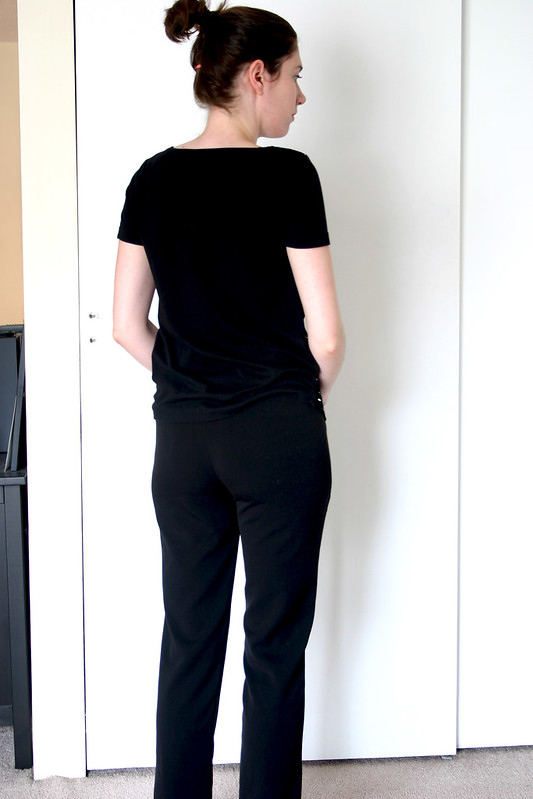
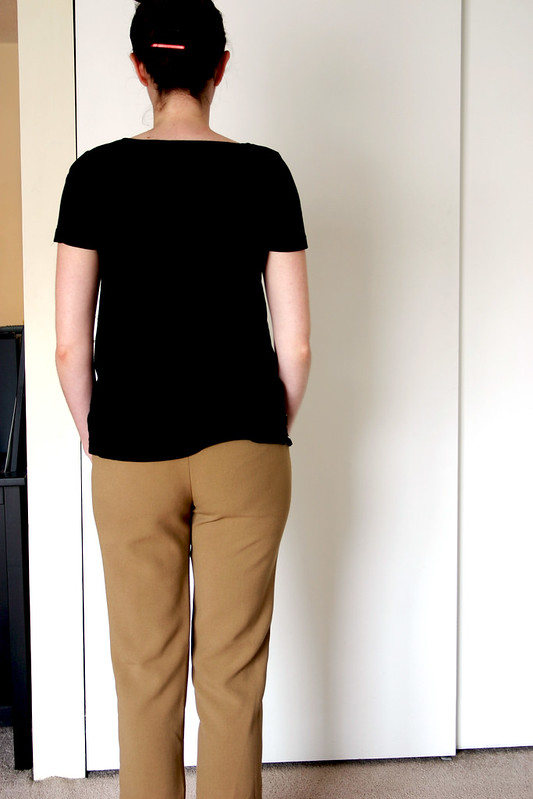
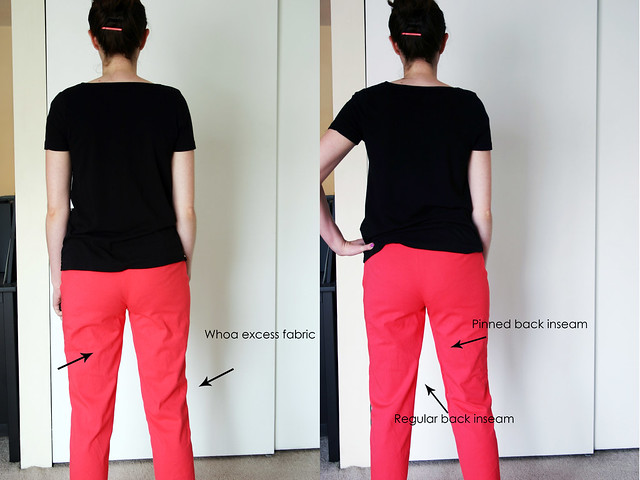
I was a little concerned with how the back would fit since this coat is roomy, but the belt cinches everything in nicely and I don’t have “bubble butt” with pooling, excess fabric; it’s actually quite fitted in the rear.

 Have you ever sewn with Polartec?  It’s really easy – you get a warm, lightweight garment and you don’t have to finish any edges or seams.  For this muslin, I cut out the body and sleeve pieces, the undercollar, and the belt using my rotary cutter to give everything a nice, clean edge.  Heck, in warmer weather, I may even wear this out of the house to run errands, it’s that nice!

I’m getting close to starting the real coat – tonight I’m testing out some options for interlining with my cashmere wool, interfacing, and heavy rayon lining fabric.  Once that’s final, I’ll gear up to cut out alllllll the layers and pieces – it’ll be like cutting out four coats when everything is said and done.  I’m a little bummed that I’m not going to be making a super-tailored coat like I was originally planning this year, but I’m pretty stoked about making Yona and I’m going to use quite a few tailoring techniques anyway.

Well, I better get a move on this – Jen just released her Cascade Duffle Coat pattern today and I’d love to make that as well this winter!  Having a wardrobe of coats is what makes winter in New England a little bit more bearable.

Follow:

Pattern Review: Butterick 5454 [DVF Dress]


DVF Wrap 1

Pattern: Butterick 5454, view B
Fabric: ITY knit from Fabric Place Basement

Watch: Michael Kors
Boots: Bandolino
Lipstick: Nars Funny Face (my fave color!)

I wanted to call this post “flat girls can wear wrap dresses, too!” because yes, with a few alterations, it’s possible to get a wrap dress that fits and doesn’t gape open.  Originally, I attempted to make a version of this dress back in 2012 with no success and a lot of gaping – I just didn’t have the energy or motivation to fix yet another dress that was too big in the bust for me.  I wrote off wrap dresses as one of those cute dresses that only girls with a chest could wear and would never grace my closet.  However, after getting sucked into a marathon of “House of DVF” reruns and seeing all of the beautiful wrap dresses gracing the contestants, the idea of making a wrap dress consumed my sewing thoughts
and I needed to conquer my fitting challenges.


DVF Wrap 2

Ladies of the small-busted variety, here’s our fitting challenge when it comes to wrap dresses: the surplice length of the wrap is usually too long.  We don’t need a lot of fabric to cross over and cover our chest, which leads to the excess neckline length and extra fabric drooping near the tie.  Sure, we can try and tie the dress tighter, but we still don’t get the secure fit of a neckline laying close to the body, or we have to wear a cami underneath the dress for modesty.

Threads Magazine #168 from September 2013 is a great resource for fitting wrap dresses and really helped me get the fit of my dress correct.  Here’s what you do: on your pattern, make a small tuck along the neckline above the bust, and another small tuck below the bust – I made two 1/2″ tucks for a total length reduction of 1″.  That’s it – excess length is reduced.  For more modesty, I also gradually raised the neckline 1/2″ to ensure better coverage and that this dress would be work-appropriate. 


DVF Wrap 4

Bias can be tricky to work with, but when you have bias with a knit fabric, watch out – chaos can quickly happen if that sucker isn’t stabilized asap.  To get a stable neckline, I used a technique from Sandra Betzina’s Power Sewing book – 1/4″ twill tape.  I measured the neckline length on my altered pattern piece and cut two pieces of twill tape that exact length for each side of the neckline, plus one for the back neck (note: she recommends different lengths depending on your bust size).  Then, with the knit fabric against the feed-dogs of the machine and the twill tape on top, I eased the neckline onto the length of the twill tape on the wrong side of the bodice front.  I was pleased as punch when I tried the dress on, wrapped the neckline, and had zero gape.  I feel like I achieved the impossible!

The other part about this pattern I liked, versus other wrap dress patterns that are out there, is the fact that there are no pleats underneath the bust near the ties like with Vogue 8379 or Vogue 8784.  With pleats comes extra volume and fabric, and I’m not sure how easy it would be to get that design element to fit on a small bust and not cause gaping.


DVF Wrap 3

The skirt on this dress has a slight flare, but is more of a straight skirt style than an A-line skirt seen on some other wrap dresses.  There’s some pleats in the skirt in the front and the back, which I didn’t mind since you don’t see them with the pattern of the fabric.  Now that I got the bodice to fit, I want to try to match different wrap skirt styles to get different looking dresses – maybe even turn the pleats in the skirt and bodice into gathers?


DVF Wrap 5

There’s a whole world of dress options open now, this is just the beginning of wrap dress sewing!  I immediately earmarked some jersey fabric that’s been in my stash for a while as new wrap dress projects, and I cut out a turquoise merino wool knit fabric the other night for a winter-ized version.  Wrap dresses are like secret PJs: polished looking, but so comfy and easy to wear.

Follow:

Fabric Affects Fit – A Comparison of Clover Pants

Last year, I wanted to finally tackle sewing pants.  And yes, I made two pairs of pants, but they never made it to the blog – I still have to fix a zipper in one pair, and the other pair is made out of a brown fabric that I don’t know how to wear.  I want to share these pants, and demonstrate how a difference in fabric can affect the fit of the same exact pattern.

Note: this is a picture heavy post, and I’ll be talking about crotches.  Hey, it’s a sewing term!

I spent a week last year trying to get the fit right on a pair of Colette Clover Pants, and learned a lot about pant fitting by combing through my back issues of Threads, searching for articles online, and reading Pants For Real People.  By the end of the week, I ended up with these black Clovers:


black clovers1


black clovers2


black clovers3

I was pretty happy with the fit!  I took out a lot of bagginess in the seat and back leg by adjusting the crotch seam and back inseam.  The fabric was a RPL (rayon-poly-lycra) I had in my stash from when I thought I’d be sewing clothes for my old job, and it had just the right amount of stretch.  These pants still aren’t finished, because I botched the zipper, but I really should fix them because I love how they fit!

So after I made the black pair, I decided to use some taupe colored poly in my stash from Metro Textiles to make Clover #2 last fall:


taupe clovers1


taupe clovers2


taupe clovers3

I liked the fit of these even better!  The fabric was a little thicker than the RPL of the first pants, and had a nice amount of stretch and recovery.  However, I never finished the hem on these or wore them – the color just doesn’t work for me.  For some reason, this brown reminds me of those polyester pants with elastic waists by Alfred Dunner that old ladies wear to play bingo.  Trust me, the color looks a lot nicer here than in-person.  I can’t find a single thing to wear them with in my closet, which is why they’re all wrinkled looking – they’ve been sitting in a bin in my closet.  But all of that aside, I was very happy with how these fit, more so than the first pair.

Which brings me to Clover #3, which I stitched up last night.  Keep in mind – all three of these pants are cut from the same pattern with the same alterations.


coral clovers1

For these Clovers, I’m using a stretch cotton twill from Mood Fabrics.  And the fact that this fabric is pink, and there were folds of excess fabric in the front…I just kept looking at these pants and getting the idea that I had camel toe going on, even though these weren’t tight!!


coral clovers2

This was completely unexpected as well, look at all of that extra fabric in the back.  Now, I don’t want these pants to be skin-tight, since that’s not how they’re designed, and the instructions warn against over-fitting.  I need to be able to move and sit, but this just won’t do.


coral clovers3

I mean, come on!!!  Maybe if this was circa 1998 the fit would be ok, but not the look I’m going for (I was watching “You’ve Got Mail” the other day, and Meg Ryan’s pants fit just like this in the back…and that movie came out in the late 90’s).

After studying my Pants For Real People book (which I highly recommend), and having a good laugh with Sonja and Neeno, I figured out what kind of alterations I need to make for these to fit.  I’ve got a case of – wait for it – “Crotch Oddities.”

Yes, my friends, it’s a term that I read in my book.  Specifically, I’ve got a front crotch bubble, which can be solved by straightening out the front crotch seam.


front before and after

I essentially pinned out a 1/4 inch of fabric right around where I had the “wrinkles,” effectively straightening the front crotch seam.


back before and after

As for the back, I made the alteration that I did on the original paper pattern: took out leg width via the back inseam.  I pinned about a 1/4″ in from the original seam on the back leg, but still kept the original seam allowance in the front (in the above right photo, I only pinned the right leg with this change, the left leg is the same).  I’m realizing that it doesn’t look like much of a change from the photo on the left, but it really does fit better and look trimmer.  Again, I don’t want these pants to be skin-tight, and I need some ease for sitting.

You know, I ran into this problem when I made my Elisa-lotte dress recently with a stretch cotton fabric.  I’ve made the Charlotte skirt many times, and never had a fitting problem, but when I made it with the stretch cotton, I had to take it in a ton on the sides.  I’m guessing that that’s what I’ll run into when I work with stretch cotton.

So I guess the moral of this story is: just because a pattern fits with one type of fabric, it doesn’t mean that it will fit with another.  These were all stretch fabrics, with a good degree of stretch, but because they had different fiber contents, the fit that I got with all three were different.

Follow:

Clover Muslin, Or, I Will Make Pants In 2013

I decided to take advantage of my “Staycation” this week to catch up on the sewing that I’ve wanted to work on.  If you haven’t been able to tell, my sewing momentum has been lacking in the past couple of months, partially because of work craziness and also because winter is getting to me and I want to make cute clothes for warm weather, not heavy bulky stuff.  I churned out a dress this week from my faux Missoni fabric, gave up on my Beignet (more details on that later), and made a toile (sounds so much fancier than muslin) for a Jasimine blouse.  And since I had the muslin fabric out, I cut out a pair of Clover pants because gosh darnnit, 2013 will be the year that I get over my fear of pants and freaking make a pair already.

So here’s the results from Round 1:


cloversmuslin1

Since the waist and hip measurements for a size 6 are spot on what I measure, and the Ginger skirt I made last year fit perfectly, I cut out a size 6 and crossed my fingers that everything would turn out as good as humanly possible.  I must say, I’m pretty pleased with how the first muslin turned out since it wasn’t as awful in fit as I thought it would be.  The waist is a perfect fit and comfortable, but I noticed that I have some bunching around the crotch area.  Hmm.  I’d like it to be as smooth as possible, but I don’t want to take so much away that I can’t sit comfortably.

Here’s the back:


cloversmuslin2

Shhh don’t look at that pile of clothes and fabric in the corner

When analyzing pull/drape lines in pants, the terms “smile” and “frown” are used since you’re looking for lines shaped just like, well, smiles and frowns.  Smiles denote that more fabric is needed in an area and frowns mean that there’s too much fabric and it needs to be reduced.  Well, I’ve got a frown-y backside wth too much fabric going on, affectionately referred to as a “Flat Derriere.”  Now this isn’t news to me, I know I have, ahem, such a backside – I’m all straight lines and no curves.  And since I’ve run into this problem before with pants, it’ll be good to figure out how to eliminate that problem for future pants patterns.  Also, the legs are crazy baggy on me and nowhere near as fitted as they should be, like on Sarai.

So here’s what I’ve determined I need to do so far:

  • Flat rear adjustment: I’ve seen a couple of different techniques online on how to do this and I also looked through some of my Sew Stylish and Threads magazines as well as some of my fitting books.  I have a some ideas on what to do.
  • Shorten the torso: I’m thinking that may be what’s causing the excess fabric in the front and the back?  Maybe it’s just the crotch depth that’s too big.
  • Thin leg adjustment: seems pretty simple, but it’d be the last alteration I do after I get my butt figured out.  Just tapering in the leg from the crotch seam.

Realistically, I don’t think I’ll have these pants fitted/made by the time I go back to work next week.  But it’s nice to have the time to spend on a project this involved.

Do you have any tips on fitting pants?  I’d love to hear them!

Follow: