Hampton Jean Jacket

Hampton Jean Jacket1


Hampton Jean Jacket2


Continuing on my quest to stash-bust and sew through what I already own as much as possible this year, the Hampton Jean Jacket seemed like a perfect pattern to use with some Cone Mills denim I bought last year. Perfect because:

  • A) I don’t have a classic jean jacket in my wardrobe, just a white denim jacket from Nordstrom Rack that I wear a lot in the summer with dresses
  • B) I have sooooo many denim buttons that I bought by mistake last year and need to use them up, lol
  • C) the weight of this denim was better suited for a jacket instead of a pair of jeans and didn’t have the stretch I needed for jeans (I don’t know what I was thinking when I bought it)
Hampton Jean Jacket5

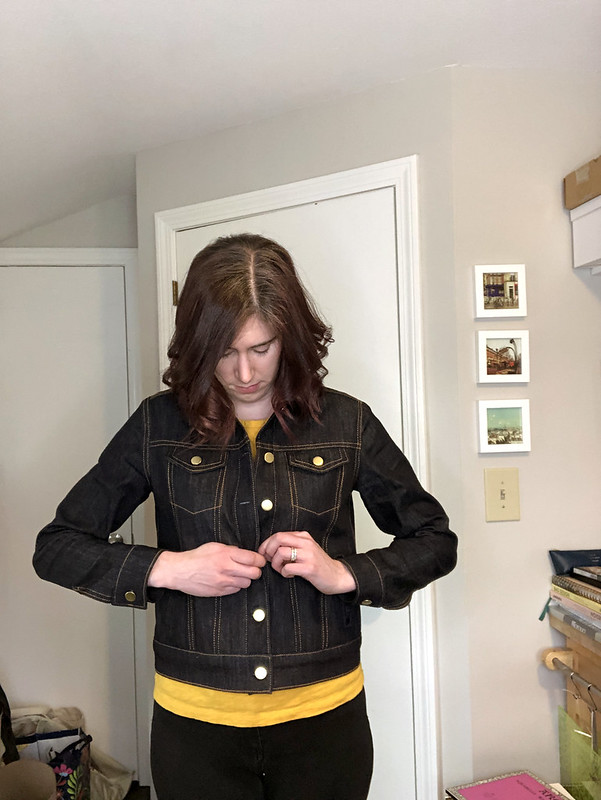
I wanted the cut and fit of this jacket to be similar to the fit of my white denim jacket, so I took some measurements of my white jacket to determine what size to make. Contrary to the picture above, I never button my denim jacket closed and didn’t really care about the ability to wear this over a sweater or bulky layers, so I cut out a size 2 even though my measurements would have put me between a 4 or a 6. I’m glad I cut the 2, and hey, I can still button it closed! I also shortened the body of the jacket by 1″.

Hampton Jean Jacket3

The construction is really straightforward and not complicated at all, the time-consuming parts of making this jacket were cutting out all of the pattern pieces (16 total!) and switching thread to complete all of the topstitching. I tried to batch as much topstitching together as I could so I wasn’t changing my thread all of the time, but it’s a step that really elevates the look of the garment and was time well-spent. I used a heavy-weight denim topstitching thread from Tailor Taylor in topaz for most of the topstitching and a lighter weight thread from Wawak in navy for the buttonholes and topstitching around the welt pockets.

The only tricky part with topstitching was the seam down the arm of the sleeve – I couldn’t figure out how to accomplish this since the sleeve at this point was no longer flat. The directions have you topstitch from the wrong side, but that would mean that I would need to have the topstitching thread in my bobbin and I wasn’t sure if my machine would handle that. So, I opted to skip it entirely.

And welt pockets…man, those scare me every time. I’ve put them in jackets a handful of times, but I’m always sweating it each time I cut into the body fabric to open up the pocket. But I love that there’s pockets in this jacket! They’re a teensy bit small and can juuuuust barely fit my iPhone 8 inside.

Hampton Jean Jacket7

I also opted to not include the back tabs – I didn’t like how they turned out (couldn’t get the points to look right) and didn’t want to fuss with adding them to the back. The photo above makes it look like the back doesn’t fit well, but it’s just because I’m pulling the jacket in closely with my hands in my pockets.

Hampton Jean Jacket4

My stitching isn’t 100% perfect on this. I messed up two of the buttonholes with my automatic buttonhole feature on my Bernina (even when using my compensation plate to make it easier to sew over the bulky seams), I accidentally topstitched part of the cuff with a very small stitch length (2.5 instead of 3.5, yikes), and something weird happened with my sleeve plackets. I need to go back and relook at them and see if there’s something I can adjust, but it looks like one side of the placket is longer than the other. I have no idea how/why this happened…I had no issues with the sleeve seams lining up and everything seemed to be the same length. You can see in some of the above photos that it balloons out a bit and doesn’t lie flat. Sigh…will need to see what I can do with this, maybe adjusting the bartack will help.

Hampton Jean Jacket8


Hampton Jean Jacket9

I love this jacket! Originally I was hesitant on using the topaz topstitching and the brass buttons because I thought it was going to be a lot louder/flashier than I wanted, but the finish result is perfect to me. It’s not a hard garment to make, just a bit time consuming with all of the stitching details, but it’s one of those garments that has a “wow” factor when you tell people you made it. The classic styling and fit is great – I would definitely make another one of these once I wear out my white one!

Fabric:Cone Mills Denim from Threadbare Fabrics

Buttons: Tailor Taylor

Topstitching Thread: Tailor Taylor and Wawak
Follow:

Finished Project: Butterick 6292 | Jacket With Detroit Cuffs

Butterick 6292
 

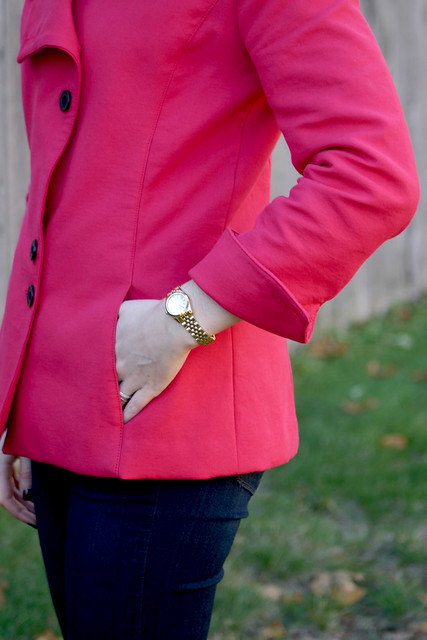
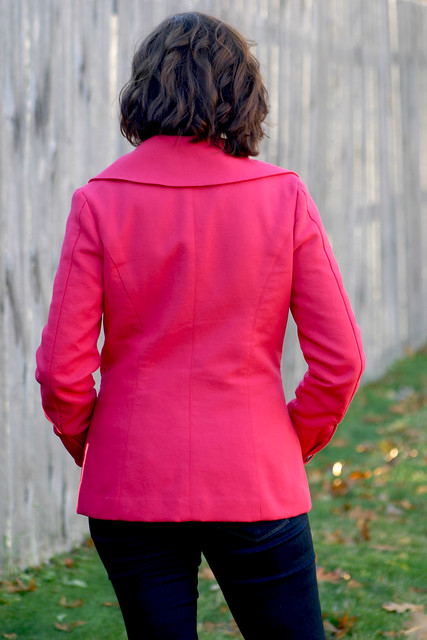
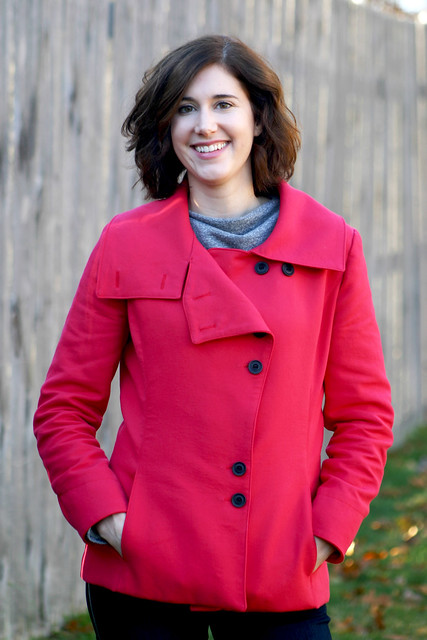
I mentioned in my last post how limited my sewing time is now that I’m going to grad school part-time.  To illustrate how slow I am: I started planning this jacket at the end of August, bought the fabric in September, started sewing in October, and didn’t finish until November.  Part of that is, like I mentioned, because of starting school, but the other part is that I needed to redraft the sleeves.  You see, this is a complete knock-off of the jacket featured on the cover of Thread’s November 2016 magazine!


The fabric I used is exactly what was stated in the article – a double-face cotton serge twill from Mood Fabrics.  I searched the site and ordered a swatch – it’s such a nice weight, perfect for a fall jacket, and has nice stretch and recovery.  It does wrinkle a bit as you wear it, especially in the sleeves, but that’s what happens when we wear cotton I guess!

Butterick 6292
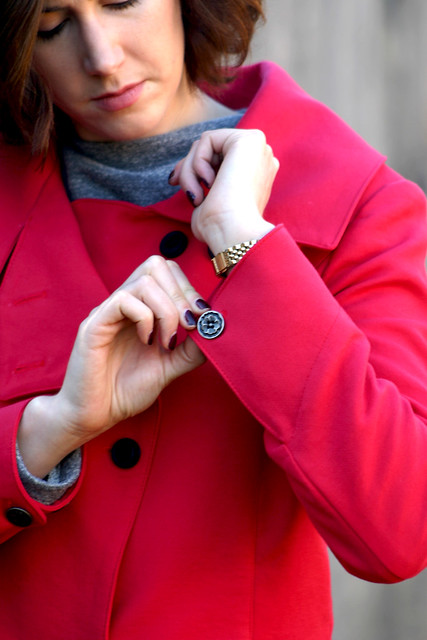
The original sleeve of Butterick 6292 is a single seam set-in sleeve.  In the Thread’s article, they show you how to re-draft the sleeve into a two-piece sleeve in order to make a Detroit cuff, an adjustable cuff finish used on workwear such as Carhartt jackets.  It’s a pretty looking design element on this jacket that has a functional purpose – the cuff can be rolled up when it’s nice out, or buttoned closed when its breezy outside.  Hard to see in the photo below, but there’s two buttons on the cuff that can adjust how tight to close the cuff.

Butterick 6292
 

The pattern itself was pretty straightforward, but redrafting the sleeve and adding the cuff made the pattern a little more challenging.  My stitching isn’t perfect and I ended up getting a small tuck when I attached the cuff, maybe I was off with some of my drafting.  And oh boy, the top stitching on this!  Definitely something I need to work on and take my time doing.

I also had a bit of  hard time with the button placement.  When I tissue-fit the jacket, I thought it was going to fit just right (my standard grading out of a size 10 to a size 12 from waist to hips).  Once I sewed it together, I realized it was too big and needed to take it in.  Then, when I marked the button hole placement, the fit was still off.  So, I improvised with the button placement and made it work with how I wanted the jacket to fit overall.  I also wasn’t that crazy about the buttons I used, they’re pretty boring and not as fun and fancy as the buttons on the original jacket.  The selection at my local Joann Fabrics is so limiting!  Maybe I’ll order some buttons online from Pacific Trimming and swap them out for these boring black ones.

Butterick 6292
 

I used a new-to-me interfacing from Fashion Sewing Supply – I read so many good things about their interfacing from other sewing bloggers, and since I couldn’t find any more of my Touch of Gold interfacing that I love, I ordered some medium weight fusible.  I didn’t completely read the instructions though, and the bond of the interfacing to the jacket isn’t 100% as you can kind of see in the photos above.  Oh well!  Definitely a user-error, I used it correctly for another upcoming project and it looks much better.

Butterick 6292
 

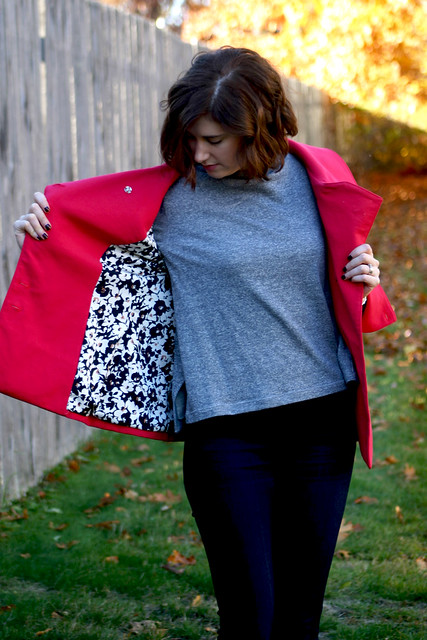
Jackets and coats are so much more fun when there’s a surprise “pop” with the inside lining!  I just love this floral poly fabric from Mood.

Would I make this pattern again?  Maybe in a wool tweed, but I have so many other jacket and coat patterns on the brain I want to sew.  This project was an example of how you can take an easy pattern and make it more challenging by customizing different design elements.  My red jacket is now tucked away in the closet until next year because winter is here and there’s snow on the ground!

Follow:

Pattern Review: Minoru Jacket [Sewaholic Patterns]


minoru 1

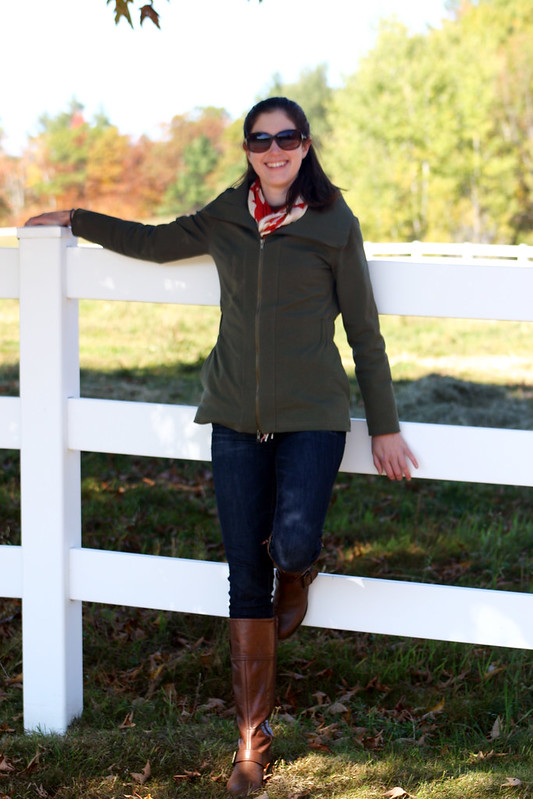
Pattern: Minoru from Sewaholic Patterns
Fabric: Theory stretch twill from Mood Fabrics
     Zipper: Pacific Trimming
Size: 2

Jeans: Paige Denim
Boots: Nine West

Finally, I now have the jacket everyone has already made – the Minoru jacket!  After seeing some versions in person this past March at the NYC Blogger Meetup, the idea of making one of these jackets this year was solidified in my mind.  Plus, have you seen Lauren’s fantastic orange version?  Yeah, I definitely needed to get on the Minoru bandwagon asap, don’t know what took me so long.

Throw in a last-minute trip to NH and I had even more reason to crank out this jacket in time for the cool fall weather.  These pictures were taken on our last day in the mountains at a place called Castle in the Clouds – we went horseback riding!  It was a great way to take in all of the fall foliage.


minoru 2


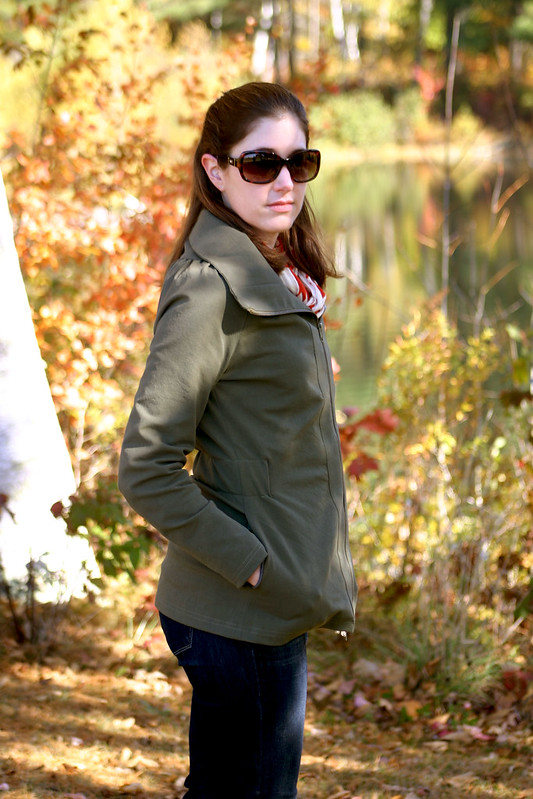
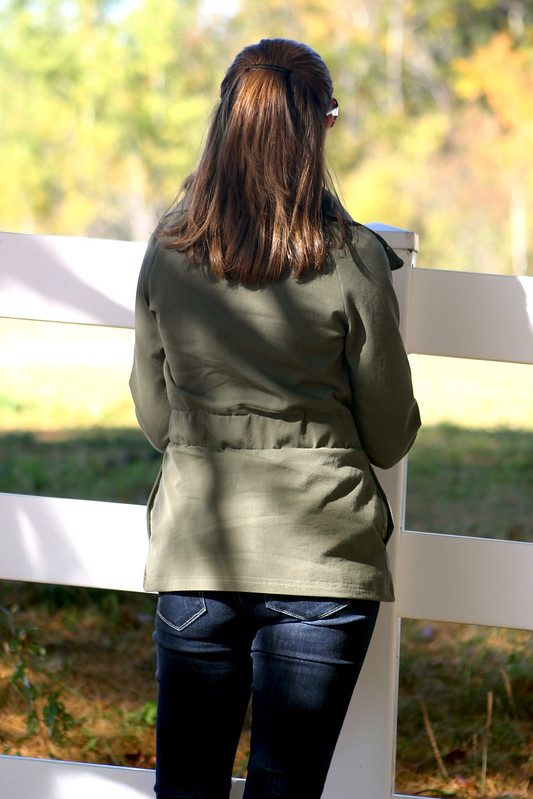
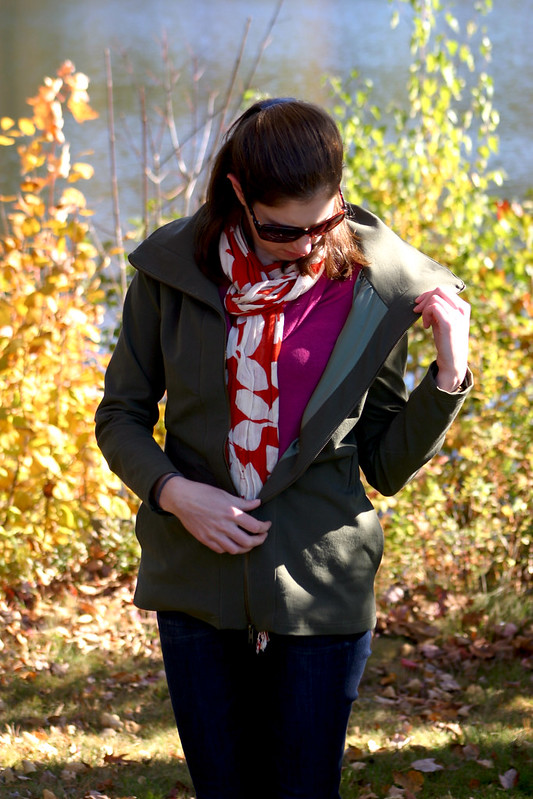
I like my outwear to be versatile and neutral enough that I can wear it with a lot of different clothes in my closet, so crazy colors or prints were not an option for the fall jacket I wanted to make.  Colors like black, grey, or brown would have been good picks, but too boring…something about the styling of the Minoru made me think of military jackets, so I settled on finding on olive green color at Mood Fabrics.  Plus the fact that it was a Theory stretch twill didn’t hurt either, I knew it was going to be great quality fabric for my jacket!


minoru 5

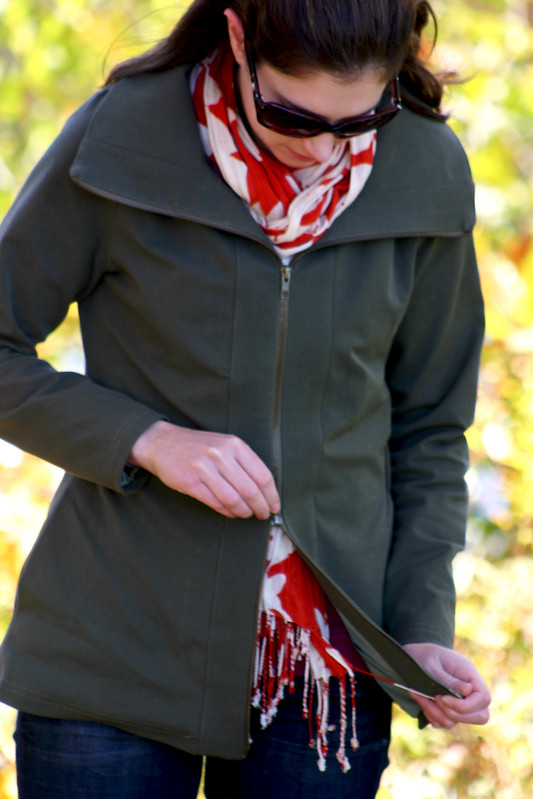
I made a few changes to the jacket, one being the double zipper I found at Pacific Trimmings.  I didn’t originally intend to use a double zipper for the jacket, but it was the zipper that matched my fabric the closest.  It’s really handy when I’m sitting (like on a horse!  Haha!) and makes it more comfortable instead of my jacket bunching up around my hips.

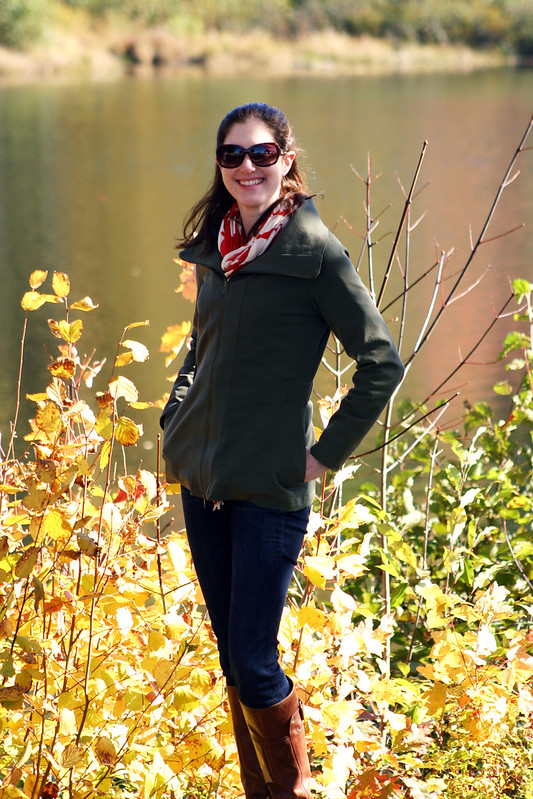
You may notice that my jacket is shorter than other Minorus…well, that’s due to the zipper being cut shorter than I asked at the store.  I had no idea it was too short until I began to install it in the jacket front and saw I was short about two inches.  So, the only real solution was to shorten the jacket so it wouldn’t look weird.  Also, I opted for no cuffs and lengthened the sleeves instead.

Which presented another problem: the pockets I added to the side seams became too long when I shortened the length of the jacket.  Once I sewed the lining shut it wasn’t a problem, they just bunch up a little.  In retrospect, had I known this was going to happen, I would have made the pocket bags shorter/smaller.  Also, how does this jacket pattern not have any pockets?? A little patch pocket in the inside (which I didn’t make) isn’t going to cut it, you know what I mean?


minoru 3

I cut this jacket smaller than the typical 6 I usually cut for Sewaholic Patterns – this is one of those instances of how picking out a size based on finished garment measurements is better than going by body measurements.  Had I picked the size 6 to make, I would have wound up with a very roomy, boxy jacket, and that wasn’t the look I was going for.  Also, I made the mistake of trying to pull the elastic too tight around the waist to make the jacket even more fitted, but ended up getting diagonal pull lines around the waist in the front.  After I cut a longer length of elastic and adjusted the fit, the lines went away.  So, if you’re experiencing that with your Minoru, the elastic length is probably why.


minoru 6

See? Fitted, but still room to wiggle around.  I wore this jacket at the driving range a few days earlier and hit two large buckets of golf balls and had no problem swinging my driver.


minoru 4

A quick peek at the lining – I ended up bagging this lining instead of however the instructions tell you to line the jacket.  The stretch in the poly charmeuse made it pretty challenging to hem the lining, and truth be told, I need to go back and fix how I sewed it.


We went horseback riding in the NH mountains today #latergram #longweekend #NH

I’ll leave you with a photo of Chris and I on horseback!  One of the guides was nice enough to take photos as we went along the trail.

 Well that’s two jackets I made now for fall!  I’m currently working on a fancy lace dress for a wedding in less than two weeks (more on that to come later this week) and then I’m back on to sewing for fall.  My latest idea – an oversized leopard print wool coat.  Does fabric like that even exist?

Follow:

Pattern Review: Rigel Bomber [Papercut Patterns]


rigel 1


rigel 2

Pattern: Rigel Bomber by Papercut Patterns
Fabric: double sided cotton from Metro Textiles; wool ribbing from Mood Fabrics
Size: XXS

Sweatshirt: Sewaholic Renfrew
Jeans: Michael Kors

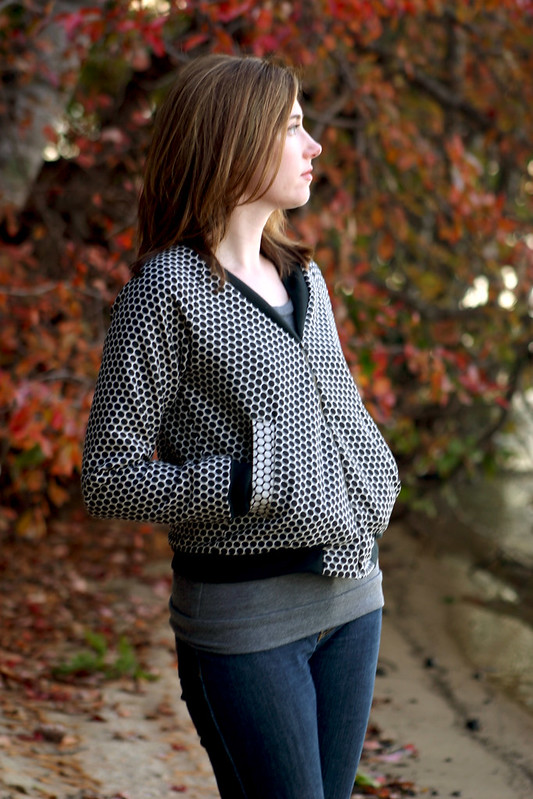
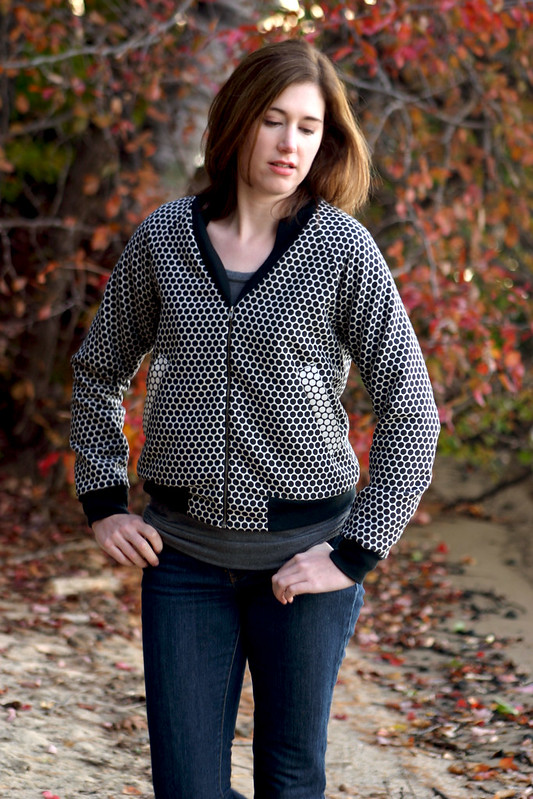
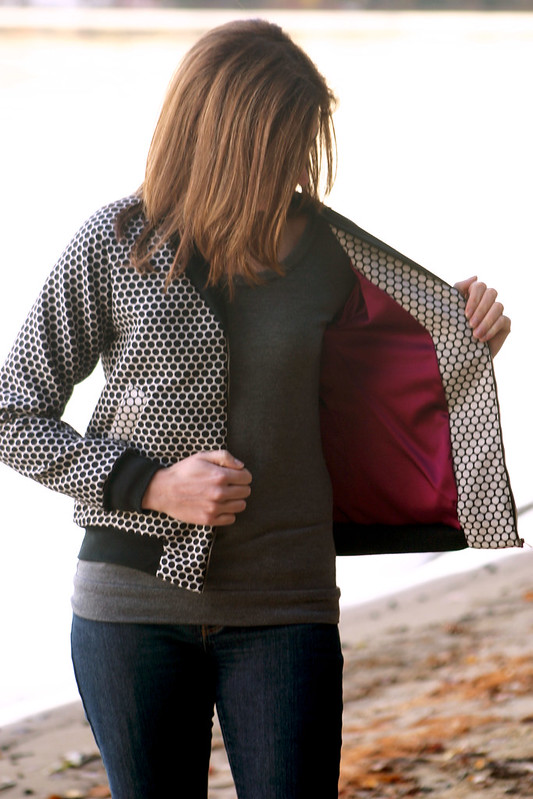
Words can’t describe how much I Love.  This.  Jacket.  It’s so versatile – I dressed it up with black pants to wear for an account meeting, and then wore it with jeans and a sweatshirt up in New Hampshire over the holiday weekend.  It’s just the right amount of weight for early fall weather, and I know it’ll be perfect when spring arrives next year.

The fabric also makes it – this is a medium weight cotton I bought at Metro Textile this summer, not knowing what I’d make from it.  My love for polka dots is unending, and this fabric is a double-sided woven with polka dots…swoon!!  How could I not bring this fabric home with me?


rigel 3

True to how Papercut Pattern sizing runs (way too big on me, that is), I cut out a XXS for the top of the jacket and graded to a XS from waist to hips.  What I can’t figure out for the life of me is why jacket patterns don’t come with linings by default (ok ok some patterns I can understand…but most, no).  I drafted my own, with a pleat in the center back, to attach to the facings because eww, I don’t want to see the pocket bags flapping around and exposed seams of my finished jacket.  Plus, linings help jackets stand up to wear much better.  It really wasn’t that hard to draft a lining, so I’m not sure as to why this wasn’t an obvious inclusion for the pattern.


rigel 5

See?  Pretty raspberry lining with the white polka dot side of the fabric, much better!  Also, you’d think I’d learn by now to not use stretch fabrics for linings.  This was a beeyatch to hem at the bottom and I had to make some small tucks in the lining fabric to get everything smooth and hemmed nicely.

If you’re planning on making this jacket, definitely take your time to get the zips to match up on either side – it’ll be really obvious at the neckline if the ribbing collar doesn’t match up.  I had to redo mine at least twice, but I’m glad I did.

Oh, this was my second time doing welt pockets – they were much easier on this fabric than the thick wool of my Anise!


rigel 4

The ribbing is a tubular wool ribbing I bought a while ago at Mood for a lightweight jacket project that fell through.  While sewing this project, I realized it probably wasn’t the best weight to use with the cotton, since the band at the bottom rolls up occasionally (like in the above shot) and the collars are a little floppy and don’t lay as flat as I’d like.

All of that aside, this jacket is going into heavy rotation for the remainder of fall.  On to sewing more jackets!

Follow:

Pattern Review: Lisette Round Trip Jacket [Simplicity 1419]


lisette jacket 1

Pattern: Lisette Round Trip Jacket, Simplicity 1419
Fabric: linen blend from Joann Fabrics
Size: 10

Dress: McCall’s 6752

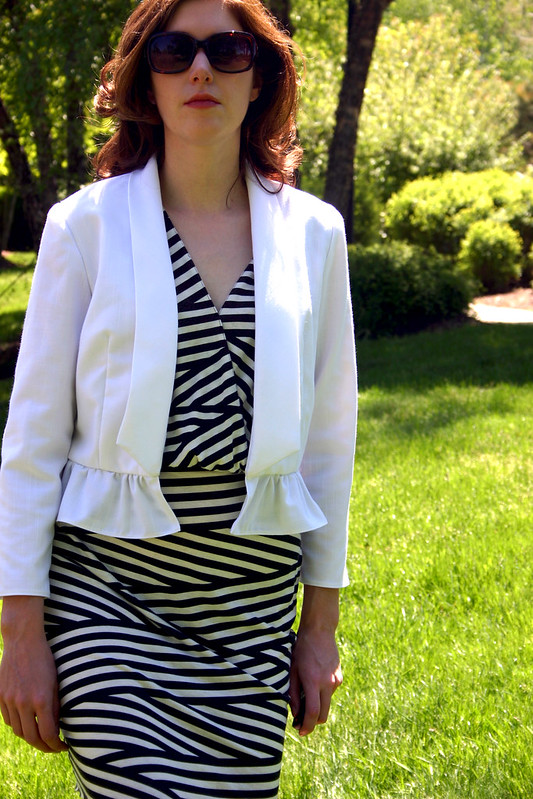
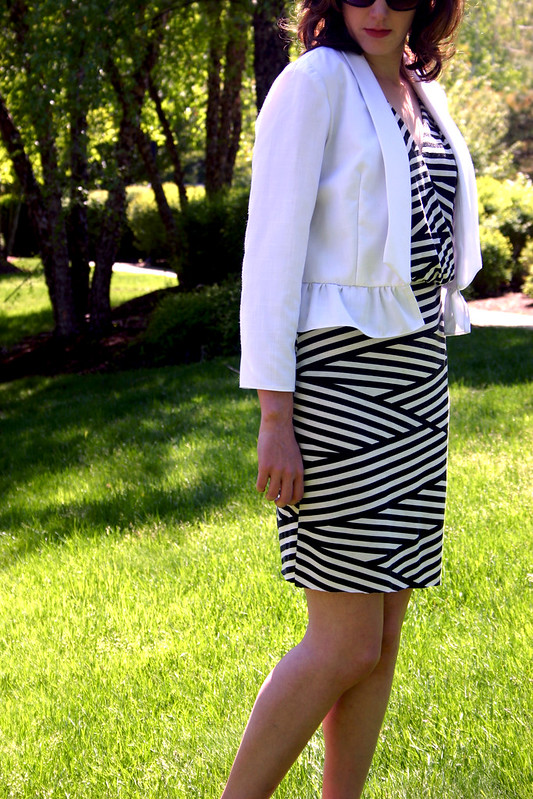
Had it not been for Me Made May this year, and following Liesl Gibson’s Instagram feed, I don’t think I would have discovered this pattern.  I guess it’s because the model on the pattern envelope is shown wearing only the dress, and the jacket is just an illustration that blends in with the dress it’s paired with.  I would have flipped right past it, since it seemed like just another fit-and-flare dress pattern, but when I saw Liesl pair her jacket with a tunic and pair of pants, I loved the shape and silhouette.  The perfect summer jacket!

(Disclaimer: I tried using my remote control for the first time outside with these shots.  They aren’t up to my usual photographic standards, but with a “creative director” who works different hours than I do, and a backlog of projects waiting to be shot for the blog…ehhh whaddyagonnado.  So yes, my head is cropped off in almost all of these pictures because I was on a hill.  Hah!!)


lisette jacket 2

Ever since my sister came up in March and we went to H&M, I’ve been on the hunt for fabric for a white jacket.  I tried one on I fell in love with when we were in the store, but hated the puff sleeves and how it fit (and who buys fast-fashion anymore?  Not me!).  It was the fabric that was to die for, a heavy knit with a neat, basket weave texture.  This linen is nowhere even close to that fabric, but the H&M jacket put the idea in my head that I wanted to make a white jacket or blazer.  I think I still want to make another white jacket, more blazer-style, this summer.


lisette jacket 3

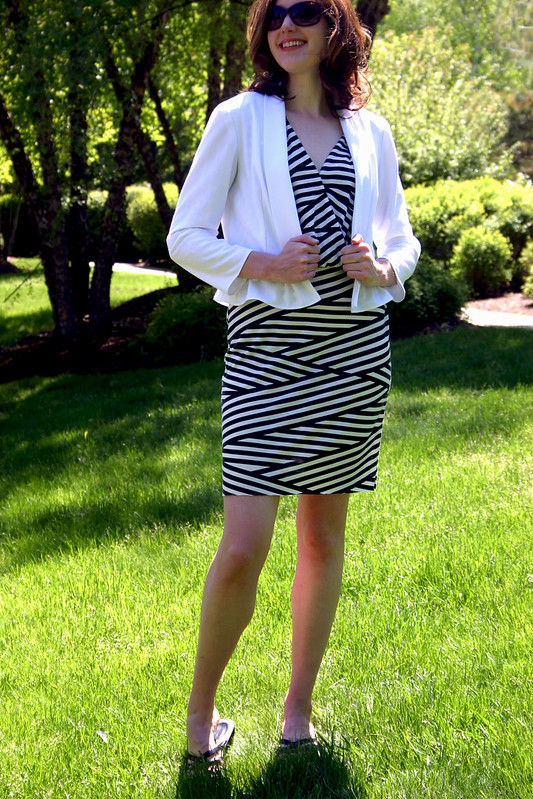
The pattern was very straightforward and easy to sew, a beginner could make this jacket.  It’s not designed to be very fitted or tailored in any way, so it was a great jacket to make coming off of my Anise project – my mom laughed when I told her I was making another jacket!  It’s unlined, which makes it easy to wear with sleeveless garments.  I’m sure you could draft a lining if you wanted to, but I didn’t want to bother with it.

What I did do, though, is underline the front and back pieces of the jacket: the white linen is a little see-through, as you can see at the shoulder seams, and I didn’t want all of the seams and darts showing through.  I underlined the pieces with some white lining fabric I had kicking around in my stash, and serged all of the raw edges to finish the seam allowances.  I didn’t feel like underlining the sleeves, since heck, that would be a full jacket lining!


lisette jacket 4

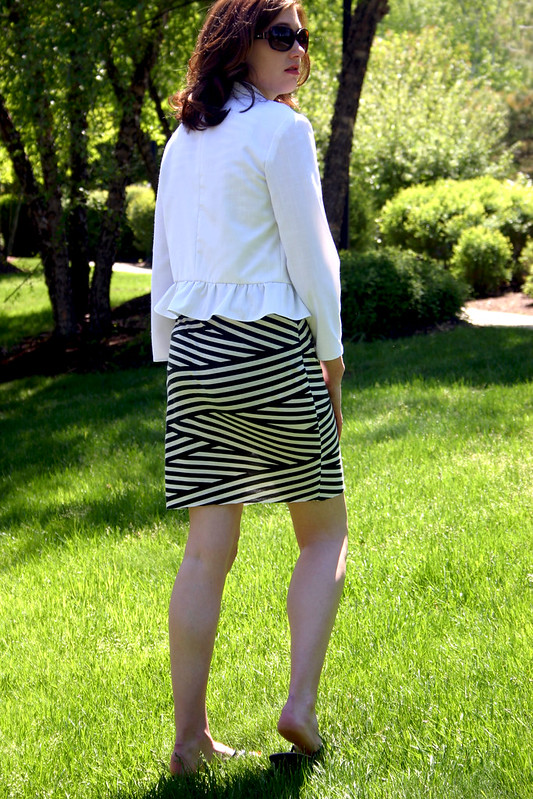
I think I’d make this jacket again, because I love the angled lapels.  I’m still not sure how I feel about the ruffle/peplum, it’s a little too “sweet” for my liking, but it’s starting to grow on me.  The ruffle stuck out like a tutu when I finished the hem, but it’s been in my closet for a week or two now and the fabric relaxed a bit.  Maybe it’s possible to leave off the ruffle on the next version, lengthen the jacket a little turn up the bottom to hem it.

Is it starting to feel like summer where you are?  Memorial Day always feels like the ushering in of summer, and we had some beautiful weather over the holiday weekend (Chris and I went to the drive-in on Sunday!).  Except it’s supposed to go back down into the 60’s again this week…the pool is open for the season now, and the lifeguard on duty must be so bored.

Follow: