Pattern Review: Circle Top [Papercut Patterns]


wool circle top 5


wool circle top 1

Pattern: Circle Top from Papercut Patterns
Fabric: Merino wool crepe knit from Metro Textiles (thanks, sis!)
Size: XXS

Tank: Old Navy
Jeans: Paige Denim
Boots: London Fog

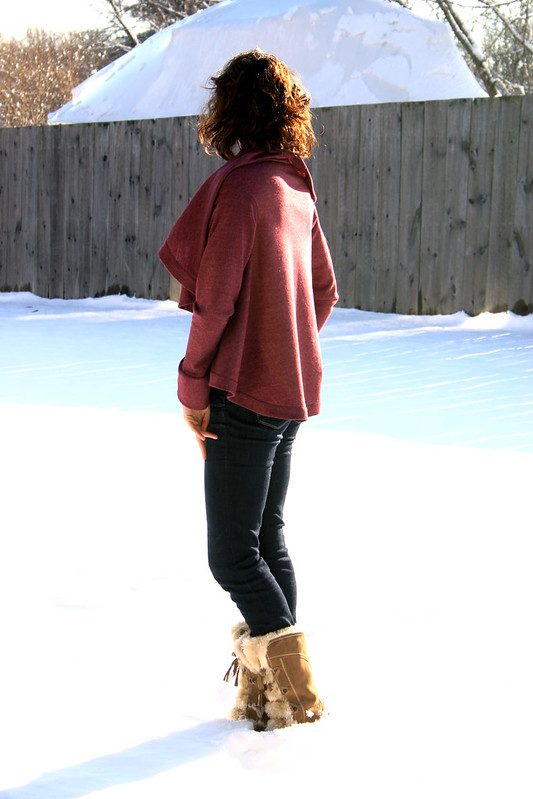
Hooray, my first finished garment for 2014!  I started this on New Year’s Eve, actually, but couldn’t finish the binding until I got my sewing machine back from the shop – as much as I love my serger, you can’t do everything on it.  I’ve worn it out a few times already and I bought some fabric for another version of this cozy cardi.  I guess that’s a testament to how much I like this!


wool circle top 2

This cardi is massive: it’s basically a giant circle with two holes in the center where the sleeves are inserted.  That’s it!  The pattern envelope claims there’s many different ways you can wear this – I didn’t find that to be the case, but if you’re feeling silly, you can wear it as a hoodie.

My sister picked up this fabric for me from Metro Textiles before she headed to our parent’s house for Christmas – it’s a yummy mauve merino wool knit with a crepe-like texture.  It has a lot of body, and behaves more like a woven than a knit, but it’s warm and I love wrapping it around me while I sit on the couch and watch TV (helloooo Downton Abbey season 4!)


wool circle top 4

The binding was the most time-consuming and fiddly part of making this cardigan.  There’s a lot of circumference to bind!  I decided to opt-out of how the pattern called for sewing the binding and did it my own way, which seemed a lot easier: sew the strip of binding around the cardigan, press it over to the right side of the garment, turn the raw edge under about 5/8″, and edge stitch it down.  It has a thicker look to it, but the way the instructions have you sew the binding seemed way too fussy for my liking and I’m happy with how my binding turned out.


wool circle top 3

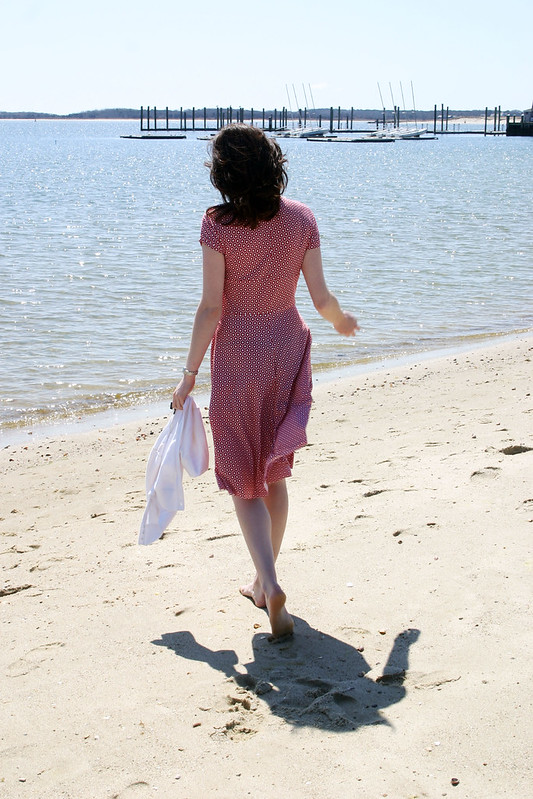
This cardigan has a very fluid and casual style to it, and I fought with it the first time I wore it to get it to lay exactly how I wanted it to.  But in the end, it’s best if you just let it do its thing and undulate around you.  I bought a light pink rayon cotton jersey for my next version and I bet it will be even softer and drapier.  A quick, no-stress project!

Follow:

Pattern Review – Magic Pencil Skirt [Pamela’s Patterns]


yellowskirt2


yellowskirt4

Pattern: The Magic Pencil Skirt from Pamela’s Patterns
Fabric: Yellow doubleknit from Gorgeous Fabrics
Size: XSmall

Top: H&M (really old)
Shoes: Tommy Hilfiger
Lipstick: Nars Niagra

I had the craving for a yellow pencil skirt last winter when Sunny posted a photo of a button-down shirt she made paired with a yellow wool pencil skirt from J Crew.  I love me some J Crew, but sadly, my paycheck doesn’t always allow me to indulge on items that aren’t on the sales rack.  Luckily, I had some yardage of a beefy yellow doubleknit that felt like it would make a great, wearable skirt.

But to find a pattern for a knit pencil skirt…hmmm.  I tried some tutorials that I found online to make a knit pencil skirt pattern (trace an existing skirt, measure your hips and draw a rectangle), but they ended up making me feel like I was wearing a tube skirt or a sausage casing.  I didn’t want it to be painted on, but the shaping just wasn’t quite right in the hips and thighs.  Enter Pamela’s Patterns Magic Pencil Skirt.


yellowskirt1

This pattern was a no-brainer and I made it in about two hours from cutting out to sewing the hem, plus I did some fitting in that time-frame as well.  Instead of being just a simple tube, the pattern has front and back waist darts to provide some shaping, and the silhouette of the skirt is pegged perfectly – definitely worth the $10 for the pattern.  The only change I needed to make was taking in each side seam 1/4″, making the total side seam allowance 6/8″ for the XSmall.  I turned the hem up the recommended 1 1/2″ and used a twin stretch needle to sew it – my favorite non-serger way to hem knits.


yellowskirt3

The elastic waistband isn’t like what you’d think of for the typical bunchy elastic waistband, it’s actually pretty smooth and flat.  I got some Fantastic Elastic for free with my pattern because of a shipping error (Thanks, Pamela, for the elastic!) and it was a dream to use.  Basically, it’s a type of elastic used in the fashion industry and can be cut down to whatever width you need.  I’m convinced that the waistband wouldn’t have been as nice and smooth with other elastic, this stuff is high quality.  It makes it totally possible to tuck in a shirt if you want to.


navyshoes

This skirt has “cake” written all over it – this is a pattern that I’ll be making over and over again, it’s easy to pair up with a lot of different tops in my closet, and it’s super comfy and easy to wear.  I can’t wait to wear this skirt in the fall with a sweater and boots! If you’ve never tried Pamela’s Patterns before, this is a great pattern to start with.

Follow:

Finished Project: Floral Tiramisu


cake floral1


cake floral2

Pattern: Tiramisu by Cake Patterns
Fabric: Jersey from Metro Textiles in NYC
Size: this round, a 30D for the bodice

Finally, a finished garment!  Seriously, it’s been a month since I posted something?  Yuck!  I blame a) my schedule and Chris’ not matching up well and b) the weather being crappy when there’s an opportunity for him to photograph my garments.  I have at least two other projects that have been waiting for a month+ to be photographed, too!  According to the poll all of you lovely readers were kind enough to take, you like pattern reviews and finished projects on this lil’ blog, so let’s not mess with a good thing, hmm?

After heeding everyone’s advice (thank you!), I cut out a 30D for the bodice on Tiramisu Deux.  It made total sense to cut that size out; it looked like it equated the amount of fabric I removed from under the bust on my first Tira.


cake floral3

I think it worked out much better this time, although it seems to me that the waistband piece should come up higher underneath my bust a la an empire waist style (dude, I look like I have virtually no chest in all of these pics).  The funniest thing is that when I went to do the gathers and tried to match the notches of the bodice pieces to the waistband piece, it was apparent that the gathers weren’t necessary since it was making the bodice a smaller size than the waistband.  Hah!  One less step for me, which was good, since I was having a “stupid sewing” day and had to resew literally every seam at least twice – I kept making stupid mistakes.  Also, since I didn’t shorten the bodice pieces like I did the last go-round (aka hack the extra length of the bodice/neckband off), I needed to shorten the neckband by a significant amount – roughly an inch or so – to get the neckband piece to lie flat around the back of the neck.  There was some crazy floppage back there beforehand.


cake floral4

On the positive side, this dress got me out of my sewing funk.  I think for the past three weeks or so, everything I picked up to start sewing hasn’t really been jiving with me.  I didn’t really want to force the issue, so this past weekend I uncovered some fabric I totally forgot I bought last spring in New York, and it clicked in my head that this fabric would make a perfect Tira dress.  Problem solved!  Now I’ve got my “sewjo” back (pun definitely intended) and can’t wait to tackle some projects that I started but haven’t finished yet.

I’ll probably make this at least one more time…maybe even cut a different bodice size.  Possible a B or C instead?  For a knit, this pattern is designed with way too much ease and I think the fit could be even better.

Follow:

Wearable Muslin: Tiramisu Dress [Cake Patterns]


cape cod cake1


cape cod cake2


cape cod cake

Pattern: Tiramisu Dress by Cake Patterns
Fabric: Jersey ITY from Gorgeous Fabrics
Size: 30D

Cardigan: Sweater Project
Sunnies: Tommy Hilfiger

This was the perfect dress for a walk on the beach this past weekend in Cape Cod.  Not too long, little short sleeves, and perfectly wearable under a cardigan.  I intended this to be just a muslin to get the fit right for this pattern, since I’ve never had luck with surplice styles, and I’ve been hanging on to this fabric for a long time, waiting for the right project.  After much fussing, I got this to fit…but it’s not perfect.  There was a lot of bagginess under the bust and I had to remove almost two inches of fabric, but how I did it caused problems with the underam seam.  I don’t get it…I picked the right size based on my measurements but it wasn’t anywhere close to fitting in the bust.  I think this pattern may be just overengineered…or not suited for us small chested gals.  But hey, no gaping!

When I make my final Tiramisu dress, I’ll post a more in-depth review of the pattern and how I solved my fitting problems.  Wish me luck, and thank you for your feedback on my earlier post.

Follow:

Saturday Stitching – Tiramisu Dress


Saturday Stitching

Surplice/wrap/mock wrap dresses have eluded me.  I’m convinced that I’m just not “built” for them since they always gape open.  However, I’ve seen so many positive reviews of the Tiramisu dress by Cake Patterns that I wanted to give it a shot.  Basically, you measure your high bust, full bust, and waist to determine what size to cut out – there’s about 20 different size combinations, which makes it pretty promising that someone like me who is “wrap challenged” could find the right fit.


Cake muslin

Well…sort of.  I think I erroneously measured myself and cut out a 30D since I thought my high bust was 33.5 and full bust was 34.  When I basted the side seams together, I was surprised to find crazy bagginess at the underbust seam.  I ended up pinching out about 2.5″ and moving up the underbust seam.


Cake muslin

This kind of fixed the problem but it ended up messing up the sleeve seam since I made the front shorter than the back.  I finished sewing the rest of the dress and it fits perfectly in the waist and hips, but I’m bugged that I couldn’t get the bust to fit correctly.  I’ll still wear my practice dress though!

I just went back and re-measured myself – my high bust is 34.5″ and full bust is 35″.  Well gee, no wonder I didn’t get the right fit!  I’m still conflicted about what size to cut out: those measurements almost match up to a 35A bodice piece, but I think the 30 fits me well in the shoulders.  I may just bite the bullet and cut out the 35A and give it a whirl in my pink knit fabric.

Have you made the Tiramisu?  How did you get the fit right?

Follow: