Wrap Dress Fitting for Small Busts


Wrap Dress SBA

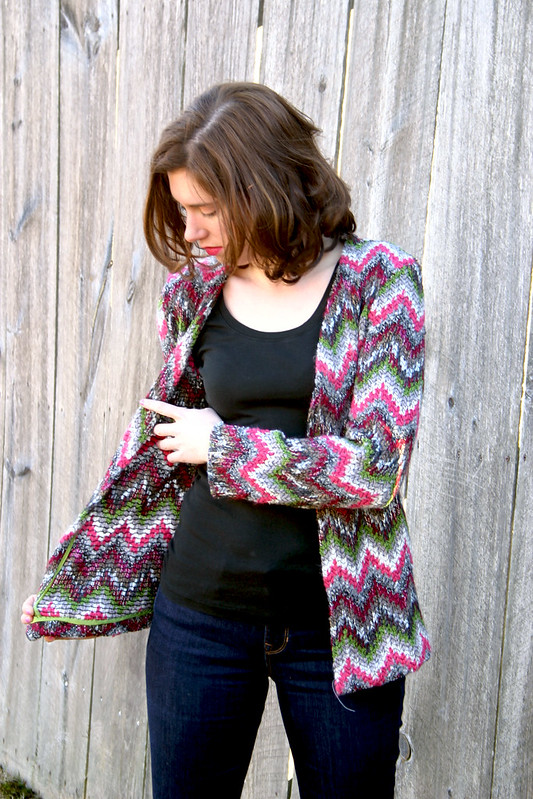
Up until a few months ago, I couldn’t wear anything with a wrap, or surplice, neckline.  Being of the small-busted variety (and damn proud I might add!), wrap dresses and tops would always sag or dramatically gape open, exposing my bra (eeek!), due to the length of the wrap being too long.  After searching all over the internet to find ways on how to make a wrap neckline fit and having no luck with the results, I pretty much gave up on ever being able to make or wear a wrap dress or top.

Then, I put together techniques I found from two sewing resources and hit the wrap-dress-jackpot: Power Sewing by Sandra Betzina, and Threads #168 September 2013.  Both cover different ways to alter wrap necklines, but combining elements from both articles gave me the winning combination for my first wrap dress I ever made at the end of last year – I highly recommend checking out both for more information on wrap dress fitting techniques.


DVF Wrap 1

There’s some good info out there on how to do a full-bust adjustment for wrap necklines – if you’re looking for a great post on how to make this alteration, Ann from Gorgeous Fabrics wrote an informative tutorial on how to do a FBA for a wrap dress for the McCall’s sewalong recently.

SBA Bodice Pattern Alterations

Before cutting out your fashion fabric that you plan on using for your final dress, use a knit fabric with comparable stretch/weight as your final fabric for a test bodice.  I also recommend trying out all of the below steps on a test bodice to make sure you get the fit you want before committing to using these techniques on your final wrap dress.


bodice diagram


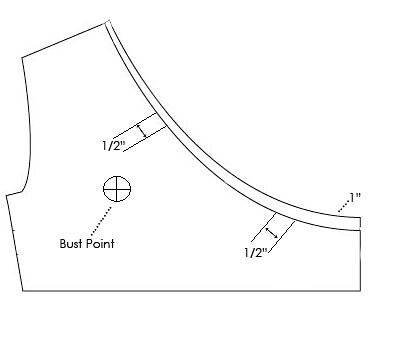
Original diagram from Sofilajantes


If you’re small-busted like me, and have tried on a wrap dress in a store, you’ve probably noticed that the length of the wrap is too long, since we don’t need as much fabric to cover our bust line.  To solve, that, we’re going to take some length out of the neckline above and below the bust point by pinching out extra length above and below the bust point.  This will vary from person to person, as well as pattern to pattern, so make up a test bodice to try on and play around with.  For me, I ended up needing to take out 1″ of length total: 1/2″ above the bust point and 1/2″ below, illustrated above.  If you need to take out more length, try to evenly distribute a series of small tucks above and below the bust point.

As a personal preference, for more coverage, I also raised the neckline.  At the waist I added 1″ to the neckline, and blended it out to about a 1/2″ at the neck.  This also affected the shoulder seam, which needed to be extended 1/2″.


SBA 1

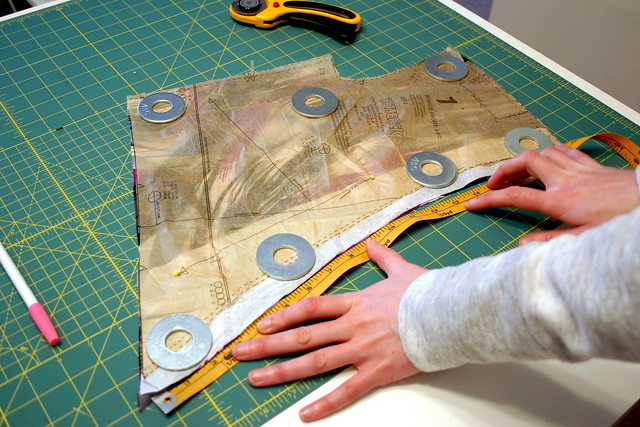
Here’s what  the pattern piece looks like after my alterations – the tucks are circled in yellow.  I taped the tucks in place with scotch tape, and the tucks gradually tapered out from the tuck point.  The white paper is the new drafted neckline.


SBA 2

Here’s another angle so you can see the tucks in the tissue a little better.  The bottom tuck, on the left-hand side above, was tricky for me since it intersected with the grainline.  So, I tried to keep the grainline as straight as I could while smoothing out the tissue from the tuck point.

Fixing the Wrap Gap

With the pattern alterations done, now we can move on to solving that annoying gaping problem and create a bodice that stays snug and close to the body.  If you don’t have that problem with your pattern, then great!  You’re ready to get sewing!  If not, try out this method using 1/4″ twill tape – I like it better than using clear elastic for stabilizing a wrap neckline.


SBA 3

Using a tape measure or your preferred way of measuring (flexible rulers are great for this), measure the length of the neck for the front bodice piece and the neckline of the back bodice piece.


SBA 4

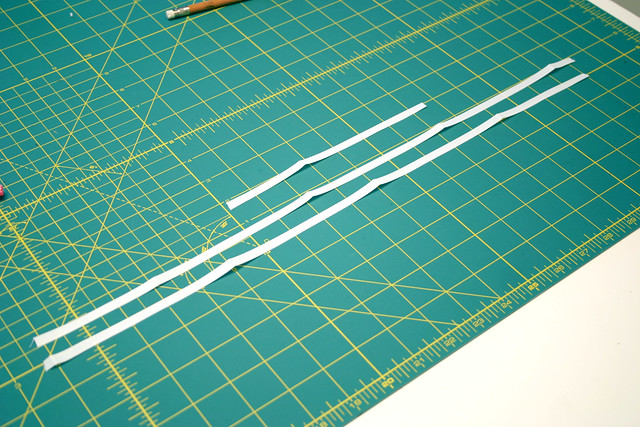
Using those measurements, cut one piece of 1/4″ twill tape that corresponds with the back neckline measurement, and two pieces of twill tape that correspond with the front neckline measurement – one for each side of the wrap.  In Power Sewing, it’s recommended that if you have a B cup to cut the front strips 1/4″ shorter than the neckline measurement to draw in the neckline better.  If you’re an A-lady like myself, cut the pieces out as the neckline measures.


SBA 5

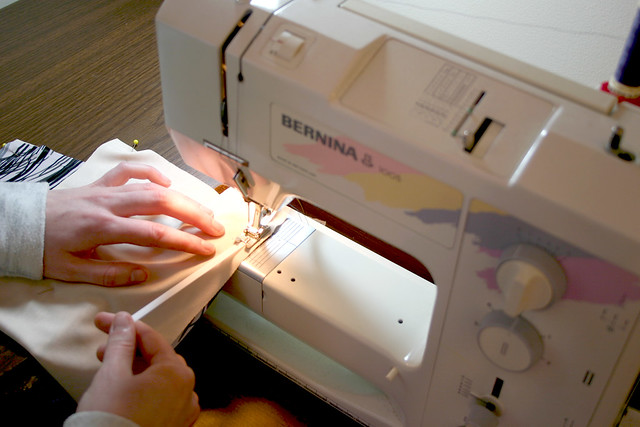
Bodice wrong side up, pin the twill tape with the edge of the tape 1/4″ away from the edge of the neckline.  Using a straight stitch, sew the tape to the neckline.  The feed dogs will ease in the bodice as you go, but I find stretching ever so slightly on the twill tape helps with this step.  Repeat for the other side of the front neckline and the back neckline as well.


SBA 6

This is what one side of my front neckline looks like after stitching the twill tape.  Gently press out any puckers with a cool iron.


SBA 7

As a personal preference, I serged the neckline edges for a clean finish after stitching all of the twill tape.  When you’re at the part during dress construction where you’re ready to hem the neckline, simply turn in the neckline 5/8″ and stitch in place.

*You may have noticed in the above photos in the tutorial that the wrong side of my garment fabric looks different than the right side.  Since my knit garment fabric is so sheer, I underlined the bodice with nude-colored swim tricot, so my bra won’t show through.  I like the body the underlining gives the fabric as well!

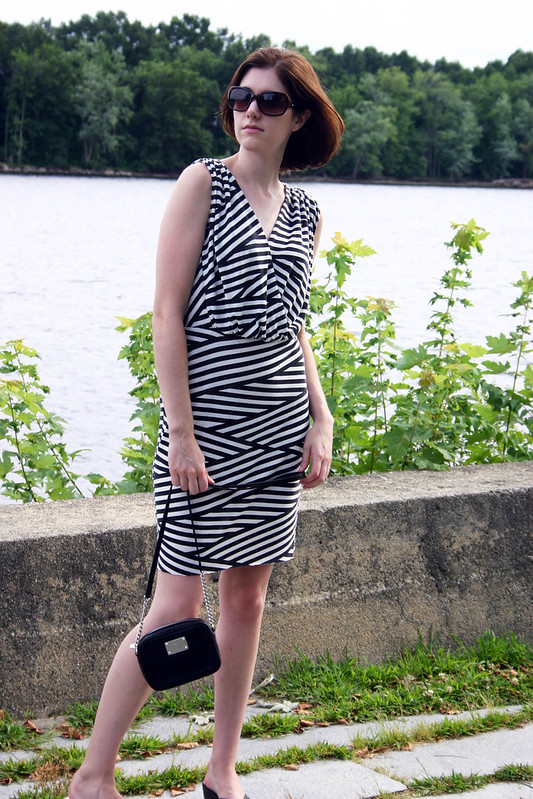
There you have it – I’m now on wrap-dress #4 (and have yet to post #2-3!) using this method, and each time I’m thrilled with how the neckline turns out.  If you’re small-busted like myself and have yet to successfully make a wrap dress because of how the neckline fits, I hope this opens up a world of wardrobe opportunities to you.  Let me know!

Now, to finish making my dress for the sewalong…

Follow:

McCall’s Wrap Dress Sewalong!


wrap-dress-sewalong-badge

What an exciting week – I finished my coat and McCall’s Patterns also announced their newest sewalong: The Wrap Dress!  What’s so exciting about a wrap dress sewalong, other than the fact that a wrap is the greatest wardrobe staple ever?  I’m co-hosting the sewalong with McCall’s Patterns and another blogger, Ruqayyah Davis of ReDpants Designs!

Wrap dresses are easy to make, now that I understand how to adjust them to fit my chest and not gape, and I have quite a few in mind to make for the spring and summer weather that will eventually (hah!) arrive here in Boston.  Here’s an overview of the sewalong schedule:

2/16: Announce sewalong
2/23: Try before you buy: Do wrap dresses work for you? Social media: hashtags, Flickr, Facebook, badges for blogs
3/2: Choosing your fabric. Cutting and working with slippery/rolling fabrics like ITY, silk jerseys, etc.
3/9: Making a muslin if necessary; how much ease do you want?
3/16: Sewing and working with knits. Finishing seams with and without a serger
3/23: Sewing the neckline area and preventing gaping
3/30: Making the sleeves; hemming the skirt; finishing up
4/6: The Big Reveal!

It’s a long timeline, but that way it’s easy to fit it in to your busy sewing schedule and make it a stress-free sewalong.

For patterns, it’s really up to everyone individually on which Vogue/McCall’s/Butterick pattern you want to use, as long as it’s for a knit dress – those are the easiest to fit, and the closest to that classic DVF wrap dress look.  They all pretty much have the same fundamental construction steps.  Last night I went “fabric shopping” through my stash and discovered I had enough yardage to make a full-skirt version out of this fabric:


Wrap dress sewalong plans


This is an ITY knit I bought from Metro Textiles a few years ago because it was so pretty, but didn’t have a plan in mind on what to make with it.  Luckily, I bought 2.5 yds, which is just enough to use for a swishy-skirted wrap dress.  I’m planning on blending the bodice of Butterick 5454, which is what I used for my first wrap dress and fits me well, with the skirt off of Vogue 8379.  Why, you ask? The bodice of Butterick 5454 doesn’t have gathers around the bust, which would be difficult to fit on me since I have a small chest and gathers create extra fullness I don’t need.  I love the flare/a-line shape of the skirt of Vogue 8379, so I’m going to try to pattern-Frankenstein the two together to make a new dress pattern!  This fabric is also a little on the sheer side, so I’m planning on underlining the bodice with a swimsuit lining tricot leftover from swimsuit sewing last year.  I’m very excited to get started on this and to share some tips and tricks along the way!

Are you planning on participating in the new sewalong?

Follow:

Pattern Review – McCall’s 6711 Wool Blazer


wool blazer 1

Pattern: McCall’s 6711, view A
Fabric: Italian wool from Mood Fabric
Size: 10

Shirt: Gap
Jeans: Gap
Sunnies: Tommy Hilfiger

Remember my post from November about this fabric?  I originally slated it for a Gerard Coat, but when the fabric arrived, I realized it was much too lightweight for a coat and more suited for a blazer.  Then, I thought about using Vogue 8887, but the muslin I made had some fitting issues in the back I didn’t want to deal with, and the entire front and back was cut on the bias – something else I didn’t want to deal with.

The blazer from McCall’s 6711 was on my sewing list from fall, and seemed like a good alternative pattern.  It has simple princess seams and a one-piece collar that would be easy to fit and sew, so I decided to take a stab at it – the muslin was perfect!  Not a thing to alter.

With beautiful wool fabric like this, I wanted the blazer to turn out looking like a well-tailored, high-end blazer worthy of a designer label inside.  If I do say so myself, I think I did a pretty good job!  I owe all of it to Pam Howard’s tailoring classes on Craftsy, which I’ve been watching obsessively (and highly recommend!).  A lot of the extra steps I took elevated this blazer from a quick-and-easy sew to a in-depth project with nicer, more professional results – here’s what I did.


wool blazer 2

Interfacing

Modern tailoring really comes down to choosing the right weights of interfacing in a jacket – you don’t use the same weight throughout.  There’s a great article from Threads Magazine dissecting the innards of an Armani jacket and the different types of fusible interfacings used throughout.  For the jacket front/lapel and collar, I used a weft-insertion fusible to give the front more structure, and a fusible tricot for the jacket side front.  Typically, sewing patterns recommend that you only fuse the fronts and not the sides, but it’s necessary to fuse the entire front to get a nice shape and support the jacket.  I noticed a big difference in the body the interfacing gave the wool after fusing the whole front.

Also, I steamed the crap out of the lapels to shape them and get them to lay as flat as possible instead of flopping around.  The design of the pattern is pretty casual and there isn’t a roll -line (heck, the model has her lapels “popped” on the envelope…is that a thing?), but I wanted this jacket to be more structured.


wool blazer 3

Tailoring the Sleeves

When I made my Anise jacket last year, I was disappointed by the dent that formed at the top of the sleeve cap when I moved my arm, and also how the sleeve hung from the sleeve cap. This was probably cause by a few different factors, but it made me aware of the importance of supporting the sleeve cap in a jacket and masking the look of the jacket innards (sleeve seams, shoulder pads, etc).  To solve this for my wool blazer, I interfaced the sleeve from the sleeve cap down to about two inches below the underarm with fusible tricot interfacing.  This gave the sleeve a nice shape and supported the fabric beautifully:


Damn fine set-in sleeve. #tailoring #blazer #wool


Isn’t that a yummy set-in sleeve??  It hangs absolutely straight with no dents or divets.  I also eased the whole cap instead of just the section notated between the small dots on the pattern, and I think that helped me get a better result.


wool blazer 4

The Back and Hems

In retrospect, I should of used a back stay to get better support in the upper back since the fabric is floppy, but ahhhhh whaddayagonnado.  Interesting fact:  the more pieces in a jacket, the better the tailored result.  Why?  There’s more seams to tweak to get a better fit.  A jacket pattern with a back like this that’s cut on the fold will not be as fitted as a jacket with a back center seam – there’s no way to really adjust the fit other than tweak the darts, which can be limiting.

The jacket and sleeve hems are all interfaced with a 1 1/2″ wide strip of weft-insertion interfacing cut on the bias.  The bottom hems really keep their shape with the interfacing and it add a bit of weight, causing the hems to hang better.


wool blazer 5

The Lining

And just to show you the last, final shot – the lining!  I love color pops and surprises with my linings, so why not make that functional part of a garment a little bit more fun?  When I was researching jacket patterns to sew, it was very hard to find a pattern out there that included a lining.  Why guys, why?  Linings really aren’t that hard to sew, I swear.  And they make it so much easier to wear the finished jacket, they protect the inside and prolong the life of the jacket etc.  Anyway, this was a well-drafted lining with a center back pleat, and I sewed a jump-hem in the bottom by hand.

Well, that’s my first project of 2015!  It was definitely a good project to make as a way to ease myself into the coat project I’m up to my eyeballs in right now.  Hands down, this is the best/nicest garment I’ve made thus far in my sewing career, and I can’t wait to sew more blazers and jackets.

PS:  the snow in these photos is from the storm that hit Boston this past weekend…I’m bracing for #snowpocalypse #BOSnow right now!

Follow:

Finished Project: Missoni Cardigan


missoni cardigan2


missoni cardigan1

Pattern: McCall’s 6559, altered
Fabric: Missoni sweater knit fabric (legit!!) from Fabric Place Basement

Tee: JCrew
Jeans: Gap
Flats: Michael Kors

This was one of those projects where I didn’t consider how in the world I was going to make the fabric work with what I wanted to do, which will become evident later on in this post.

I admit it, I must have a crush on everything Missoni, their fabrics are just too amazing .  I kept looking at this Missoni sweater knit fabric every time I went in to Fabric Place Basement (which is usually once a week), eyeing the pretty colors and imagining what kind of wonderful garments to make out of it.  I think it was around the end of January when I broke down and ponied up the cashola (totally worth it though) for two yards of this colorway, thinking it would make a great sweater jacket.


missoni cardigan4


I didn’t have a pattern in my stash that was the kind of jacket I wanted: basically, no seams or shaping except for the side and shoulder seams.  I realized when I got home and opened up my fabric that this stuff was fragile – the cut edges fell apart easily, so the less seams in my garment, the better.  I liked the sloping front style of the tie-front cardi of McCall’s 6559, so I altered it to have a straight front instead of ties and drafted a self-facing for the cardigan neckband and fronts.  I also lengthened it, too.

The picture above gives a good idea of how the fabric is constructed – it’s pretty baffling, actually.  Even though it’s made up of loose ply yarn and sweater-like, the construction is more like a woven.  Those thin black threads keep everything together and connect all of the colored yarn, so if a black thread is snipped, the color pieces pull out and fall apart.  That’s the only way all of the yarns connect in this fabric, very unlike a knit.  I have no idea how this fabric was manufactured!!


Missoni fuzz, post edge-serging

And this is what immediately happened after I cut out my cardigan pieces…yikes.  If I didn’t have a serger, there is no way I could have made this garment.  I used the four thread setting on my serger and a wide overlock, and finished all of the edges of the garment pieces immediately after I cut them out.

The construction itself was a no-brainer, but I had to be a little creative in some instances.  For example, even though I set the sleeves in ok, some of the thin black threads become loose and I had some running holes under the arm or at the front of the sleeve cap.  I ended up “darning” them with black thread by hand, catching all of the colored yarn loops together and securing them so they wouldn’t create bigger holes.  It was some tricky stitching…


missoni cardigan3

Then came the problem as to how to finish the edges of the cardigan.  I didn’t want to turn the edges in, and then turn them in again and stitch them down since it would be bulky.  Thank goodness I stopped in at Grey’s Fabrics and picked up some silk bias tape – you really haven’t lived until you’ve sewn with silk bias tape!!  In retrospect I should have hand-stitched it to the edges instead of machine sewing since there’s irregularities in the width of the bias tape, but oh well!  After I attached the bias tape, I folded in the front facings and hand stitched everything.  Funny enough, I forgot to hem the sleeves, but I’m ok with the edges being serged and not hemmed, you can’t even tell.


missoni cardigan5

This jacket/sweater/cardigan is definitely something I’d wear for special occasions due to the nature of the fabric – it seemed appropriate to debut it at the NYC blogger meetup last month!  I’m not sure if I’d ever even have it cleaned, I wouldn’t want to risk damaging the fabric.  But it’s all worth it, because now I have a real Missoni garment in my closet for a fraction of the cost.

Follow:

Pattern Review: McCall’s 6752 [Stripey Sundress]


mccalls6752_1


mccalls6752 2

Pattern: McCall’s 6752, view D
Fabric: gifty from my Spring Sewing Swap partner Sue 
Size: 8 graded to a 10 at the hips

Sandals: Nine West (old)
Crossbody: Michael Kors
Sunnies: Tommy Hilfiger

I only made this dress a little less than a month ago, but I’ve worn it a bunch of times already.  It’s so easy to wear!  I knew with a fabric this funky, I wanted to sew a dress that had simple design lines that would show off the multi-directional nature of the print.  And since the surplice style of the bodice is cut on the bias, it made the stripe direction even crazier.  Love this dress!

I read a review somewhere online about how the reviewer thought this was a ho-hum, yawn-inducing pattern.  Honestly, I think this is a case of you get out of it what you put into it: if you don’t use some kind of fun print, then yeah, you’re going to get a little bit of a snooze-fest dress.  But really, I would make this again out of a solid black or red knit.  It’s a great basic dress pattern that can be styled in many different ways- I actually wore it to a seminar last week with a cropped black blazer and peep-toe heels and felt professional but stylish.


mccalls6752 3

I was apprehensive about how this dress would fit, what with the low-cut neckline and a potential for gapeage.  Since I’ve been noticing a large amount of ease when sewing Big 3 knit patterns, I cut out an 8 for the bodice and 10 for the skirt instead of the usual 10 for the bodice/12 for the skirt I cut for patterns calling for woven fabrics.  It actually worked like a charm and didn’t need to be taken in any more to achieve the fit I like with knit garments.  Honestly, why would there be no negative ease with knits, or at least zero ease…


mccalls6752 5

Although I got the dress to fit, I still recommend to anyone who wants to make this dress to tack down the criss-cross neck.  It’s got to be almost impossible, because of the drape,  for this dress to not flap wide-open when wearing.  Also, if you’re thinking about skipping the elastic, you will end up with a drastically different-shaped dress.  Before I inserted the elastic I thought there was no way that this dress was going to fit me since I was swimming in the bodice.  After sewing in the elastic, I couldn’t believe how much the bodice changed!


mccalls6752 4

So yes, this is my new go-to, wear-everywhere summer dress.  I just wish that the fabric was holding up better since I lovelovelove the striped-ness and squealed out loud when Sue sent me this fabric.  Sadly, it’s starting to pill and the black is fading (I think the black is printed onto the white fabric).  I’m going to try and get as much wear out of this dress as I can!

Follow: