Cottesloe One-Piece Swimsuit

Cottesloe 3


Cottesloe 7

Oh summer vacation, take me back! We recently returned from our annual trip to Maine, and as customary in the last few years, I made a new swimsuit for vacation.

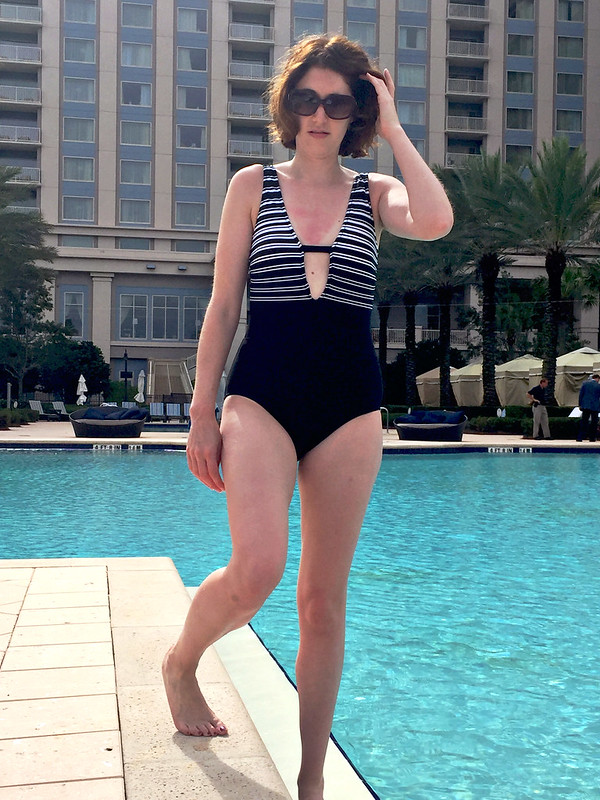
I’m so glad that one-piece swimsuits are considered stylish these days because they’re really what I’m most comfortable in. My pattern stash lacked a basic tank-style swimsuit pattern, so when Megan Nielsen released her Cottesloe swimsuit this year, I snatched it up. I love how this pattern acts as a base pattern to become whatever you want! Sometimes it’s the most simple patterns that are the best.

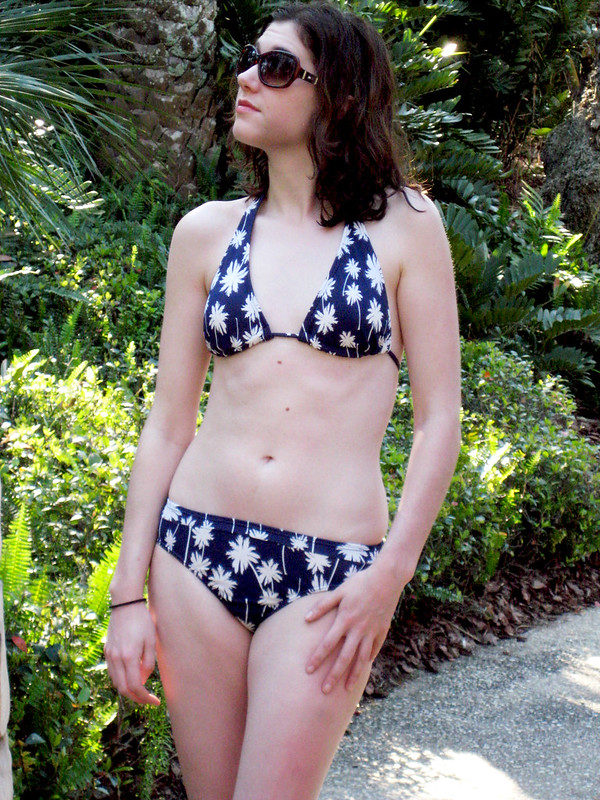
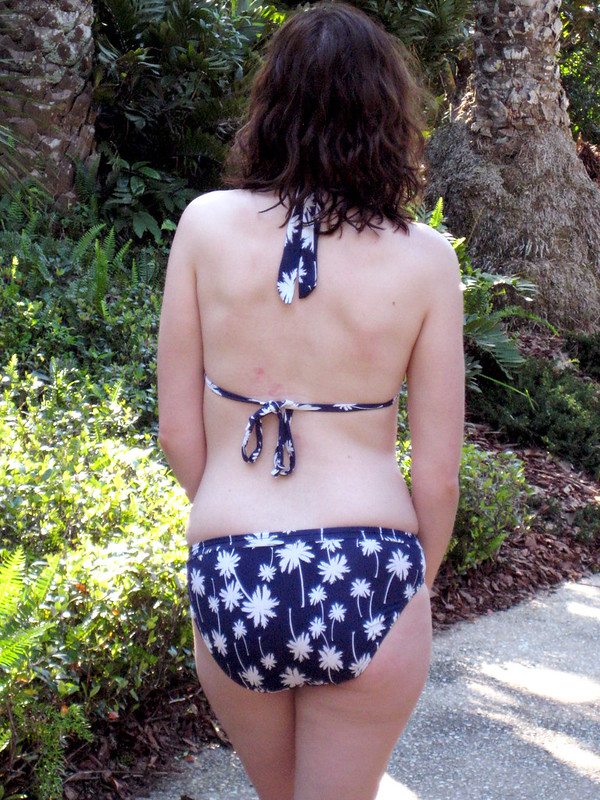
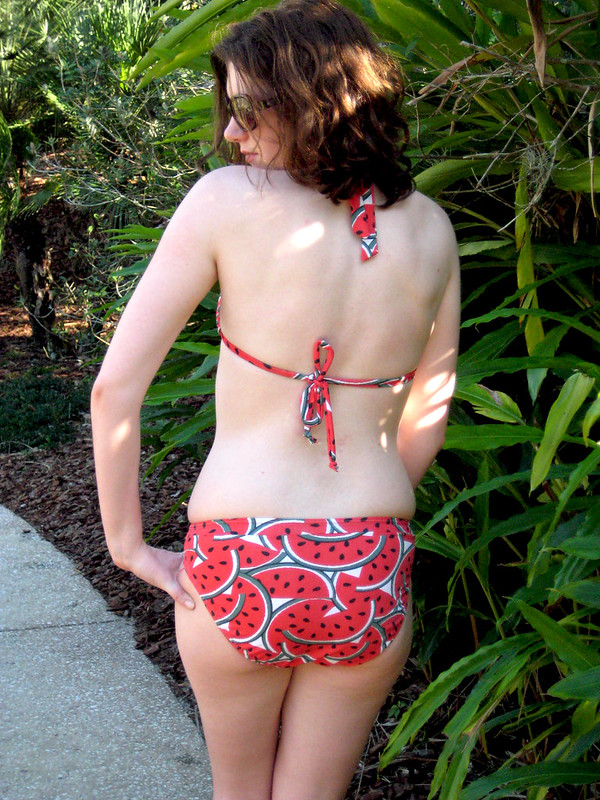
Not shown here, but I actually made the two piece version of the suit first – I wanted to check the fit before cutting into my lovely Liberty spandex fabric. I’m glad I did, I ended up going up a size in the top for my one piece (total shocker over here, hah!).

Cottesloe 2

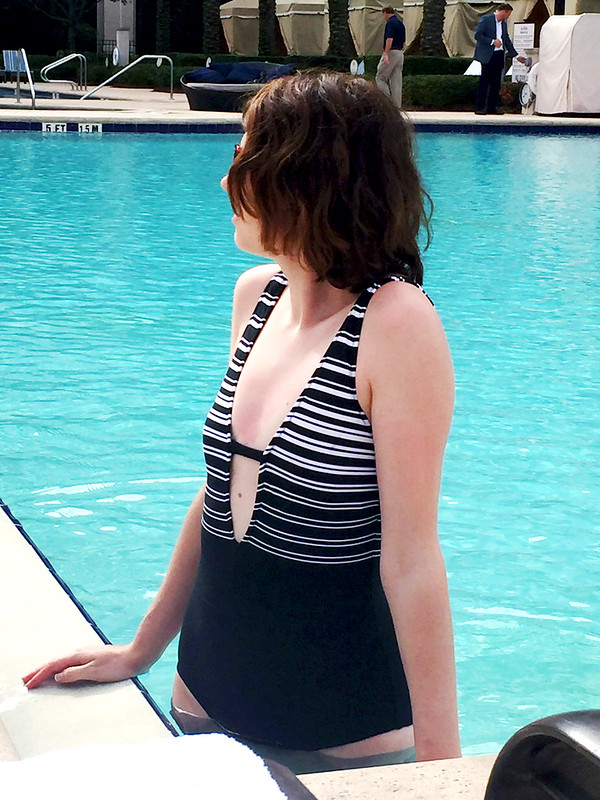
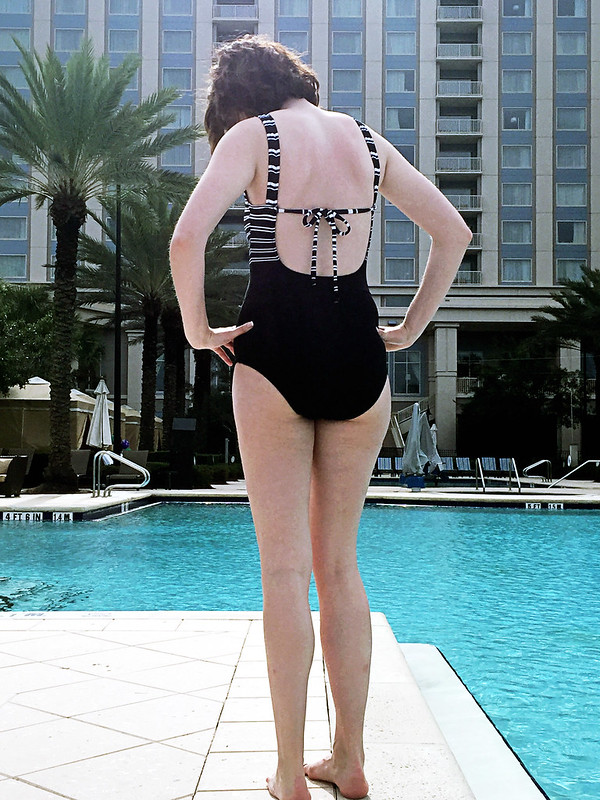
I lovvvvvve the low scoop back of this suit. At first, I wasn’t sure if this was going to stay put and in place when I started sewing the suit together and trying it on. One of the perks of being a small-chested gal is not needing much support in my swimsuits (but I did add swim cups for modesty), so luckily once the elastic was in place, I felt pretty secure. It also passed the ocean waves test at the beach, whew!

Cottesloe 5
There are a few changes I made to the construction, one of which I should have thought out in more detail. I stumbled across a tutorial on using binding to finish the edges instead of turning and stitching the elastic edges, really liked the RTW effect of using binding, and thought to give it a try. What I didn’t take into account is that the binding actually created more width – the technique is the same as using fold-over elastic, so instead of turning back the seam allowances 3/8″, I essentially was just encasing the seam allowance with spandex strips. This made the straps wider, the leg holes a bit longer, and the neckline higher. I also pulled the binding a bit too tight around the leg holes, so it’s a really snug fit.

Not the end of the world, but some details I need to take into account if I decide to use this technique again. I really do like how it looks, and it feels smoother on my skin instead of having all of my serger threads rubbing against my skin.

Also, because someone asked me on Instagram – the booty coverage is on-point with this pattern. I like full butt coverage for my swimsuits, and this gets the job done.

Cottesloe 4

I also attempted to make tie straps a la Holly’s tutorial. I think it was a combination of using the binding technique along with the fabric I as using that attributed to the ties not looking, well, cute. And the binding was jutting out from the edges of the ties, looking awful! My solution was to snip off the tie extensions, sew the shoulder seams together, and then cut long spandex strips of fabric to tie at the shoulders and hide my sewing sins. I tacked them in place so they won’t come undone, and frankly, I like them a lot better than what I initially attempted to make. They flutter in the breeze!

Cottesloe 6

Looking forward to trying out some other design ideas with this pattern next summer! For now, it’s on to fall sewing.

Pattern: Cottesloe Swimsuit by Megan Nielsen, view A (without ties)
Fabric: Liberty swim spandex from The Fabric Store

Follow:

Vogue 9192 Stripey Swimsuit

Vogue 9192
 

2017 is the year of the one-piece bathing suit for me.

To be quite honest, I’m over the teeny triangle bikini tops and swim bottoms that you need to hold onto when a big wave breaks in the ocean.  Maybe it’s that I’m older now and I just want to be comfortable in a fuss-free swimsuit at the beach and pool.

In preparation for our Florida vacation at the beginning of June, I started scouring the internet looking for one-piece swimsuits and had a hard time finding anything that wasn’t too frumpy or mumsy looking.  I ended up buying one from J.Crew that’s pretty cute, but it still wasn’t fitting the bill of what I wanted: a low back, some kind of print or pattern that looked slimming, and something “helpful” in the bust area that I’m severely lacking.  Fortunately, Vogue 9192 checks off just about all of those boxes.


Vogue 9192
 

This is an awesome pattern (I want to make the other one-piece from this pattern) but the fabric is really what’s making the suit – a border print with variegated stripes on both ends and black in the middle, found in a swimsuit remnant bin at Fabric Place Basement.  Playing around with the pattern placement, I placed the bodice pieces on the fabric so that the stripes ended right where the V stops and cut the bottom portion of the suit out of the solid black part of the spandex.  That way, the stripes would draw more attention upward, with some of the larger stripes going across the bust, and the bottom part of the suit in black would have a slimming effect.  My stripe placement isn’t perfect at the side seams, which you’ll see in other photos, but I’m pleased as punch with how the stripes match across the front and back bodice pieces!


Vogue 9192 5
(I got the worst sunburn on my chest the very first day, no way to color-correct that in Photoshop!  That’s what I get for not reapplying in time!)


Obviously, this is a verrrrrrry low cut swimsuit in the front (and the back) and I was worried that it might not be, ahem, that secure when I wore it in the pool.  To be quite honest, I felt really comfortable and confident wearing it and would be more concerned if I had a larger bust that something might slip!  The straps across the middle are designed to anchor everything in place across the two cups; I eliminated one of them since the second one seemed too long for me and bunched up in the middle, guess I didn’t need that extra security.  I also added in some small swim cups for modesty between the lining and the outer fabric and tacked them to the lining, an exercise that took quite a lot of fussing to get the cup placement just right.


Vogue 9192
 

If there’s one thing I’d change about this swimsuit, if I was to make it again, it would be the order of construction when turning the seam allowances with the elastic and attaching the straps etc.  It’s very “homemade” to turn and sew the elastic, and then go back over the original stitching to attach the shoulder straps and front bodice strap.  Fortunately with black fabric and black thread it’s not noticeable, but it would have been with a lighter colored fabric.  I believe the directions are written this way because it makes it easier to construct the suit, but if you’re really looking for a professional finish, it would be best to try to do everything in one step with one line of stitching.  Just nit-picking, but it’s something I wish I thought of earlier on when I was sewing.

This design is right on-trend and exactly what I was looking for in a one-piece swimsuit pattern – c’mon Vogue, give us some more!


Vogue 9192
 

Pattern: Vogue 9192, View B
Fabric: spandex remnant from Fabric Place Basement

Follow:

DIY or Buy – Swimwear


swimsuits

Last year, the whole online sewing community became more comfortable with sewing swimwear thanks to Heather of Closet Case Files and the launch of her Bombshell Swimsuit pattern.  I don’t know about you, but I have more confidence than ever now when it comes to sewing swimwear – heck, I made two new bikinis already this year!  They’re not as scary to sew as it seems, and it can be a lot cheaper than buying a new swimsuit off the rack at a department store…plus, you don’t get the “yuck” factor of trying on something a bunch of other ladies have squeezed into before you.

(Funny story – I used to be a merchandising manager for a department store, and would try on new swimsuits I liked as soon as they came off the truck before they hit the selling floor.  That way, no one else would have tried them on before me, they were fresh!  Once July 4 rolls around, the peak of swimsuit shopping season, I don’t recommend trying on swimsuits…if you catch my drift!)

Swimsuit sewing patterns are a lot cuter nowadays, and the styles are really on trend!  It’s easy to copy some of your favorite RTW suits for a fraction of the cost, as shown above.  Here’s the patterns:

1. Bombshell Swimsuit – two different versions, plus a high-waisted bikini bottom
2. McCall’s 5400 – also some cute bikini options
3. Kwik Sew 4003 – my go-to bikini pattern, you can leave off the ruffles
4. Simplicity 1426 – try converting the bra top into a retro bikini top!

Follow:

Pattern Review: Kwik Sew 4003 [Teeny Bikinis]


watermelon bikini 1


palm tree bikini 1

Pattern: Kwik Sew 4003
Fabric:
   Watermelon PrintFabric Fairy
   Palm Tree PrintSpandex House
   CoverupFabric Place Basement
Size: XS top, S bottom

Sunnies: Tommy Hilfiger

Ok – I can now say in 2014, I successfully made a swimsuit!  These bikinis were so quick and fun to make that I think that I’ll swear off buying swimsuits ever again.  I made each of these for roughly $20, less than the cost of a bikini at a department store, and the fit and booty coverage is better than I would have found in a current RTW bikini.  Plus, I got to pick out the fabric I wanted!


watermelon bikini 3

I was determined to try swimsuit sewing again after I didn’t get some things right on my Bombshell, and since I now have a serger, I thought it would be easier to get better-looking results.  Using some leftover spandex, I made a quick test bikini to check the fit, and it was spot on: my theory of going with my bust size sans bra resulted in a perfectly fitting bikini top.  Score!

I think these bikinis took about two hours each to make, including cutting out the fabric.  Using what I learned the first time I worked with spandex, I used a rotary cutter to get a more precise cut.  You may notice on the pattern envelope, the bikini top has pinked edges – I cut out two sets of the lining piece so I could have a plain bikini cup instead of piecing together three different bodice pieces with pinked edges.


palm tree bikini 2

Using my serger to attach the swim elastic to the leg holes, waist, and bikini top edges made a world of difference over using my regular sewing machine.  I had a problem last time when I used my sewing machine to attach the elastic, I got all sorts of fabric rippling because I can’t control the pressure of my presser foot on my machine.  Actually, I used a serger for sewing just about all of this bikini except for the top stitching!  I know it’s possible to make a swimsuit without a serger, but I don’t think I personally would have had results this nice without mine.

I also found some great, high-quality swim cups at Sil Thread in the NYC Garment District that I trimmed down to fit the bikini bodice, inserted them, and stitched the bodice pieces shut.  They give the bodice some shaping and coverage that I like in my swimsuits.


swimsuit coverup

At the last minute, I decided to make the coverup to go with the bikinis.  I found the most amazing Tahari cotton/poly net fabric from his resort collection, tried to make this with it, and ended up with a mess of fabric and a neckline that kept growing and stretching.  What a shame!  So, I settled for this jersey burnout fabric instead.  I would apply the neck band differently next time a la Jen’s Hemlock Tee, and I didn’t want to be bothered with finishing it the way I was supposed to according to the instructions, so I just left it raw and let the neckband roll.  Call it a “design element.”  I used a rolled hem stitch on my serger for the edges, but didn’t get the greatest results – I think it helped when I used the differential feed on my serger instead of the neutral setting, because on neutral the fabric kept bunching up.  Ehhh who cares, it’s just a coverup.


palm tree bikini 3

Bum coverage!  For my next bikini, I think I may try to do a rub-off of a bikini bottom I have that gives me nice coverage, but doesn’t have as high of a rise.  I like this, but they could be a wee bit smaller.


watermelon bikini 2

Here’s another thing I learned while sewing these: the quality of spandex, just like any other fabric, really varies.  I thought they were all the same, for some reason, but the quality of the palm tree print fabric is very different from the watermelon print, due to the fact that the palm tree fabric is yarn dyed and the watermelon print is printed on to the fabric.  The watermelon fabric is stiffer feeling, and when it stretches, you can see the white of the base fabric it’s printed on.  The hand of the palm tree fabric is much more fluid and soft, and I think the two suits look slightly different on and fit a little differently because of the nature of each fabric.  Plus, the palm tree fabric cost a lot more because it’s nice fabric!  Don’t get me wrong, I love both swimsuits very much, but I know now to look for these characteristics when I’m shopping for spandex.

What a shame that I have to wait until summer to wear these again!  Warm weather can’t come fast enough.

Follow:

Packing For Vacation


vacation packing

If you’re wondering why it’s been a little quiet over here in the last week, it’s because I’ve been busy cranking out new stuff for vacation!  If you follow me on Instagram, you’ve seen that I finished two bikinis, a coverup, and an Elisa-lotte dress in the last two weeks.  Sewing for warm weather has definitely helped me beat the winter-blahs lately, and I think when we get back from sunny Florida, I’m going to start to sew my spring wardrobe.  I’m SO over this cold and snow, enough already!  Hand me a margarita already and I’ll be good to go.

See you next week!
(PS: I’ll be posting pool-side pics on Insta this weekend fo’ sho’)

Follow: