Pattern Review: Simplicity 2418 [Tangerine Tunic]

simplicity 2418

simplicity 2418

(The sleeve caps stick out more than I’d like them to)

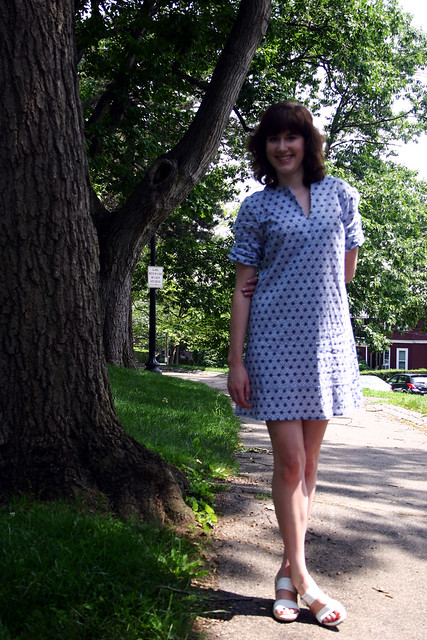
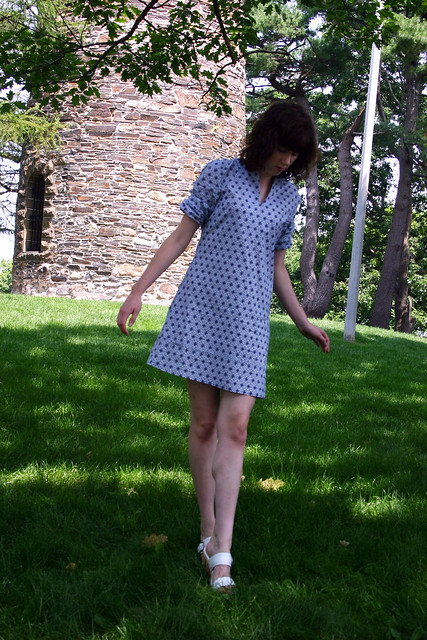
Pattern: Simplicity “It’s So Easy” 2418 (OOP)
Fabric: Cotton gauze from Mood Fabric in NYC
Size: 10 graded to a 12

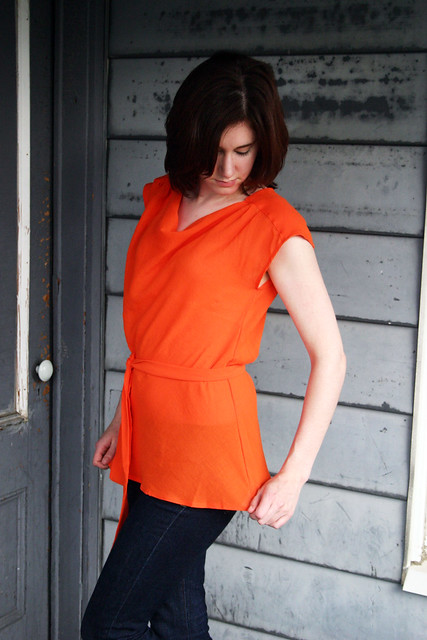
During last year’s shopping trip to NYC (you know, the one that I bought fabric for this top) I also found this yummy orange cotton gauze.  Orange isn’t a color I wear much (not at all, actually), but there was something about this bright pop that jumped off of the shelves and beckoned me to buy it.  And I’m not one to buy fabric without having an idea first as to what I’m going to make out if it!  The fabric has great drape and seemed perfect for a tunic pattern I picked up a few years ago and had hanging out in my stash.

(I’m a pretty bad pattern hoarder, btw.  I’ll buy them and not sew them up.  Hmm I should sell some of them…)

simplicity 2418

(This is a little see-through but I don’t need to wear a tank underneath)

Construction:

Honestly, the hardest and most time consuming part of making this pattern was cutting out the fabric.  The pattern is cut in a single layer on the bias, which gives it such nice drape, but was a pain in the ass getting a nice and smooth cut edge!  Once the pattern was cut out, it took about two hours for me to stitch the top together.

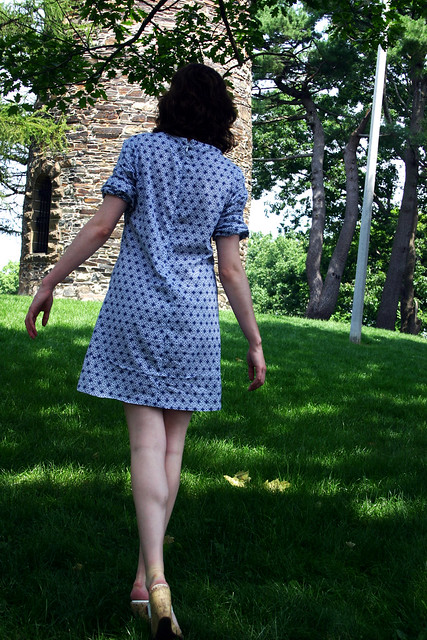
The best part of this top is that there are no exposed seams.  I used french seams to enclose the side seams and narrow turned hems for the cowl and bottom hem.  The yoke was a little fussy – the wrong sides of the front and back are attached to the yoke and the yoke is then top-stitched over the raw edges of the front and back to completely enclose the seams, as can be seen below:

simplicity 2418

It makes it more RTW, but still fussy.  I love the gathered detail in the back.

I’m not sure if I’d make this again.  Sure, it was an easy top to put together in a short amount of time and fits well, but it was more of a “what can I make with this fabric” type of situation (that way I could justify buying more fabric on a recent trip to NYC).  It’s a great basic, but I think I’d rather try and make some other patterns before coming back to this one again.

Follow:

Simplicity 2584 – Cynthia Rowley Tunic/Dress


Cynthia Rowley 2584

Pattern: Simplicity 2584

Size: 10 graded into a 12 from waistline to hipline
Fabric: Cotton lawn from the Lisette Collection at Joann Fabrics
Shoes: BOC Born Concept
I bought this pattern over a year ago, and when trolling through my stash last month, it stood out as something I had to make this summer. Lindsay T has made it several times in different variations/combinations and it inspired me to give it a go. I’m so glad several sewers have made this before me since their tips helped me to figure out the changes that I would have to make to this pattern to get it to work for me.


Cynthia Rowley 2584

1) The Bust Darts

I’m bust challenged, I admit that. From sewing, I’ve also realized that my bust is higher than drafted for RTW clothes as well as sewing patterns, which makes it difficult to find fitted dresses or tops in stores that have darts and shaping that hit at the correct bust point; they’re usually too low. Looking at this pattern I could see that this would be a problem for me and I was correct when I tissue fit the pattern on me. So using my handy dandy The Perfect Fit book (which is awesome for pattern alterations!), I moved the bust dart up to where my bust point was on the pattern. Tah-dah, no dart issues and I have a fitted top to a pretty shapeless shift dress/tunic.
2) The Neckline
After reading Lindsay T’s recommendations as well as from others on Patternreview.com, I realized the neckline slit would be waaaaay to long for me, like down to my diaphragm long! No thanks. Easy change, just didn’t cut the slit all the way down. I also didn’t make the yoke overlay since I figured with the busy pattern it would just get lost. Plus, it made it quicker to sew, yay!
3) The Length
This may be the shortest dress I own, and adding my “fake tall” platform wedges makes it seem even shorter. It was a risk to make it this length…but I’m glad I did it. I even added the tuck near the bottom, which isn’t noticeable except from the back since it gets all funky looking when I sit down.


Cynthia Rowley 2584

Whoops, wrinkles from sitting!

4) The Zipper

This cotton lawn fabric, which I absolutely love and is so breezy on hot days, is quite flimsy and concerned me when I wanted to install my invisible zipper. I used a technique from Sandra Betzina’s Power Sewing book: interface the seam allowance where the zipper is going to be installed to add stability to the seam. I think it actually makes the zipper open and close much easier now and the fabric doesn’t buckle or sag at the seam.
5) The Sleeves
I also read that there’s a lot of ease in the sleeve caps. I hate set-in sleeves, I always have a hard time distributing the fullness of the gathers around the cap. So again, I referred to Power Sewing and learned a new technique: Staystitch Plus. It made it so easy to insert the sleeve and I had no problem with the extra ease. I also decided to wear this dress with the sleeves pushed up like how it’s styled on the pattern envelope, but it also looks cute with the sleeves down. I can see this dress layered with a chunky cardigan or jacket for a spring/early fall look.
I definitely would make this pattern again, maybe using the yoke overlay the next go-round, but I have way too many things to make in my queue right now. Highly recommend if you’re looking for a simple, not too fitted, dress-like tunic for summer.
Follow: