Wrap Dress Fitting for Small Busts


Wrap Dress SBA

Up until a few months ago, I couldn’t wear anything with a wrap, or surplice, neckline.  Being of the small-busted variety (and damn proud I might add!), wrap dresses and tops would always sag or dramatically gape open, exposing my bra (eeek!), due to the length of the wrap being too long.  After searching all over the internet to find ways on how to make a wrap neckline fit and having no luck with the results, I pretty much gave up on ever being able to make or wear a wrap dress or top.

Then, I put together techniques I found from two sewing resources and hit the wrap-dress-jackpot: Power Sewing by Sandra Betzina, and Threads #168 September 2013.  Both cover different ways to alter wrap necklines, but combining elements from both articles gave me the winning combination for my first wrap dress I ever made at the end of last year – I highly recommend checking out both for more information on wrap dress fitting techniques.


DVF Wrap 1

There’s some good info out there on how to do a full-bust adjustment for wrap necklines – if you’re looking for a great post on how to make this alteration, Ann from Gorgeous Fabrics wrote an informative tutorial on how to do a FBA for a wrap dress for the McCall’s sewalong recently.

SBA Bodice Pattern Alterations

Before cutting out your fashion fabric that you plan on using for your final dress, use a knit fabric with comparable stretch/weight as your final fabric for a test bodice.  I also recommend trying out all of the below steps on a test bodice to make sure you get the fit you want before committing to using these techniques on your final wrap dress.
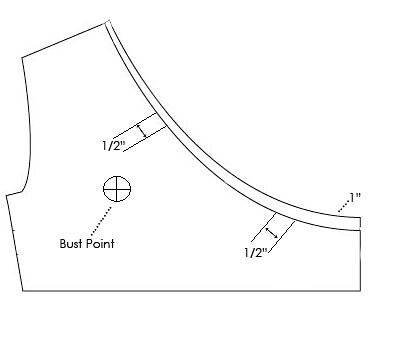

bodice diagram


Original diagram from Sofilajantes


If you’re small-busted like me, and have tried on a wrap dress in a store, you’ve probably noticed that the length of the wrap is too long, since we don’t need as much fabric to cover our bust line.  To solve, that, we’re going to take some length out of the neckline above and below the bust point by pinching out extra length above and below the bust point.  This will vary from person to person, as well as pattern to pattern, so make up a test bodice to try on and play around with.  For me, I ended up needing to take out 1″ of length total: 1/2″ above the bust point and 1/2″ below, illustrated above.  If you need to take out more length, try to evenly distribute a series of small tucks above and below the bust point.

As a personal preference, for more coverage, I also raised the neckline.  At the waist I added 1″ to the neckline, and blended it out to about a 1/2″ at the neck.  This also affected the shoulder seam, which needed to be extended 1/2″.


SBA 1

Here’s what  the pattern piece looks like after my alterations – the tucks are circled in yellow.  I taped the tucks in place with scotch tape, and the tucks gradually tapered out from the tuck point.  The white paper is the new drafted neckline.


SBA 2

Here’s another angle so you can see the tucks in the tissue a little better.  The bottom tuck, on the left-hand side above, was tricky for me since it intersected with the grainline.  So, I tried to keep the grainline as straight as I could while smoothing out the tissue from the tuck point.

Fixing the Wrap Gap

With the pattern alterations done, now we can move on to solving that annoying gaping problem and create a bodice that stays snug and close to the body.  If you don’t have that problem with your pattern, then great!  You’re ready to get sewing!  If not, try out this method using 1/4″ twill tape – I like it better than using clear elastic for stabilizing a wrap neckline.
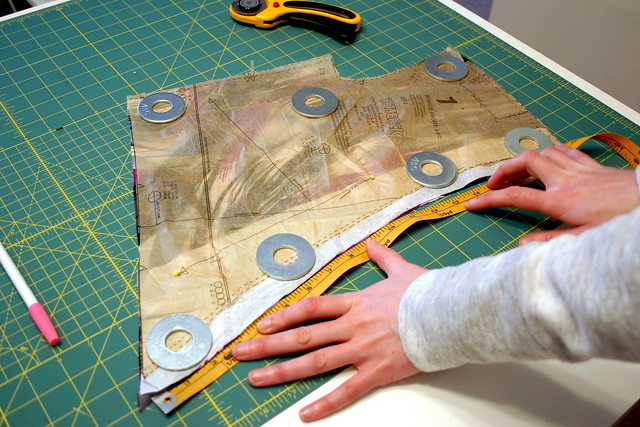

SBA 3

Using a tape measure or your preferred way of measuring (flexible rulers are great for this), measure the length of the neck for the front bodice piece and the neckline of the back bodice piece.
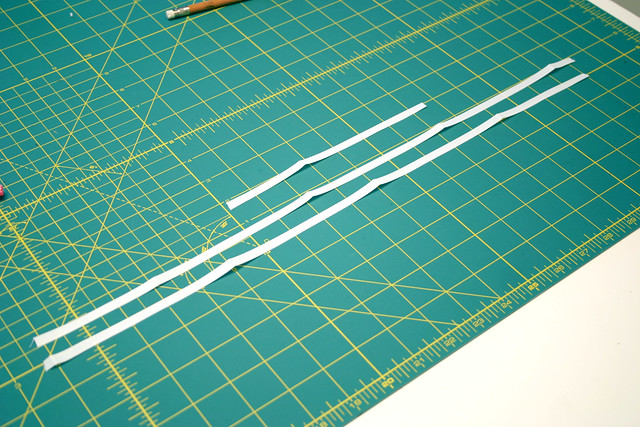

SBA 4

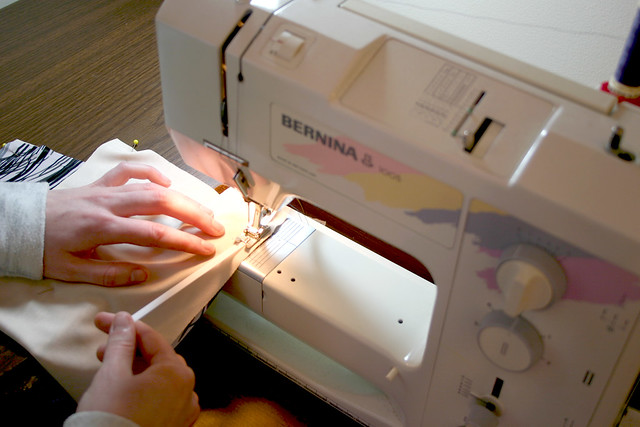
Using those measurements, cut one piece of 1/4″ twill tape that corresponds with the back neckline measurement, and two pieces of twill tape that correspond with the front neckline measurement – one for each side of the wrap.  In Power Sewing, it’s recommended that if you have a B cup to cut the front strips 1/4″ shorter than the neckline measurement to draw in the neckline better.  If you’re an A-lady like myself, cut the pieces out as the neckline measures.

SBA 5

Bodice wrong side up, pin the twill tape with the edge of the tape 1/4″ away from the edge of the neckline.  Using a straight stitch, sew the tape to the neckline.  The feed dogs will ease in the bodice as you go, but I find stretching ever so slightly on the twill tape helps with this step.  Repeat for the other side of the front neckline and the back neckline as well.


SBA 6

This is what one side of my front neckline looks like after stitching the twill tape.  Gently press out any puckers with a cool iron.


SBA 7

As a personal preference, I serged the neckline edges for a clean finish after stitching all of the twill tape.  When you’re at the part during dress construction where you’re ready to hem the neckline, simply turn in the neckline 5/8″ and stitch in place.

*You may have noticed in the above photos in the tutorial that the wrong side of my garment fabric looks different than the right side.  Since my knit garment fabric is so sheer, I underlined the bodice with nude-colored swim tricot, so my bra won’t show through.  I like the body the underlining gives the fabric as well!

There you have it – I’m now on wrap-dress #4 (and have yet to post #2-3!) using this method, and each time I’m thrilled with how the neckline turns out.  If you’re small-busted like myself and have yet to successfully make a wrap dress because of how the neckline fits, I hope this opens up a world of wardrobe opportunities to you.  Let me know!

Now, to finish making my dress for the sewalong…
Follow:

Learning About Lace – How To Work With a Couture Fabric


Alisha Dress sneak peek

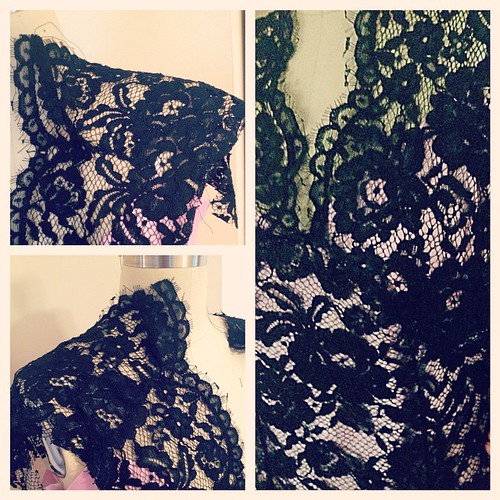
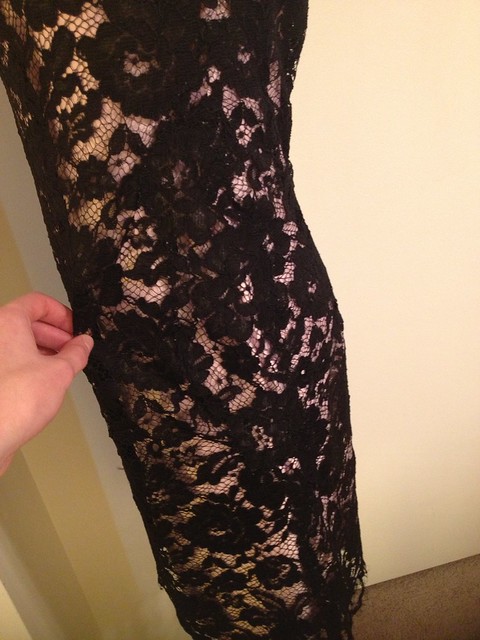
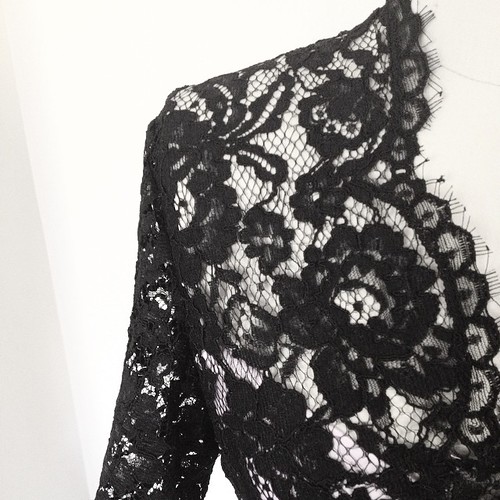
Pssst – here’s a sneak-peek of what I’ve been working on over the last few weeks.  When I decided to make a dress completely out of lace fabric for a friend’s upcoming wedding this weekend, I didn’t anticipate the challenges that would come along with working with such a, well, see-through and airy fabric! 

Ladies, there’s a reason why those lace wedding dresses on “Say Yes To The Dress” are wicked expensive – sure, the name on the label inflates the price of a wedding dress, but working with lace is very time and labor-intensive, and to achieve a seamless-looking garment, there’s a lot of couture sewing techniques that need to be used.  Of course, none of this occurred to me until I sat down with my sewing books and did a little reading about how to work with lace fabric.  Here’s what I learned and how I made my dress.

Lace needs to be cut in a single layer

To get a seamless look, each pattern piece needs to be a full pattern piece (no half pieces) and cut on a single layer of lace.  This allows you to match up motifs when planning out how to cut out your garment so the lace pattern can continue through the garment without any interruption at seam lines.  Then, cut around the motifs that extend beyond the edge of the paper pattern, which will be appliqued on top of the joining garment piece at the seam line (this only needs to be done on the garment front pieces, not both front and back.  You’ll see why later when we sew the seam).  My lace pattern was so busy that I didn’t need to worry about matching up motifs.

Also, did you know that lace doesn’t have a grainline?


Thread tracing on lace is hard work. #sewing #couture #fancypartydress

Mark all seam lines and notches with silk thread

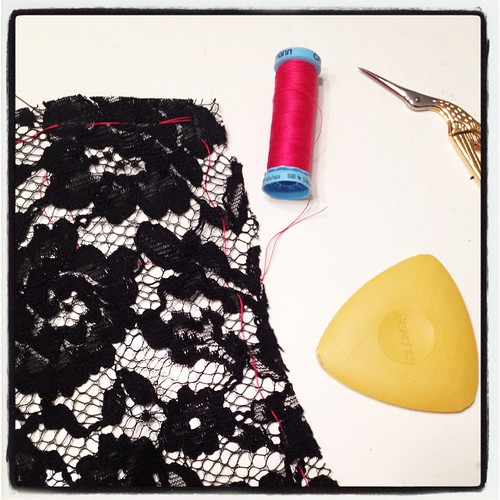
After the garment pieces are cut out, seam allowances need to be thread-traced.  For my dress, I used hot pink silk thread and basted the 3/8″ seam allowance line.  Silk thread is great for lace since it slides smoothly through the fabric and is easy to remove after the machine stitching is in place.  I also used tailor’s tacks to mark darts and notches.  I tried to use tailor’s chalk, like in the picture above, but it was too difficult to accurately mark where I needed to mark because of the openness of the fabric.

Are you with me so far?  All of this prep work took about two nights to complete, whew!


A new technique for #bpSewvember - lace appliqué seams. No ugly seam allowances showing through on my lace dress! I was super nervous about working with lace, but this is pretty easy to sew. Plus, my print is pretty busy so I didn't worry about matching u

Applique seams for a seamless garment

Since lace is see-through, seam allowances showing through is not the most ideal look.  You could sew French seams, but the seam will still be visible through the lace, and some lace is too bulky for that kind of seam treatment.  To get the illusion of a seamless garment, like in the photos above, I used applique seams.


applique seam

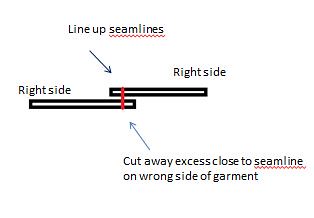
To explain, I’m going to reference sewing a side seam in a dress.  Layer the right side of the dress front over the right side of the dress back, lining up the seam lines – this is where the thread tracing comes in handy!  There will be excess extending from the seam allowances on the top layer because of the motifs that we cut around beyond the seam allowance.  Then, using a narrow zig zag, sew around the motifs along the seam – you may end up sewing pretty far away from the original seamline, but that’s ok.  When you’re finished sewing the entire seam, use your applique scissors to cut away the excess fabric underneath on the wrong side, close to the seam line.  Voila – seamless looking seam!  I also needed to cut away some of the fabric on the right side of the garment, close to the stitching.  If you’ve ever appliqued in quilting, sewing applique seams is a very similar technique.

I found this video really helpful when I tried to wrap my head around applique seams.  The only seams that I didn’t applique for my dress were the sleeve seam, because it was so short and no one will see it unless I lift my arms up, and the armhole seam…because that would be way too hard.  If you don’t want the armhole seam to show through, you could bind it with a bias strip of silk close to your skin color.

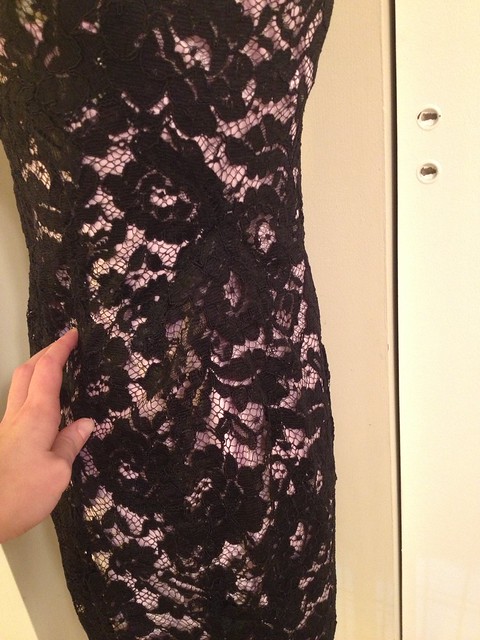
Applique seams also helped me out of a bind – I thought my muslin for the dress fit me fine in the hips, but when I sewed the side seams in my lace garment, it was too tight.  Like, I couldn’t sit down!  I have my theories on why this happened (I think it had something to do with a tuck of fabric I took out in the bust/waist), but I cut open the side seam where I had fitting issues and appliqued what was essentially a lace gusset to get more room in the hips:


Untitled


I can tell where I inserted the gussets (and maybe you can, too!), but you have to admit, it’s pretty tricky to see where the seams are.  Applique seams totally saved this dress from being a tragic disaster.

Yes, you can insert an invisible zipper in lace

Don’t get me wrong, I was sweating bullets and so nervous when I sewed my invisible zipper in the back.  I mean, what if I screwed up and got the zipper twisted?  Spoiler alert: I did!  What saved me was that I basted the zipper in first and used a contrasting thread so it would be easier to see the stitches if I needed to rip them out.  Just taking some simple precautions beforehand makes it possible to sew a zipper in a lace garment.

Here’s the big question: would I ever sew with lace again?  Well now that you mention it, I have some lace in my stash for two simple blouses, but I don’t think I’d jump at the chance again to make a lace garment like this knowing all of the labor and time that goes into constructing a lace garment.  Lace is not for the faint of heart, my friends!

Have you ever sewn with lace? 

Follow:

How to Open a Buttonhole


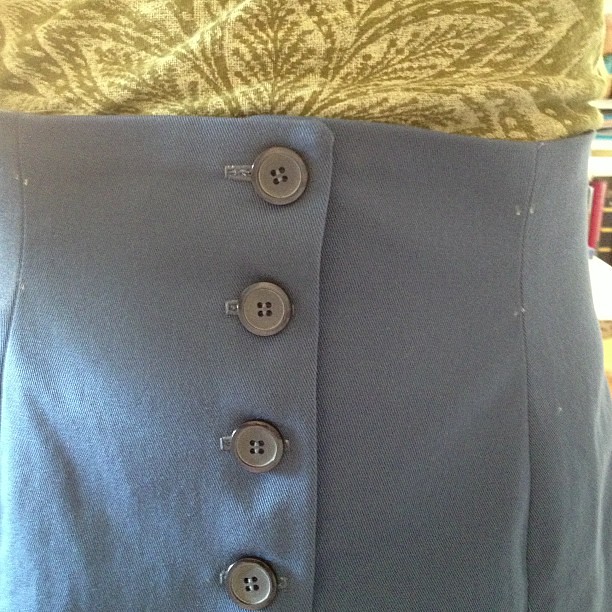
Successfully open button holes on my Beignet skirt, woo hoo!

I think I’ve finally conquered buttonholes. Well…at least opening them nicely. I may not have an automatic buttonhole stitch feature on my sewing machine, like on my mom’s Bernina Virtuoso (definitely looking for that when I upgrade machines), but I can get a clean, professional opening with a couple of simple tools.  I wrote awhile ago about some of my favorite sewing accessories and included a buttonhole cutter in the roundup; it really is a great tool to have.

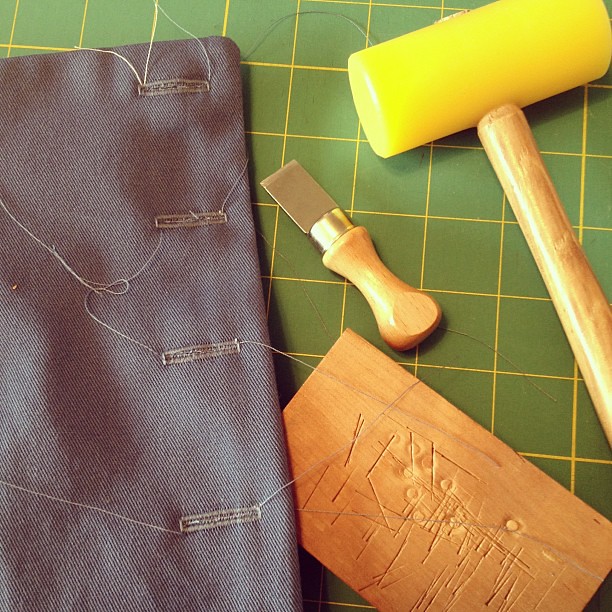
What makes a difference is using a block of wood and a mallet/hammer to really drive the cutter through the fabric.  Before, I was using the little cutting mat that comes with the set and wiggling the cutter back and forth through the layers of fabric.  The results were ok, but I still had to use my seam ripper to open the holes a bit.  Watch this quick six-second clip to see how I open my buttonholes now:


See how easy?  Just place the wooden block under your fabric, insert the button hole cutter in-between the stitching, and give it a couple of wacks with your mallet – open buttonhole perfection

After opening up the buttonhole, I snip some of the loose fibers with some sharp scissors and finish the buttonhole edges with clear nail polish, a little trick I learned from my mom.  It dries clear and doesn’t discolor fabric like Fray Check can, plus it doesn’t wash out.


I've mastered buttons!!

I’m quite happy with how my buttonholes turned out on a successful second version of my Beignet skirt!

Follow:

Tutorial: Fix a Small Hole in a Garment

I had a small panic attack last night.  Want to know why?


quickpatch1

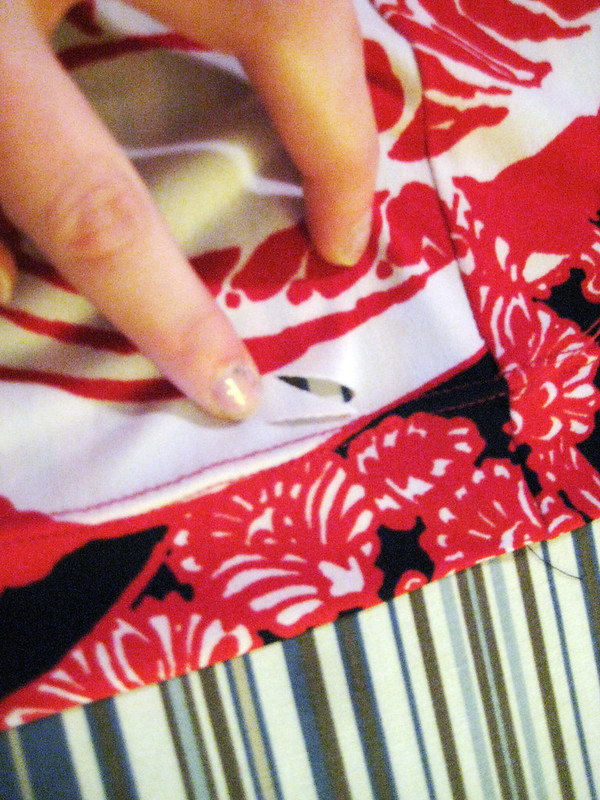
As I was trimming the excess fabric away from the hem of my party dress with my shears, I accidently snipped into the skirt fabric and made an ugly hole.  Ahhh!!!  The party was only two hours away!  I didn’t want to re-hem the dress to a shorter length so I picked up the phone and called my mom to figure out what I should do.


quickpatch2

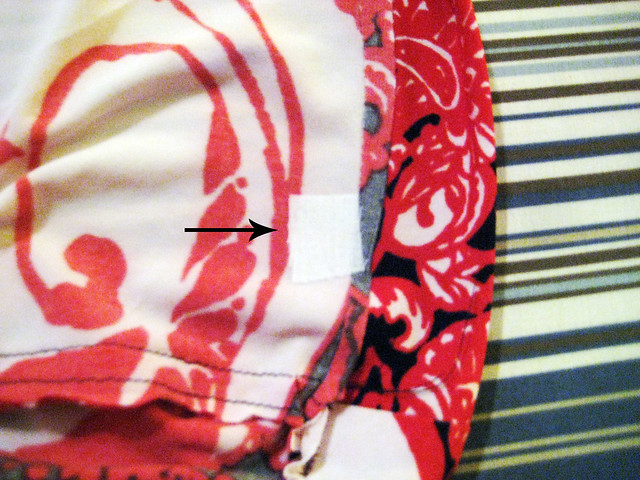
I cut out a small square of interfacing that was big enough to cover the hole and fused it over the hole on the wrong side of the skirt.  Fusible web would also work in place of interfacing.


quickpatch3

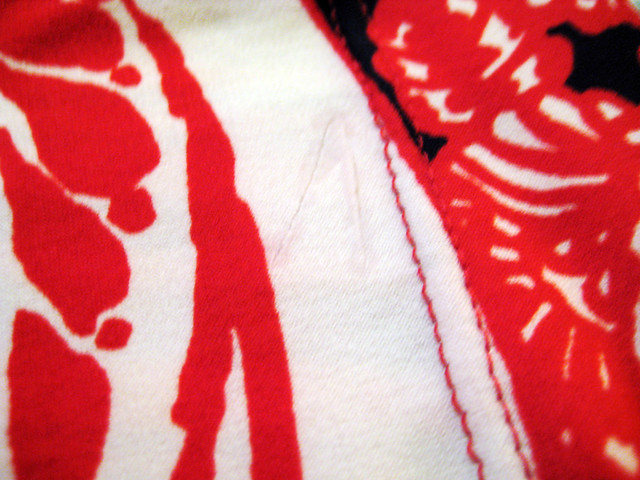
On the right side, I applied a little bit of Fray Check to the edges of the hole to prevent the fabric from unraveling.  Look at that!  You can barely see the boo-boo I made.  And since it’s on the back of the dress towards the very bottom, I doubt anyone would notice it as well.

Crisis adverted!

Follow:

Tutorial: Christmas Paper Garland


paper garland1

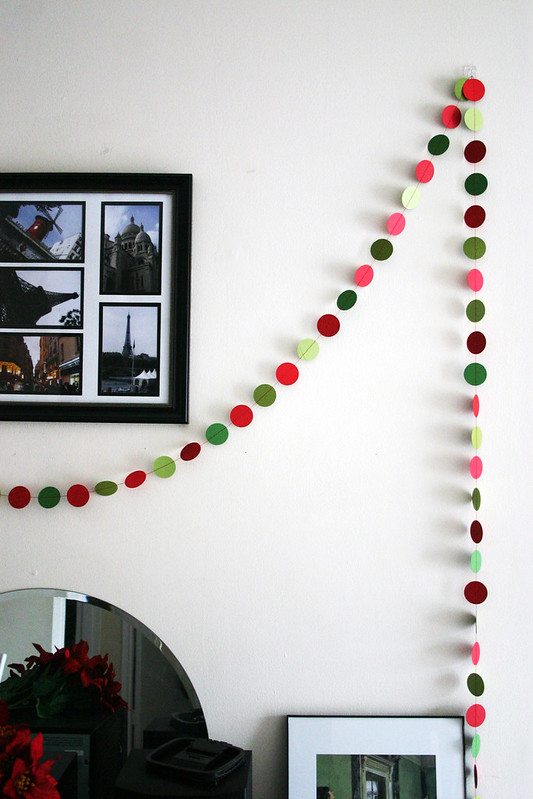
Feeling that my apartment lacked a certain festive “punch,” I cut out and stitched up this paper garland in about fifteen minutes.  These paper circles would also look adorable woven around a tiny Christmas tree or draped casually over a chandelier.

You can make this as long or short as you’d like, depending on where it will hang or what it will wrap.  Be careful though, punching out those circles can be addictive!


paper garland3

Materials:

Craft paper in an assortment of colors (I used three different shades of green and red)
Circle paper punch
Sewing machine
Sewing needle
Thread
Clear adhesive hooks (optional)

Directions:

Step 1. Using the circle punch, cut out lots of circles from the different colors of craft paper.  I didn’t really know how many I wanted or needed until I stitched them together and saw how long I had made my garland .

Step 2. Arrange the different colors in a repeating pattern that looks pleasing.  Stack the circles in this order so they’ll be ready to be stitched together correctly.


paper garland4

Step 3.  The technique I used to stitch the circles together is called chaining – a technique used frequently in quilting. If you’re not familiar, take a peak at this video over at Grainline Studios to get a good idea of what chaining looks like.

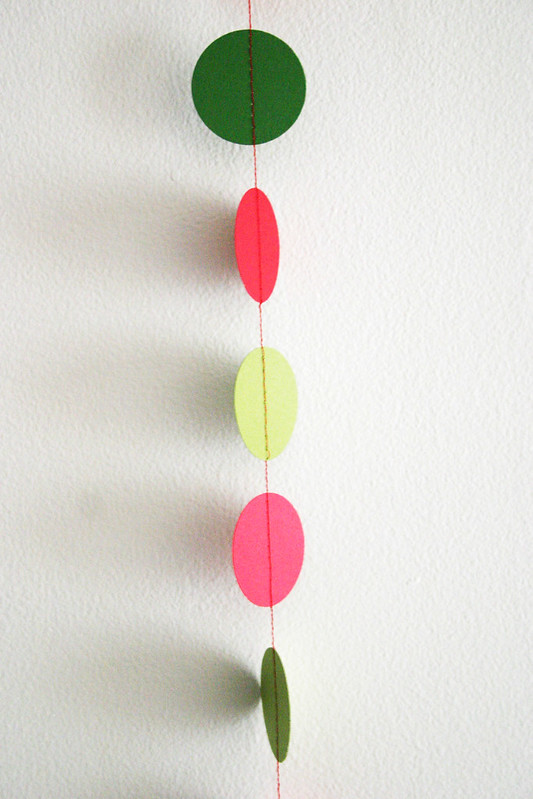
Take your first circle and stitch through the center.  When you’ve reached the opposite side of the circle, stitch about four more stitches to create a thread chain, slide the next circle in the series under your presser foot, and stitch through the center of that circle.  Repeat until you reach your desired garland length.


paper garland2

I used clear adhesive hooks on my wall above my credenza to hang my garland – they’re removable and make it look like my garland is floating.

Follow: