Tutorial: Valentine’s Day Sequin Heart Pin

heart pin 1

I guess I’ve always been a fan of Valentine’s Day.  I loved picking out which Barbie valentines I’d give to my classmates for our parties in elementary school, I buy those candy conversation hearts for fun every year, and I always dress up on Valentine’s Day in red with some kind of heart-shaped accessory.  This sequin heart pin adds just enough sparkle to any holiday outfit and has several wearable options- it could be customized to be a hair clip or pendant depending on the size you decide to make your heart.
Materials:
Red felt
Sequin strand, approx. 1 yd
Glue gun and glue inserts
Craft scissors
Paper
Pen
Directions:

heart pin 3

Step 1.  Fold a piece of paper in half and draw half of a heart shape along the crease – you know, like how you used to make hearts in school.  Cut out your shape and unfold it to get your template that will be used for cutting out the felt.

heart pin 4


Step 2. Cut out two heart shapes from the felt using your paper template.  I found it easiest to fold the felt in half and cut out the two shapes at once so that they would be uniform.

heart pin 5


Step 3
. Glue around the edges of one heart and place the second heart on top of the first, creating a heart “sandwich.”  Go back and fill in any holes with more glue so that all edges are securely glued together.

heart pin 6


Step 4
. Place a dot of glue at the center top of the heart and secure beginning of sequin strand.  Carefully apply glue to outer edge of heart and press sequins into glue, making sure strand doesn’t become twisted.

heart pin 7


Step 5
. Continue to apply glue to outer edge of heart until the entire outer edge of the heart shape is covered in sequins.  Repeat again, this time placing glue and sequins next to first row of sequins.  Continue gluing and placing sequins in a clockwise fashion until felt is no longer showing through.

heart pin 8

Step 6.  Secure last sequin with a dot of glue and trim remaining sequin strand.  Your heart should look like the one above.  Once the glue has dried, remove any pesky hot glue strands and excess glue that may have oozed out onto the sequins during the gluing process.

heart pin 9

Step 7. Apply a line of glue to the center back of the heart shape and press pin back into glue.  Wait for the glue to dry before wearing.

heart pin 2

Follow:

DIY Christmas Gift Wrap Headband

DIY Christmas Giftwrap Headband

Need a festive accent to wear with your “bedazzled” Christmas sweater at the party this week?  My snap-your-fingers easy headband can be whipped up in the time it takes to bake a batch of sugar cookies, and I’m sure you have all the materials on hand in your gift wrapping arsenal…well, maybe not the headband, but I’m sure you have one kicking around the house somewhere.

Materials:

Headband
Metallic curling ribbon
Mini sticky gift bows
Hot glue gun and glue sticks

Directions:

Starting at one end of the headband, wrap the curling ribbon around the end and secure with a drop of glue.  Apply more glue to a small section of the headband and wrap the curling ribbon around, slightly overlapping each wrap of ribbon with the next.  Keep applying glue to sections and ribbon wrapping until the entire headband is completely covered in ribbon.  Secure ribbon at opposite headband end in the same fashion as the beginning.
I decided to then wrap additional ribbon in a contrasting color around the headband in more of a “candy cane” stripe style, repeating the same process of gluing each ribbon pass in place with the hot glue gun.
For the mini gift bows, trim the sticky paper (don’t removed the backing!)  to the same width of the headband so that there will be no excess hanging off the headband when the bow is glued on.  Position the bows to where you’d like on the headband and glue them on.

Now you can rock around the Christmas tree in style!

DIY Christmas Giftwrap Headband

Follow:

Tutorial: Boot Inserts

boot insert tutorial 16

It’s official: I am a boot aficionado.  This year I have now brought my boot collection to a total of 13 pairs, ranging from rain to riding, snow to stiletto.  My problem is how to properly store them in my closet: I’ll line them up on the floor or on shelves, but they always flop over each other.  In the past, I bought plastic boot inserts to keep them upright (they broke), and the price for those nice cedar inserts are out of my budget.  So when I brought home a pair of heeled boots this year and pulled out the stuffing from my new beauties, I thought for a second – these cardboard inserts aren’t so bad!  They keep the shape of the boots in the box, and when you stand the boots, the leg stays upright.  So why not make pretty looking ones?
Materials:

1/2 yard – 1 yard fabric (depending on how high your boot leg is)
1/2 yard – 1 yard Thermolan Plus
2 – 4 sheets 12×18″ ultra stiff plastic canvas (depending on how floppy your boots are)
Cardboard boot insert from packaging (optional)
Spray adhesive
Freezer paper
Clear ruler with grid
Fabric and paper scissors
Straight pins
Coordinating thread
Sewing machine
Iron and ironing board
Hand-sewing needle
Sharpie or marker

Directions:

boot insert tutorial 2

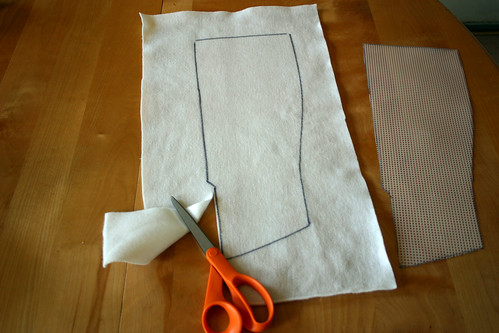
Step 1: Trace the silhouette of your cardboard boot insert onto a piece of plastic canvas to make the plastic insert. If you don’t have a leftover cardboard insert from your pair of boots, trace the top of the boot down to the ankle to make a pattern.  The purpose is to create a shape that will fill the leg of your boot when you’re not wearing it.  Repeat this for the other boot, making a total of two plastic canvas inserts.

You may want to make a total of four plastic canvas inserts instead, two for each boot.  This depends on the boot’s degree of floppiness.  I used one plastic canvas insert for each boot in the picture above, but could definitely see using two each for my suede boots.
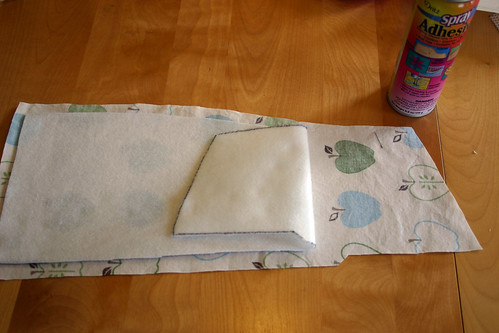
boot insert tutorial 3


Step 2
:  Using your plastic canvas insert, trace the shape on to a piece of double-thickness Thermolan Plus.  Cut out along the lines and repeat for the other boot.

boot insert tutorial 4

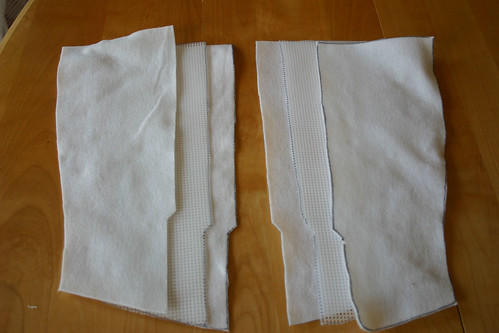
You will now have a total of four Thermolan Plus shapes, two for each boot, and two plastic canvas inserts, as seen above.
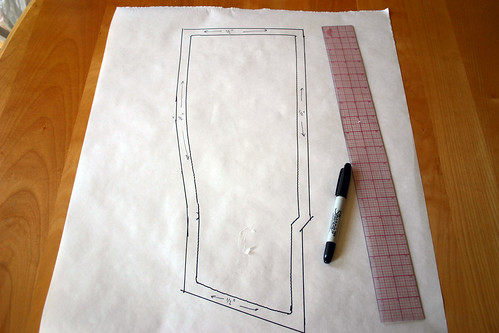
>

boot insert tutorial 5


Step 3
:  Using your plastic canvas insert as a pattern, trace the boot shape onto a piece of freezer paper.  Add a 1/2″ seam allowance around edges using a clear grided ruler.

boot insert tutorial 6
 

Step 4: Fold your fabric in half and cut out two boot shapes from the fabric using your freezer paper pattern.  You will have a total of four boot shapes when completed.
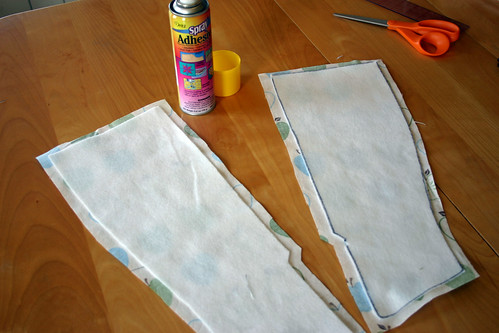
boot insert tutorial 7


Step 5
: Lay your Thermolan Plus pieces on top of the wrong side of your fabric, making sure to keep a 1/2″ seam allowance border.  This allows the Thermolan Plus to not be caught in the seam allowances when sewing, making nice, bulk-free seams.

boot insert tutorial 8

Peel back one side of your Thermolan Plus from one side of the insert fabric.  Spray adhesive in a back-and-forth motion lightly over the exposed Thermolan.  Smooth Thermolan back over to adhere to fabric, and repeat on other end.  Flip fabric and Thermolan piece over and smooth out any visible wrinkles that may have happened during adhesion.

Repeat for other half of boot insert.  You will have two boot insert components made of a piece of Thermolan Plus fused to the wrong side of the fabric.

boot insert tutorial 9

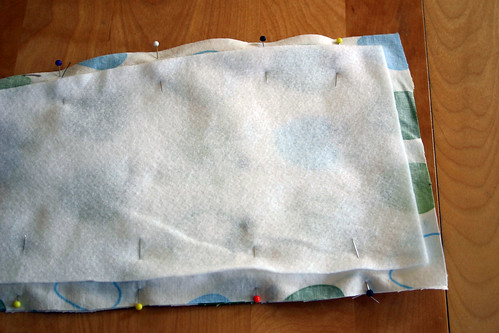
Step 6: Pin together the right sides of the boot insert fabric, leaving the top of the boot insert (the wide end) open.

Sew around boot insert with 1/2″ seams, backstitching at both ends to secure stitching.  Clip corners.

boot insert tutorial 10

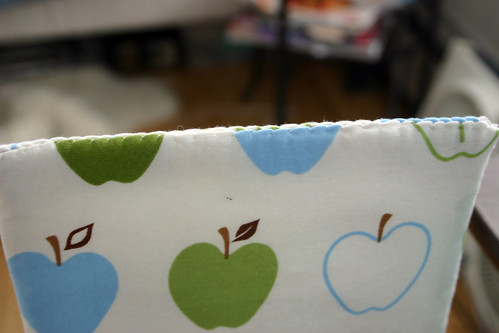
Step 7:  Turn boot insert right side out and press seams, making insert nice and flat.  Doesn’t that look pretty?
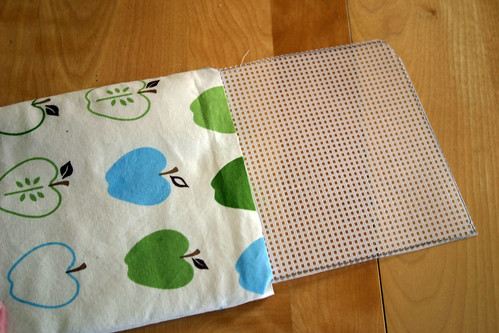
boot insert tutorial 11


Step 8
:  Insert plastic canvas into boot insert “pocket,” guiding it in with your hand.  You may have to trim down the top of your plastic canvas a little so that a 1/2″ seam allowance of fabric can be folded over the canvas, seen in the next step.

boot insert tutorial 12

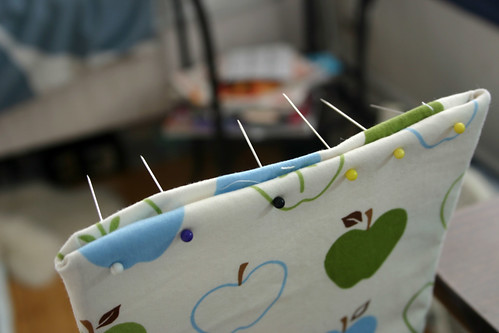
Step 9:  Fold in 1/2″ seam allowance over canvas and into “pocket,” forming a closed seam at the top of the boot insert. Pin in place through fabric and canvas.
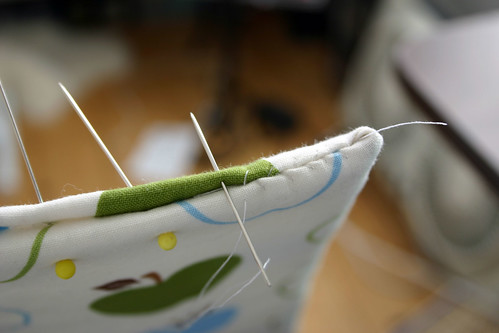
boot insert tutorial 13


Step 10
:  Using coordinating thread and a needle, stitch the top seam closed with a slip stitch.  Bury knot and clip thread ends.  The top of your boot insert should look like this:

boot insert tutorial 14

Repeat steps 6-10 for other boot insert.

boot insert tutorial 15

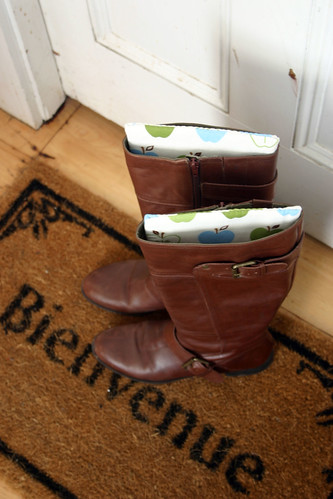
Floppy boots, begone!

Follow:

Weekend Project: Fabric Covered Crates


While reading the Sew, Mama, Sew! blog yesterday, I saw a fantastic link to some fun fabric covered crates over at this blog. Cute, functional, and easy to boot? I’m game.

Follow: