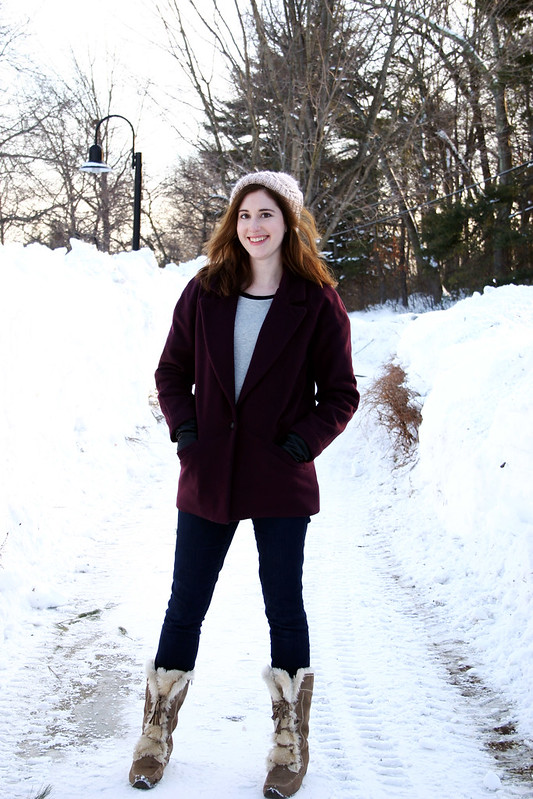
I Made a Yona Coat!


yona 1

Pattern: Yona Coat from Named Patterns, c/o Indiesew
Size: 6

All Materials For This Coat:

  • Outer fabric – cashmere wool from Metro Textiles
  • Lining – coat-weight lining from Fabric Place Basement
  • Diaper Flannel Interlining – Fabric.com
  • Interfacing (hair canvas, sew-in) – Steinlauf and Stoller
  • Fusible weft interfacing – Fabric Place Basement
  • 1″ Button – Fabric Place Basement

Sweatshirt: Linden (just made, unblogged)
Jeans: Gap
Boots: London Fog
Hat: Topshop

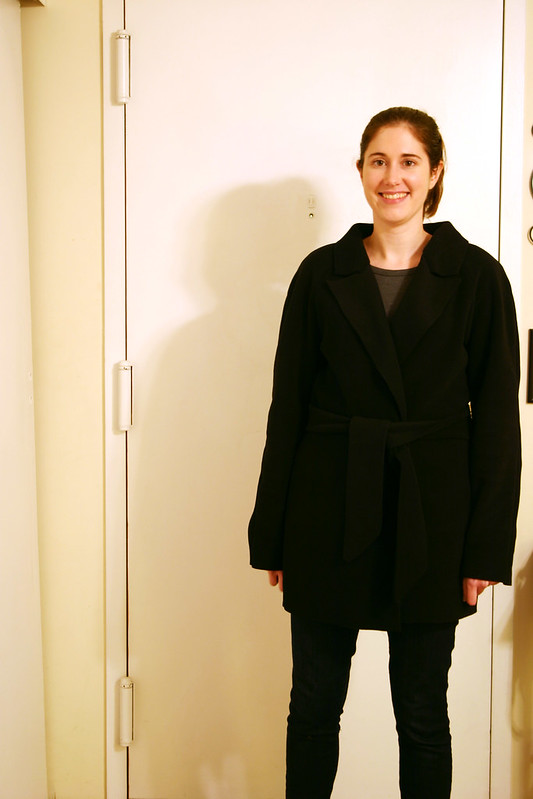
To quote Led Zeppelin, I come from the land of ice and snow…no really, we have seven feet of snow here in the Boston area after this weekend’s little Valentine’s Day storm (10″ more, woof) and there’s major icicles of doom hanging off of every single building.  I had a fear that once I finished this coat, which I’ve been chronicling since early January, the weather would turn and it would become too warm to get some wear out of it this year, kind of like what happened when I made my Anise wool jacket last spring.  Seeing that we’re going to have the coldest temperatures of the season this week (it was 16 degrees in these photos) and there’s, of course, more snow on the way, I don’t think it’s going to turn spring-time with daffodils blooming anytime soon.
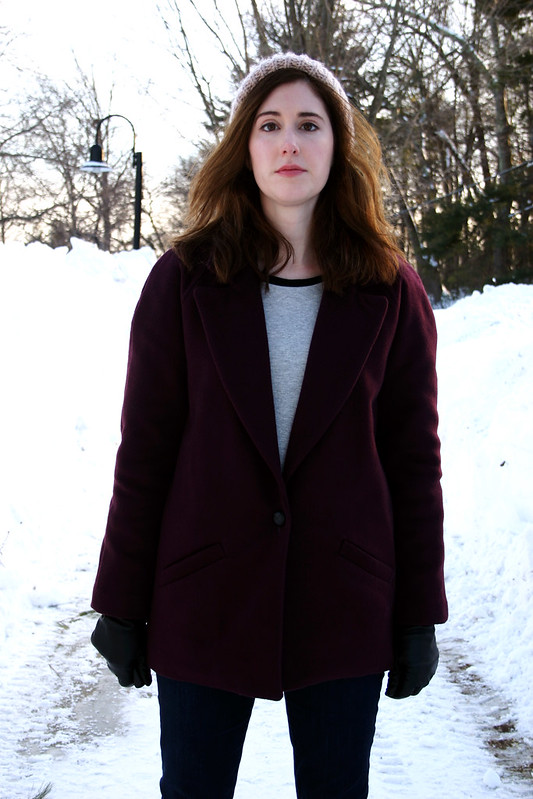

yona 6

This is my “I’m tired of this winter shit” face…seriously.

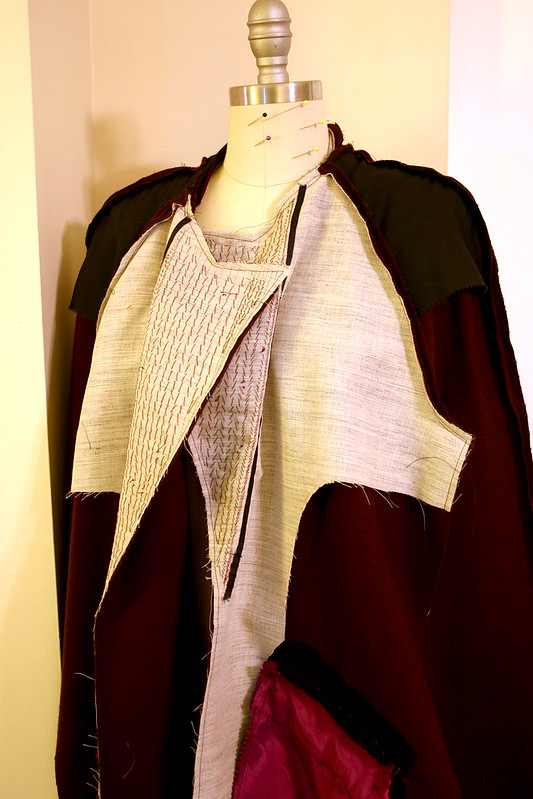
Even though I went through the whole “how to tailor a wool jacket” thing last year with Anise, I still learned a ton more this year making this coat.  I pretty much threw away the instructions after I glanced through them to get a general idea of construction, and exclusively followed my tailoring book for every step of construction.  Sure, you can make the coat following the included instructions, but it may not drape how you want it to, the collar may not roll right, and the lapels could flop around instead of staying put.  There’s really a lot more to making a coat than just sewing the seams together – there’s a lot of secret engineering inside the coat that gives it shape and makes things lay just right.
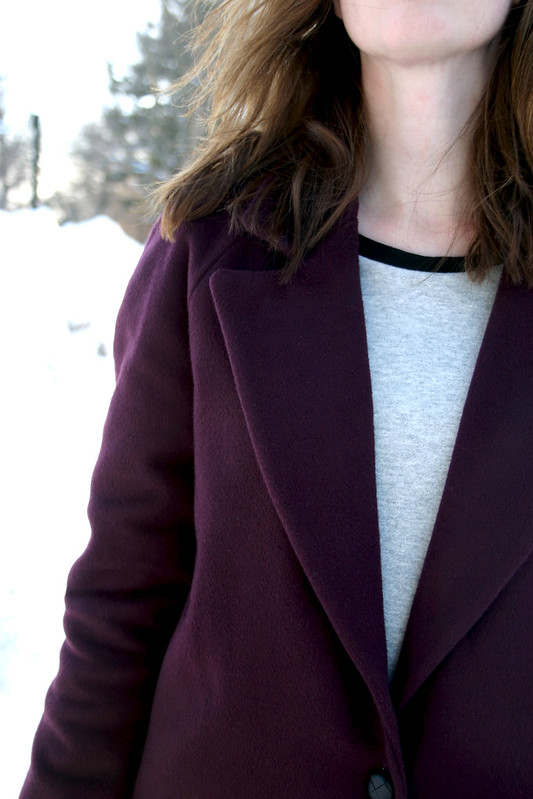

yona 3

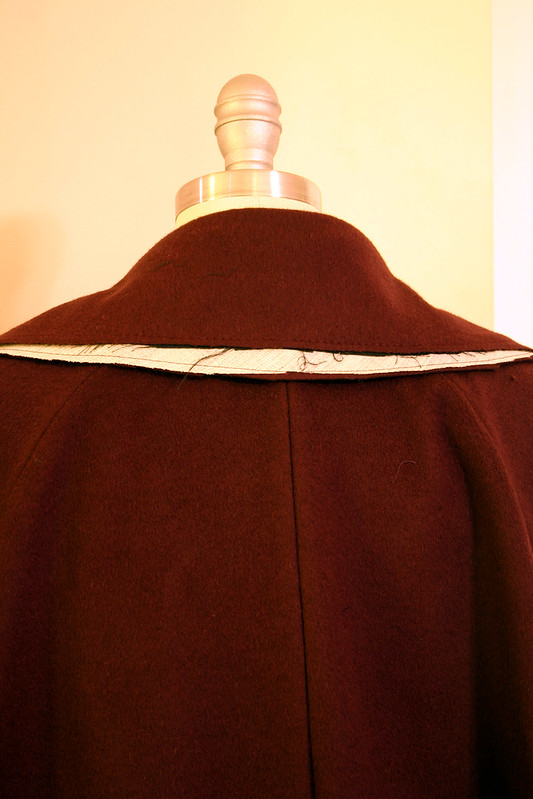
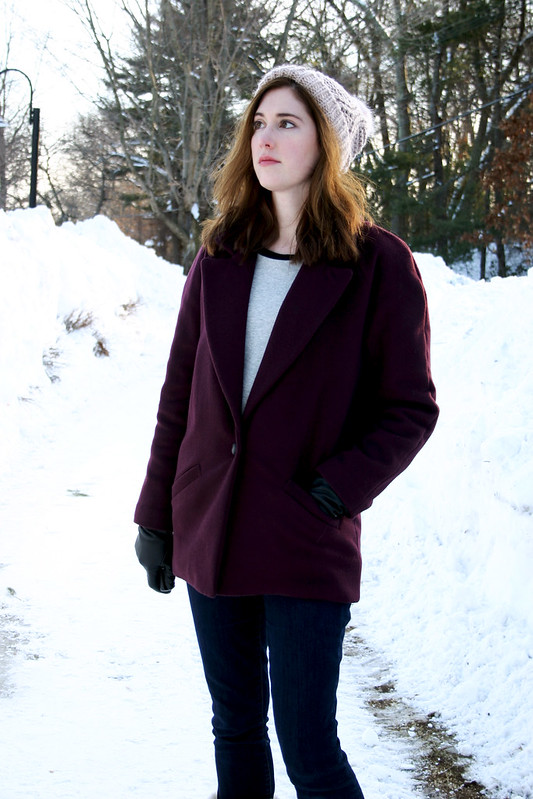
I am so damn happy with the lapels and collar, especially since this is the first time I used hair canvas and padstitching.  Taping the roll line made a world of difference with the lapels laying flat – it’s a little puckery underneath, so I may not have adjusted the ease as best as I could, but you can’t see it so it’s ok.  Adjusting for the turn of cloth of the collar ensured that the seam line doesn’t roll out in the back.
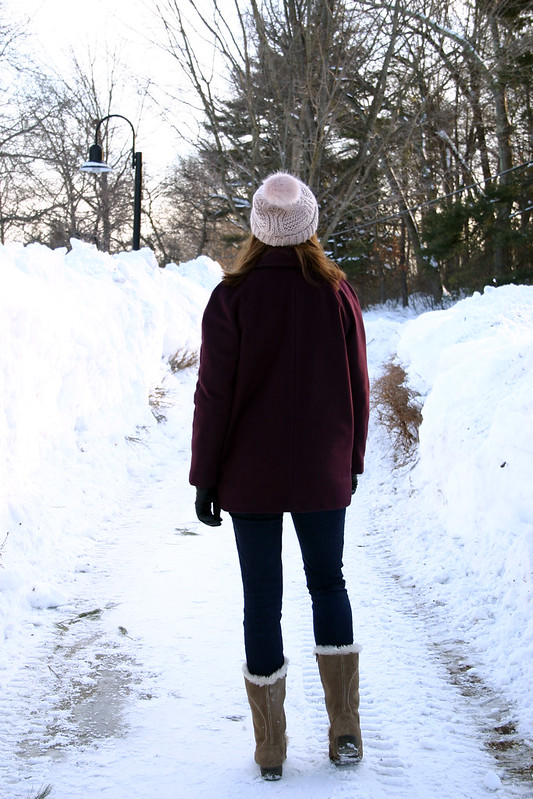

yona 2

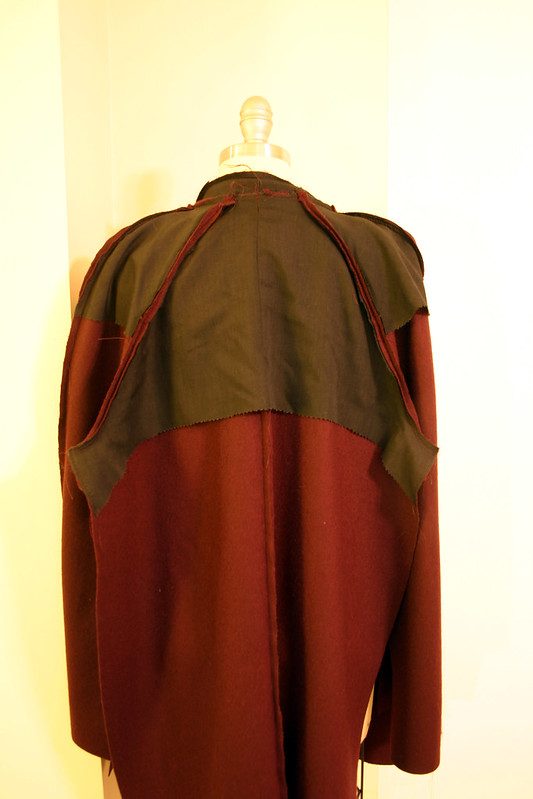
With the drape factor of the cashmere, it was definitely a good move to add a back stay and shoulder stays for the raglan sleeves.  The sew-in interfacing didn’t make those parts of the coat too stiff, but there’s noticeable, light support through the back and no sag lines.

yona 5

I drafted welt pockets in place of the patch pockets, since welts are a lot easier to sink your hands into when it’s cold, or for stashing  your keys and phone.  Kinda wish I placed them a bit higher, since the pocket bags are about six inches and hang down very close to the hem.

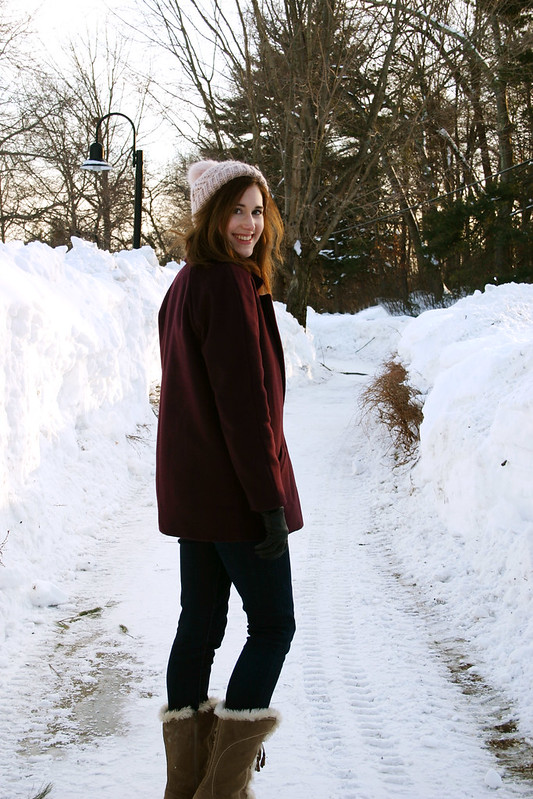
Yes, let’s talk about the length…it’s three inches shorter than it should be.  This is due to the fact that I didn’t notice that the facing piece wasn’t drafted long enough for the front of the coat…grr.  Because I didn’t want any exposed raw edges inside the coat, and I didn’t want to bag the coat lining, I had to shorten the length of the coat by quite a bit to finish the lining correctly by hand.  It’s not ideal, but at least the coat still keeps my behind covered and warm.

Edit 2/20/15Allie from Indiesew contacted Named Patterns about my feedback – apparently, the coat has a wider turn-up at the hemline than what I used, and that the pattern drafting was intentional.  Good to know if you plan and finishing the hem by hand vs bagging the lining. 

yona 4

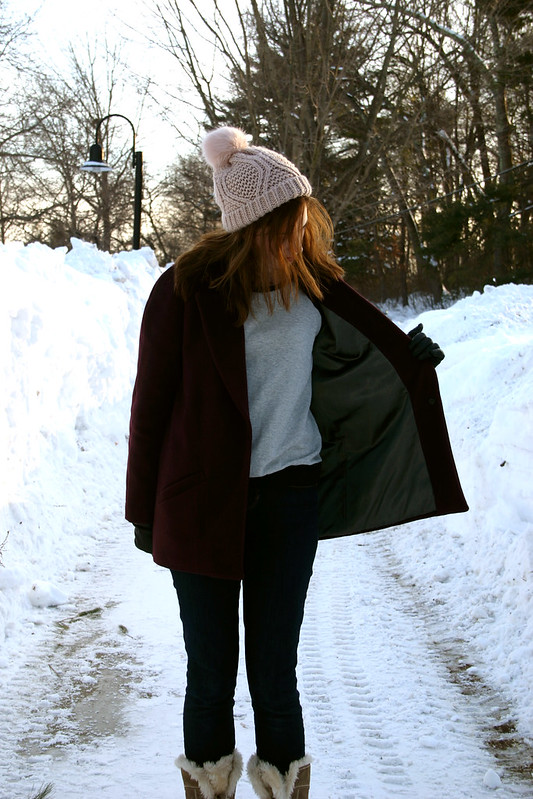
For the lining, I called B&J Fabrics in NYC to get some purple samples of their Sunback lining fabric (it’s a rayon lining backed with flannel), but when they arrived, the samples seemed so flimsy and I didn’t think I’d get the level of warmth/insulation I wanted.  Instead, Fabric Place Basement had coat linings that were a thick, heavy rayon fabric with a brushed back that seemed like a good option if I interlined it with diaper flannel.  Testing this coat out yesterday in 16 degree weather with a windchill of -1 confirmed that yes, this is indeed a warm coat!  However, it’s also a really heavy coat because of the weights of all of the coat layers combined.

Something I didn’t take into consideration was the design of the coat vs. the drape of my version of the coat.  Using all of these layers (diaper flannel, heavy coat lining, cashmere wool) made the coat a little thick and fairly structured.  The bulk of the coat didn’t lend itself well to wearing it closed with a belt, as it’s designed – it just looked really awkward and made my midsection look chunky.  Had I known this beforehand, I would have redrafted the front overlap to be wider than 1″ to better accommodate the button closure I had to end up using (I originally wanted to use coat snaps, but they were too big).

yona 7

This pattern has some definite flaws that weren’t apparent when I made my muslin, but if you like the shape of the coat and have a couple of blazers or button-down shirts under your belt, it’s do-able to work through some of the issues.  Morgan wrote a great post on all of the changes she made to the pattern, it’s a great reference that I wish I could have used when I made my coat.

So yeah, I made a winter coat!  Now I can look all cool and stylish like the street-style city girls on Pinterest in their oversized coats, skinny pants, and Stan Smith sneakers (I’ll sub in my Classic Leathers instead).  I also had plans to make the Grainline Cascade duffle coat this winter, but for my mental health, I think I need to start thinking warm thoughts and work, optimistically, on my spring wardrobe.  Thank goodness Chris and I have a trip to Florida coming up in two weeks, we gotta get out of here!

Be sure to check out my other posts for coat construction details and tips:
Disclaimer: I received this pattern from Indiesew as part of being an Indiesew Blogger Team member, but all views and opinions of this pattern are my own
Follow:

Tailoring the Yona Coat [Coat Project 2015]


yona wip1

You’ve been warned…there’s some serious geeking out about tailoring in this post!  I’ve been using Evernote on my iPad as a brain-dump to keep track of all of my thoughts and the different methods used in this tailoring process, and I’d like to share them with you, dear readers, in case you’d like to make a tailored Yona Coat of your own.

I alluded to this in one of my earlier coat posts, but there’s a lot to consider when you’re working on a tailoring project on this scale – do you custom, machine, or fuse tailor, or a combination of the methods to achieve the desired result?  What types/weights of interfacing are best for the fabric you’re using?  Do you interline or underline, since you can’t do both?  And if you’re interlining, will you have enough wearing ease after the fact?  These questions just skim the surface of the types of things to think through before cutting out a coat, it all starts with having a clear plan in mind of the processes you’ll use before you begin.

If you’ve ever sewn a blazer or a jacket, the basic construction of the Yona Coat is pretty straight-forward.  I quickly skimmed over the instructions to get the general gist of construction, but heavily relied on the book Tailoring: The Classic Guide to Sewing the Perfect Jacket for all methods of tailoring and construction outlined in this post.


yona wip3

The Coat Front

Pockets – those patch pockets had to go, I want to sink my hands into some nice welt pockets when I wear this coat.  I drafted a pattern for an angled welt and pocket bag (7″ deep) and inserted it before sewing any seams.  I also interfaced the welt pocket opening with fusible tricot interfacing for stabilization (this was before sewing any of the welt and cutting open the pocket).

Interfacing – I opted for a partial front interfacing with lightweight hair canvas.  The reason for not interfacing the entire coat front is because I was afraid that the hair canvas would make the coat too stiff and bunchy when closed with the belt, and it’s also what the tailoring book recommended for coats, lol.  To attach the interfacing to the coat front, I basted it by machine in the seam allowances.

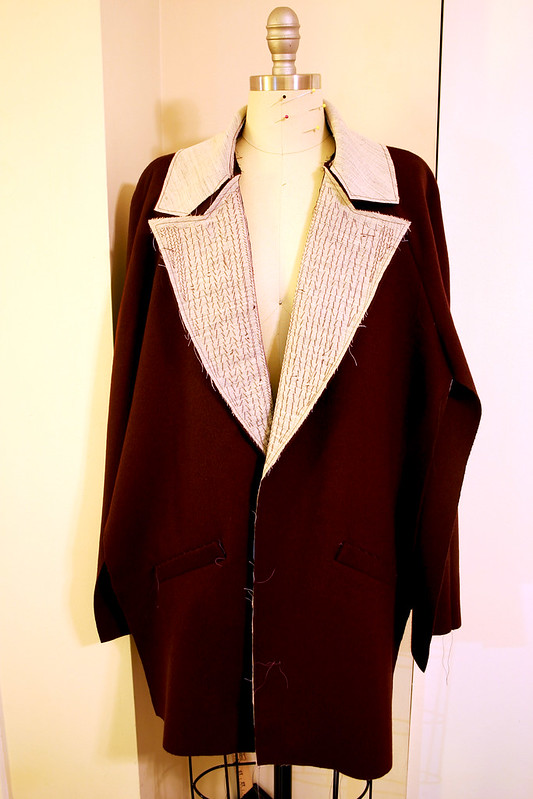
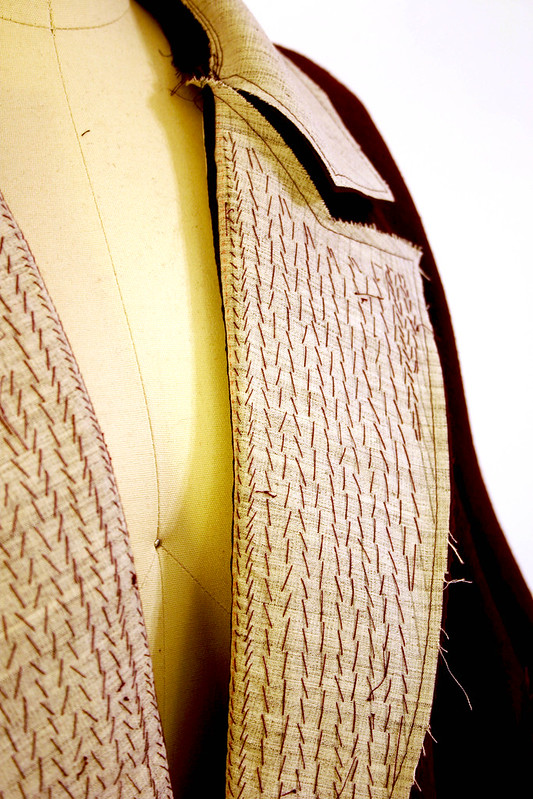
Lapels – As much as I liked the idea of custom tailoring the front and lapels all by hand, I just couldn’t bring myself to spend that much time hand-sewing all of the hair canvas in place (I don’t enjoy hand-sewing very much, to be honest).  Using the machine tailoring method, I applied the twill tape on the roll line by machine, and then marked my pad-stitching lines with pencil and pad-stitched the lapels.  I believe it took me about two nights total to finish all of my pad-stitching, and then I steamed the heck out of the lapels and let them dry overnight.  I’m glad I didn’t skimp on the hand sewing on this part, the pad-stitching makes such a big difference in the lapels rolling out and staying in perfect place.  It was so cool to see this process happen as I stitched!


yona wip2

The Sleeves and Coat Back

Sleeves – raglan sleeves require neck and shoulder stays to keep the shape and drape of the coat uniform and prevent the coat from looking droopy in these areas.  Plus, if you’re using shoulder pads (not sure if I will or not yet…), the stay disguises them from showing through to the front.  I used a lightweight sew-in interfacing from Steinlauf and Stoller – the stays were drafted off of my sleeve pattern and extended down 8″ from the top of the sleeve cap, cut on the bias.

Back – a back stay is also important to prevent the upper back from collapsing.  The drafting process was the same as the sleeves, I used the back pattern piece as my guide and drew a curve about 3″ below the armhole for the bottom of the stay pattern piece.  This piece was also cut on the bias out of the sew-in interfacing.


yona wip5

The Collar

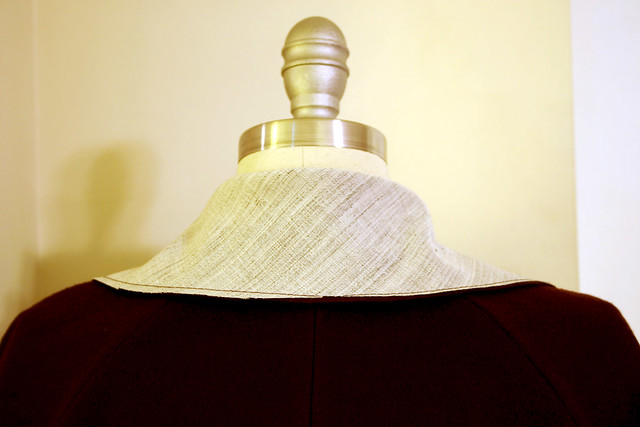
This was a little tricky to figure out how to execute.  The traditional tailored collar consists of an undercollar and top collar, with the undercollar including the collar stand in the pattern piece.  Then, the undercollar is padstitched to create and shape the roll line of the collar stand.  However, for the Yona Coat, there are separate pieces for the undercollar and the collar stand.  I was torn with how to proceed: do I try to redraft the undercollar with the collar stand attached?  Do I just throw caution to the wind and cross my fingers it will work, drafted as is?

The Threads article about Armani jacket interfacings mentioned how to handle this type of collar construction and interfacing weights to use, so I cut the undercollar on the bias, hair interfacing for the undercollar on the bias, the collar stand on the straight grain, and lightweight sew-in interfacing on the straight grain.  Cutting the undercollar and interfacing on the bias helps the undercollar roll under when it’s attached to the top collar.


yona wip4

Now you can see what the collar looks like with the top and undercollar joined together at the neck.  There was some significant turn of cloth that I needed to adjust before sewing the two units together along the collar seam.


yona wip6

And here’s what the front of the coat looks like before sewing the side seams!  I waited to sew them up until I applied interfacing to the hems, which I did the other night.  Again, not wanting to do more hand-sewing than necessary, I thought it would ok to use fusible weft interfacing cut on the bias for the hems.  It’s not such a critical area that it would be detrimental if the fuse application didn’t hold well, like in the lapels, but it seemed to fuse nicely with no problems.

As a side note – yes, this is a notched collar, and it’s not sewn correctly in these photos.  This was before I realized that, d’oh!  The collar and lapel weren’t connected at that critical seam at this point.  I went ahead and sewed the collar and lapel facings and graded the seam allowances before realizing this, and I got a really funny looking coat afterwards!  It wasn’t anything a little seam ripping and hand-basting couldn’t fix, and now my coat collar is correct, whew.

All that’s left is the lining, and if Mother Nature decides to not dump more snow and let UPS deliver my flannel interlining, I’m hoping to complete the coat by the end of the week.  My ultimate goal is to have a new coat to wear by Valentine’s Day (no particular reason, it was a month out from when I started planning all of this in January) and I think that may be a reality!

Follow:

Gathering The Supplies [Coat Project 2015]


Yona coat supplies

There’s a snow storm heading up the east coast this weekend, and staying inside to sew a coat while it snows sounds like the perfect way to spend my day tomorrow!  I think I’ve finally gathered all of the supplies I need for my Yona coat:

Fabrics

Wool cashmere – obviously what the coat is going to be made out of!  I think this will be warm enough, it’s a little lighter weight than a regular wool fabric, but after doing some research, I learned that cashmere is one of the warmest animal fibers.  Plus, I did the “wind” test: I held up the fabric near my face, blew on it, and couldn’t feel any air pass through the fibers.

Rayon coat lining – originally I bought a coordinating rayon lining for the coat, but since it’s pretty lightweight and I want to be able to wear this during the winter, I thought it would be prudent to upgrade to this hefty lining fabric.

Diaper flannel – yes, this is what people use to make cloth diapers!  But seriously, this stuff is nicer than regular ol’ cotton flannel – it’s a little thicker and much more plush.  I’m using this to interline the coat for extra warmth.

Interfacings

Hair canvas – I bought lightweight and heavyweight hair canvas for this project, since I wasn’t sure what I’ll need, but I think I’m going to go with the lightweight hair canvas for tailoring the coat front, lapels, collar, and interfacing for the sleeve and body hems.  Part of me wants to padstitch/custom tailor the coat front, the other part of me wants to machine tailor…

Sew-in interfacing – the cashmere fabric is sooooo nice, and I’d hate to ruin it with a fusible interfacing that doesn’t really stick.  So, I’m going to safe route and using sew-in interfacing for shoulder stays, back stay, facings, and maybe interfacing the front of the coat instead of the hair canvas.

Notions

Coat snaps – for keeping the front of the coat closed and the cold air out!

Buckle kit – I thought it might be cute to make a belt with a buckle to tie around my waist instead of just a sash of fabric.

Poly and silk thread – the poly thread is for sewing the whole coat, the silk thread is for any hand-basting I need to do.  Nothing like silk thread for hand-basting, it glides through fabric like buttah.

Thread conditioner – I’ve had this stuff kicking around since my jewelry-making days.  It’s great for strengthening your thread and keep it from getting tangled, and necessary for hand tailoring.

I think that’s everything!  My Friday night now looks like I’ll be watching some episodes of Breaking Bad on Netflix while I slowly cut out all of my coat layers…

Follow:

Yona Muslin [Coat Project 2015]


yona muslin 2

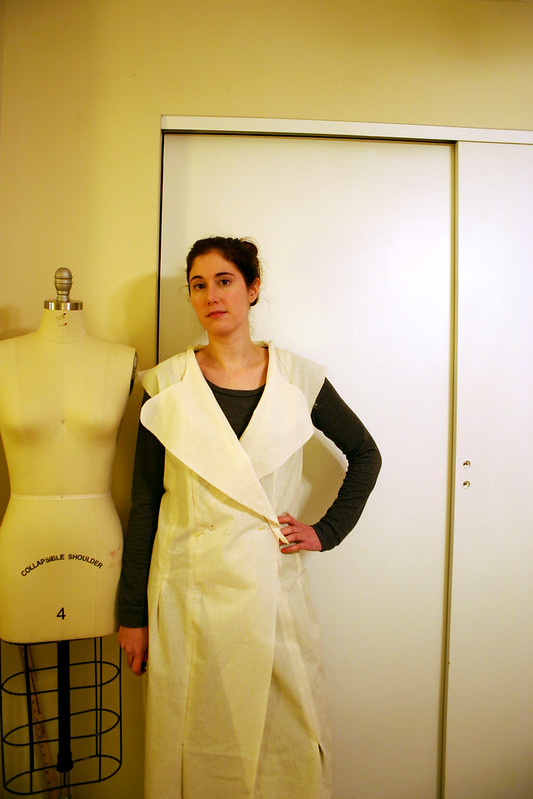
Hey hey, I had success with my Yona “muslin!”  On the day after my failed attempt at fitting Vogue 1365, I went out to pick up some more muslin fabric so I could try out the Yona pattern, but the idea hit me to try to make it out of some legit Malden Mills Polartec fleece I spotted at Fabric Place Basement.  It was so nice and soft, came in a heavier weight suitable for outwear (300 weight), and I thought it would closely emulate how the layers of my wool, interfacing, interlining, and lining would behave.  Plus, it would end up being a “wearable” muslin – what a nicer alternative to wearing my big red bathrobe to stay warm in my apartment!  A stylish house coat that I wouldn’t be embarrassed to be seen in when the FedEx guy drops off my boxes…whoops!


yona muslin 1

So yes, I’m very happy with how the fit turned out – it has the perfect amount of ease for a slouchy coat, and the subtle cocoon shape is perfect.  I cut out a size six, which was almost spot on with my measurements, and I really don’t need to adjust a thing – that’s the perks of making an oversized coat with an adjustable closure.


yona muslin 3

I was a little concerned with how the back would fit since this coat is roomy, but the belt cinches everything in nicely and I don’t have “bubble butt” with pooling, excess fabric; it’s actually quite fitted in the rear.

 Have you ever sewn with Polartec?  It’s really easy – you get a warm, lightweight garment and you don’t have to finish any edges or seams.  For this muslin, I cut out the body and sleeve pieces, the undercollar, and the belt using my rotary cutter to give everything a nice, clean edge.  Heck, in warmer weather, I may even wear this out of the house to run errands, it’s that nice!

I’m getting close to starting the real coat – tonight I’m testing out some options for interlining with my cashmere wool, interfacing, and heavy rayon lining fabric.  Once that’s final, I’ll gear up to cut out alllllll the layers and pieces – it’ll be like cutting out four coats when everything is said and done.  I’m a little bummed that I’m not going to be making a super-tailored coat like I was originally planning this year, but I’m pretty stoked about making Yona and I’m going to use quite a few tailoring techniques anyway.

Well, I better get a move on this – Jen just released her Cascade Duffle Coat pattern today and I’d love to make that as well this winter!  Having a wardrobe of coats is what makes winter in New England a little bit more bearable.

Follow:

So It Begins – The Great Coat Project of 2015


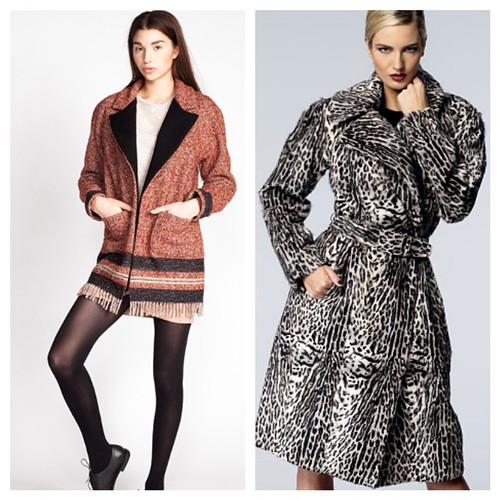
Taking an Instagram poll! Should I make the Named Yona Coat or Vogue 1365? I'm torn between the two, like the styling of both. Would be made out of eggplant purple cashmere wool. #instapoll #coatproject #sewing #tailoring

It’s the middle of January, so I suppose it’s time to get cranking on what I’m calling “The Great Coat Project of 2015,” or, my attempt to make a tailored winter coat this year.  Prior to starting, I made a quick tailored blazer that boosted my confidence in my tailoring skillz (which you may have seen on Instagram, photos to come), so I’m ready to go!

Of course, I got cold-feet initially – there’s so many variables to take into consideration when launching into a major project like a coat: what kind of fiber/weave/weight of fabric to use, combinations of interfacing to get the right support and drape, should I underline or interline (can’t do both!), how to make the coat warm without adding bulk, hand-tailoring vs fusible tailoring…I could go on.  There were quite a few nights recently where I was up to the wee hours of the morning researching and reading and making myself dizzy with the knowledge and contradicting opinions of those who have prior experience making coats.  And of course, I doubted my choice in pattern selection at the last minute and put up a poll on Instagram and Twitter last weekend on which coat I should make.

Vogue 1365, on right above, won the poll on Twitter.  The Named Patterns Yona coat, on left, won on Instagram.  Since I originally planned on making the Vogue coat, I went ahead and cut out the muslin this week to see what the fit was like – if it was bad, I could always use Yona as my backup plan.

To sum up my Vogue 1365 fitting-experience: I’m making the Yona coat now.


vogue coat 1

Doesn’t look too bad, right?  I’m not standing up straight, so the fronts aren’t lined up correctly. Holy lapel action, Batman!  Those are some statement lapels, amiright?


vogue coat 5

Not too crazy from the side either…


vogue coat 6

I think the back is ok, too.  Setting the sleeves in would alleviate some of the bagginess around the armholes, I wasn’t too concerned with it.


vogue coat 2

Seriously, I could fit my lunch in here.

So here’s where it gets good…my friends, this coat is drafted with 10 inches of ease in the bust.  After doing some extensive research on coat ease (on one of those recent late nights I referred to), 10″ is standard ease for a loose-fitting coat and is calculated to fit over a jacket and a blouse (here’s a great post on Sewingplum about layering ease for BMV patterns).  However, on the model on the pattern envelope and also in the article “Secure a Coat Lining” from the December 2014 issue of Threads, this coat has much more of a semi-fitted look.  I cut a straight 10 for this coat, which is typical of what size I make for Vogue patterns, so I figured I would just go down a size in the chest and grade out at the hips – no big deal.

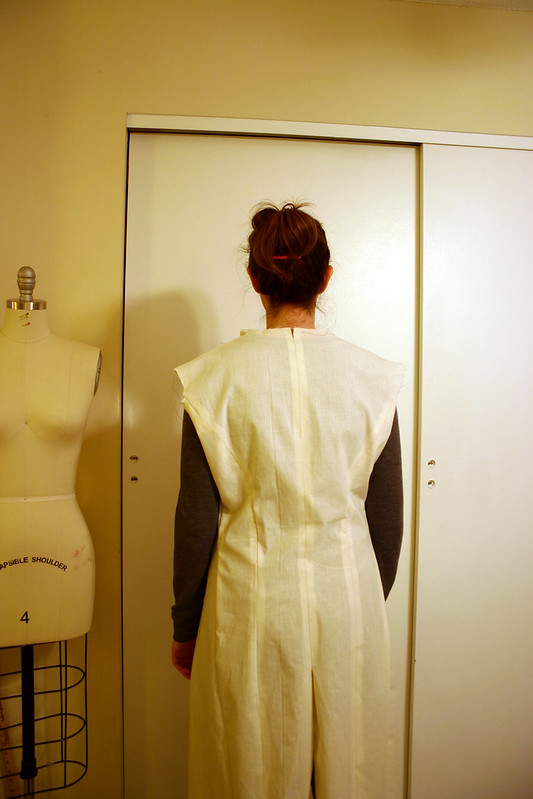
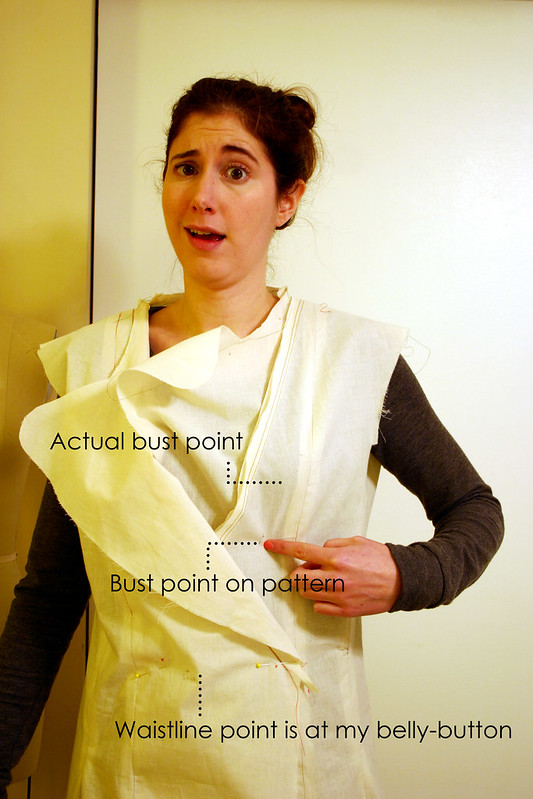
HOWEVER – observe the following photo illustrating where the real issues with this coat lie:


vogue coat 3

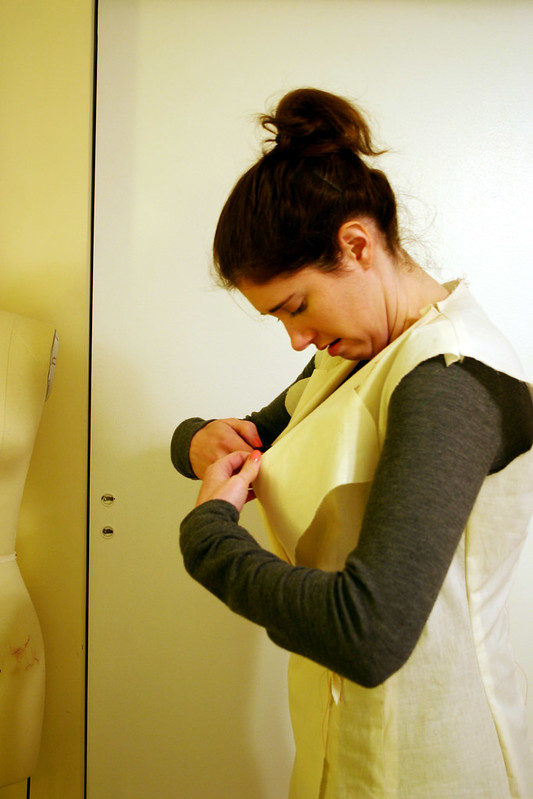
In order to get this coat to fit correctly, there needs to be some major overhauling of the entire front.  The bust point is two inches below my actual bust point – I run into this problem from time to time, but never to this dramatic effect!  The waistline is almost down to the top of my hip bones by my belly-button.  Fixing the waist would be no problem, since I could just adjust along the “lengthen or shorten here” line on the pattern, but altering the pattern to raise the bust to the correct level would affect: the front, front facing, length of the lapel and lapel facing, side front, armhole, and all three parts of the three-piece sleeve.  Maybe even the collar, too.

It was at this point that I threw my hands up in the air and said, “fuggedaboutit!”  There’s already going to be so much labor put into constructing the coat, since I decided to hand-tailor this project, that I couldn’t really bother/deal/didn’t want to go through with the pain of redrafting half a coat to get it to fit me correctly.  Hmm, is there a reason I couldn’t find a single person on the internet that made this coat pattern?


vogue coat 4

Additionally, the side seams irritated me.  No, this is not an error – the side seams are really supposed to hang like that, I checked the line art and it shows the side seams curving towards the back (the front is cut much wider than the back).  In my opinion, even though this is an intentional part of the design, it just looks bad – one of the hallmarks of a well-tailored coat is a side seam that hangs perpendicular to the floor, and I want my coat to look well-tailored.

I love the style of this coat, but I’m quitting while I’m still ahead and moving on to the Yona Coat – this is why we make muslins to test-drive patterns before cutting into our nice fashion fabric!  Yesterday evening, I made a muslin of the Yona pattern and the fit is absolutely perfect – more to come on that, I can’t wait to share!


Coat-Project-2015

Are you making a coat this winter?  Sew along with me!  Use #coatproject2015 on Instagram to tag your progress so we can all see what you’re working on!

Follow: