Finished Project: Polka Dot Laurel [Colette Patterns]


polka dot laurel1

Pattern: Laurel from Colette Patterns
Fabric: cotton voile from Mood Fabrics
Size: 2 graded to a 6

Jeans: Michael Kors

Hooray, it’s another Laurel!  One of a few I have planned for fall.  When I was in NYC last month I stopped by Mood, and just about every fabric I walked out with has some iteration of a polka dot print.  Maybe I was having a polka dot moment?  Well, in my opinion, you can never go wrong with polka dots.


polka dot laurel2

This version is probably more suited for spring since the cotton is very lightweight and a little on the sheer side, but our fall has been really mild so far and I wore this all day at the park without a jacket.  It also gets a bit wrinkly, just like my previous Laurel I made in the spring.


polka dot laurel3

I opted to use a bias facing for the neckline instead of binding the neckline for this version (I was also being suuuuper lazy in making bias tape, too).  I followed Jen’s directions and they worked like a charm, I actually like the result much better than my first top.  I think I’ll be doing this in the future for my next Laurel, a plaid flannel.

Follow:

Pattern Review: Blue Beignet Skirt [Colette Patterns]


beignet1


beignet2

Pattern: Beignet from Colette Patterns
Fabric: Blue cotton twill from Metro Textile in NYC
Size: 6

Top: Jasmine

This skirt was a long time in the making.  Back in January I attempted to make a Beignet skirt from some luscious green wool I bought on a shopping trip to New York.  There was my first mistake – the wool was way too heavy/bulky for this kind of skirt.  It was a matter of romance with the color: I envisioned a sleek, sophisticated moss colored skirt with light green buttons.  Sadly, the skirt looked like a big sack and the buttonholes were a nightmare, mostly because I wasn’t using the right techniques for sewing buttonholes and buttons in place.  Twelve buttonholes are not for the faint of heart.

Fast-forward to early April – I’m visiting my parents during Sewcation and using my mom’s sewing room to try my hand at this skirt again.  I omitted the lining (didn’t feel it was necessary and didn’t want to risk the bulk issue again) and sewed the skirt together pretty easily.  And then, it was just me and the buttonholes…


beignet3

I’m laughing because I conquered those bastards!

The automatic buttonhole feature on my mom’s Bernina has now forever spoiled me.  Helloooo…it remembers the buttonhole length for all the buttonholes you need to sew!!  No guessing or crossing your fingers (bad to do when sewing anyway), just press the button, guide the fabric, and voila.  Perfect freaking buttonholes.  It’s hard to go back to my hand-crank four-step buttonhole sewing machine after that little bit of sewing heaven…

I also learned the hard way that it’s more exact to make tailor tacks rather than use chalk to mark the holes.  I think that also helped out a lot in getting nice, straight, even buttonholes.

And then there’s the cutting open of the buttonholes.  I posted a video tutorial on the best way to open buttonholes when I made this skirt and really, it’s pretty great if I do say so myself.  There were no seam ripper nightmares on this skirt!


beignet4

Overall, I’m pretty happy with this skirt.  The fit isn’t as sleek as I’d like and seems to stand out more than other Beignet skirts, like Rachel’s from House of Pinheiro.  If I had been more concerned about the fit at the time, I would have taken in the seams a little bit in the front (it dips in slightly) and sides.  I feel like the waist should fit a little tighter…maybe it would fit better if I paired it with a belt (I didn’t like how it looked with the fabric belt at all).

Would I make this skirt again?  Maybe…it was a big time investment in making the buttonholes and sewing the buttons down (a trick I’ll try to share on here sometime).  I like Andrea’s version with no buttons – that seems more like a realistic repeat to me. But there’s other button skirts on my radar, too…(hello Kelly skirt). Only time will tell!

Follow:

Cocktails with Colette in Boston


Untitled

Me, Karissa, Sarai, and Ana


Untitled

Refreshment and goody table


Untitled

Laurel dresses in the shop – the fabrics give them each a different look


Untitled


Untitled

Sarai’s gorgeous eyelet dress, from the Laurel PDF

I have to say: Cocktails with Colette was a total blast last Saturday at Grey’s Fabric and Notions in Boston.  Sarah went all out with the treats, music, and even made a special cocktail for the event, the Basil Snippet (super yummm, btw).  It was so encouraging to see the turnout at the party – I had no idea that there were that many sewing enthusiasts, especially younger ones, in and around Boston.  It just goes to show, sewing is growing stronger and isn’t going anywhere!  Some of my favorite Colette makes were an eyelet Violet blouse worn with polka dot Iris shorts and heels, and a black Swiss dot Laurel.  I’ve never seen so many Colette garments in one room before!

In regards to the first photo at the top – yeah, my friend Karissa and I had a total fan-girl moment when we came in and saw Sarai; it ended up being Ana asking for our picture to be taken since we were too shy and awe-struck.  Sarai was so sweet to chat with us and answer our questions about the pattern line, sewing, and as Ana found out, knitting as well.  We also learned another pattern will be coming out soon this summer…can’t wait to see what it is!

Follow:

Finished Project: Laurel Dress [Colette Patterns]


Laurel party dress1

PatternLaurel by Colette Patterns (view 1 )
Fabric: Eyelet from Fabric Place Basement, Silk Habotai from Grey’s Fabric and Notions
Size: 2 graded to a 4

Belt: self made (see Tilly’s Bow Belt Tutorial)
ShoesTommy Hilfiger
EarringsFrancesca’s 

Well, I did it!  I finished my Laurel dress in the nick of time for the Cocktails with Colette party last Saturday in Boston (pics and party details to come later this week).


Laurel party dress2

The Fabric 


I had a couple of firsts with this dress – it was my first time working with silk (eek!) and my first time underlining a garment.  The underlining probably would have been much easier to do had I not been working with silk which, by the way, was a miserable experience.  All the shifting, all the raveling….ugh!!  I’m not a fan, to say the least.  Had I had a bigger cutting mat, I would have used a rotary cutter to cut out the lining pieces, or if I had tissue paper, I would have tried the paper sandwich method to cut out the fabric.  But I took my time with hand sewing the darts and the basting of the two fabrics together and it turned out alright.


Laurel party dress3


The Pattern 


The dress seemed to fit a little different than the top.  For my top, I cut out a 2 for the bust, a 4 for the waist, and a 6 at the hips.  When I did that for the dress, it hung like a sack and and felt and looked too big on me. After re-grading down to a 4 for the waist and hips, the fit looked better but…I just wanted a little more of a fitted look.  Tilly’s Bow Belt to the rescue!  I cut out some leftover silk (with my rotary cutter this time) and whipped one up following her instructions.  I love the contrast to the main dress fabric and the belt makes the green underlining pop and stand out a little bit more.  In the future, to get a better fit, I’ll take in more at the back darts – the front fit was great but it really looked like it was the back that had more of a fitting opportunity for me.  Again, this was different from how the top fit on me.


Laurel party dress4

A word of caution: this dress is s-h-o-r-t!  Which, if that’s your thing, this dress is perfect.  I could have made this a teensy bit longer, since it’s difficult to pick up things in a dress this short, but the length makes the dress much more hip and fun than if it was a longer length.  Because, you know, no one wants to wear a long shift dress – that would just look frumpy.

Follow:

Pattern Review: Laurel Top [Colette Patterns]


easter laurel top1


easter laurel top2

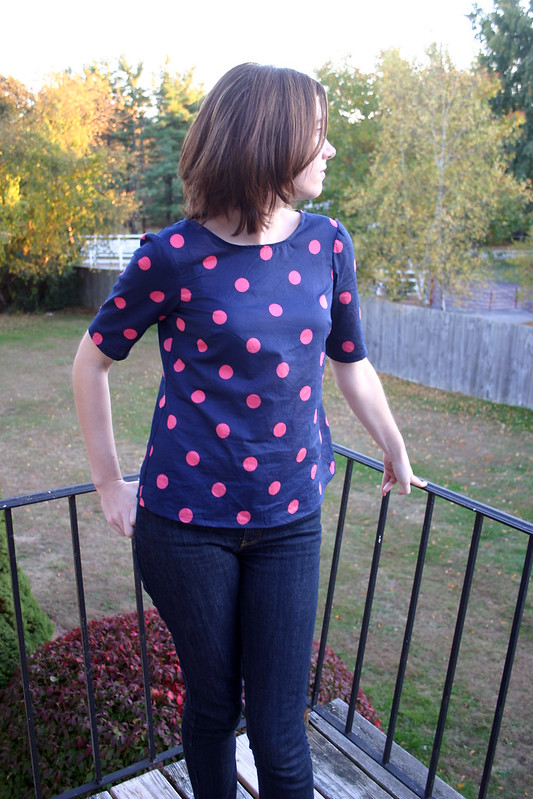
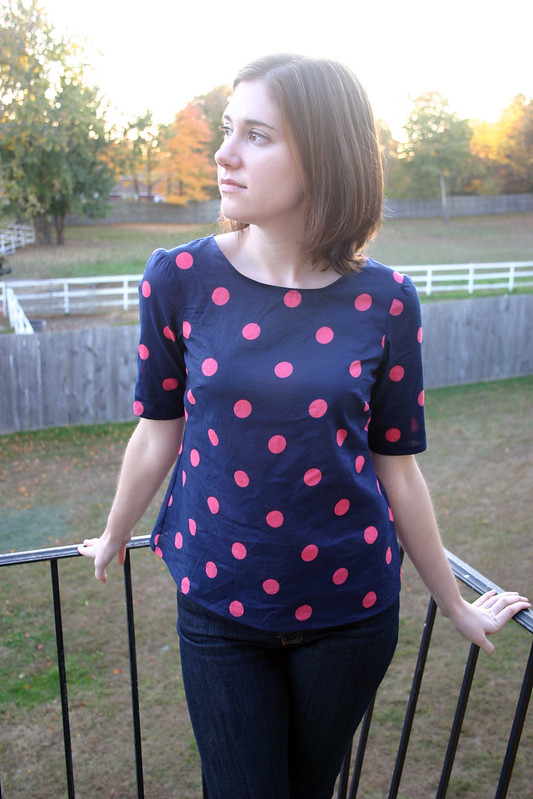
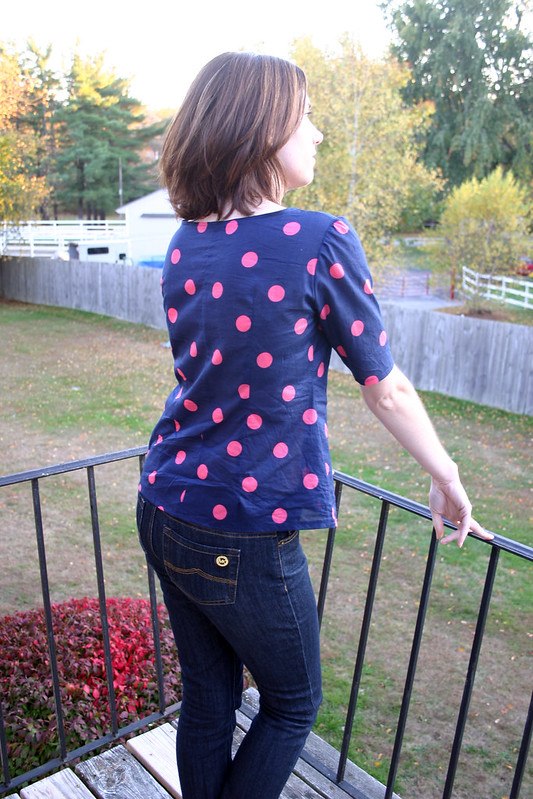
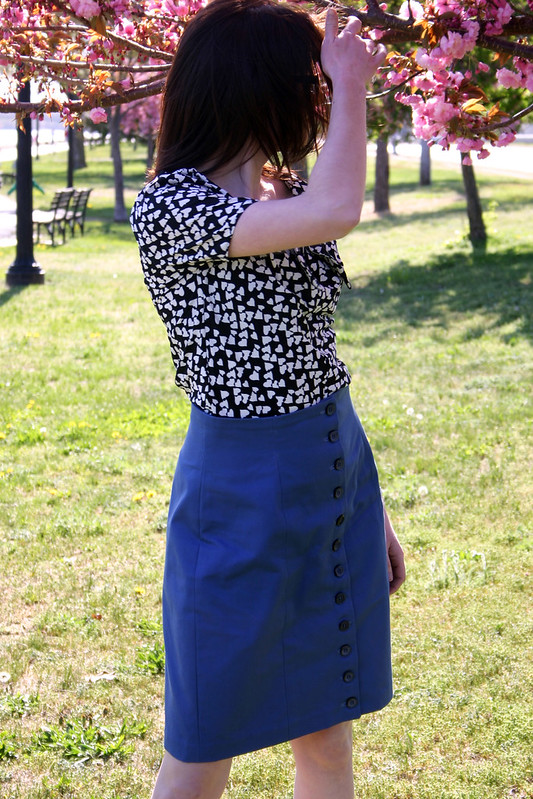
Pattern: Laurel by Colette Patterns, pullover top version
Fabric: Swiss dot from Mood Fabrics
Size: 2 graded out to a 6

Jeans: Levi’s
Earrings: Francesca’s
Sunnies: Tommy Hilfiger
Nails: Essie “Play Date”

My first wearable “practice” garment!  In preparation for sewing the dress version of the new Colette Laurel pattern, I pulled out some Swiss dot I bought at Mood several summers ago in NYC and thought, if the fit worked out,  it would make a cute top to wear for Easter.  I love this pattern!  My fabric is all washed and ready to go to make the dress and I can’t wait to see how the fabrics come together (I’m layering eyelet over silk habotai).


easter laurel top3

These pictures were taken after eating Easter dinner, so please excuse the wrinkles from sitting! 😉

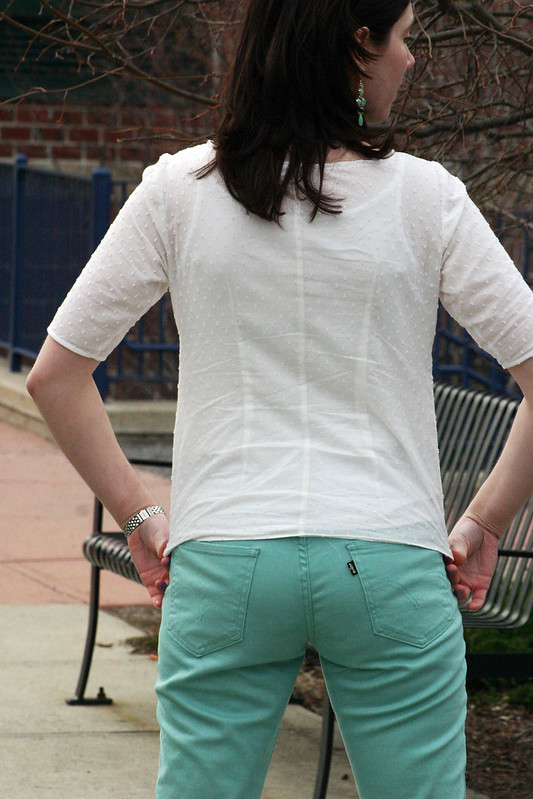
Unlike a lot of pullover tops, this one has a good amount of shaping.  I cut a 2 for the bust, graded to a 4 at the waist, and then a 6 at the hips, but I probably should have cut the bust as a 4 since it’s snug to pull on and off over my head.  Or, in the next version, I could do a cool exposed zipper in the center back seam.  Other than that, I didn’t need to do any other fitting – even the bust darts were spot-on perfect, didn’t need to move them up like I usually do.  The back waist darts add a nice amount of shaping as well that keeps the back from poofing out.  At no time did I feel like I was wearing a blousey maternity top!


easter laurel top4

The bias tape finishing for the neckline and sleeve hem was a nice, neat touch.  Being the lazy sewist I am, I opted to sew the bias tape in place with my machine instead of my hand.  I will probably hand sew my dress since it’s going to be made out of special fabric.


easter laurel top5

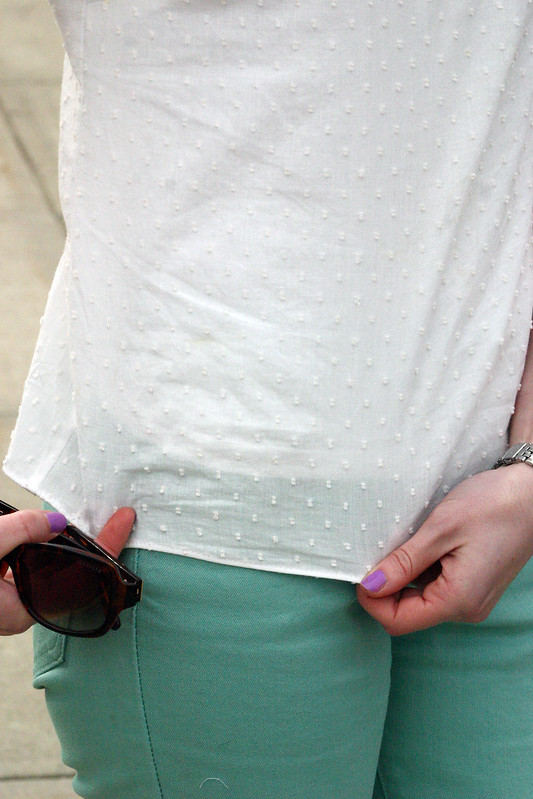
The reason I held on to this fabric for so long in my stash is because, as you can see in the picture, it’s really sheer (and wrinkly!).  I felt like if I made a dress with it, it would look like I was wearing a nightgown, plus I’d have to line it – no fun.  This top is really fast to make but took me a little longer since I French seamed alllll of my seams, even the sleeve seams.  I think I’m addicted to French seaming, it makes everything look so clean and tidy inside, plus it’s perfect for sheer and lightweight fabrics.  The hem is a teeny tiny narrow hem I machine stitched using this tutorial from Jen at Grainline.

That’s pretty much it!  It was in the mid 50’s in Boston on Easter and this top was perfect for the early spring weather.  If you’re looking for a no-brainer, instant gratification project, the Laurel top is a great garment.

Follow: