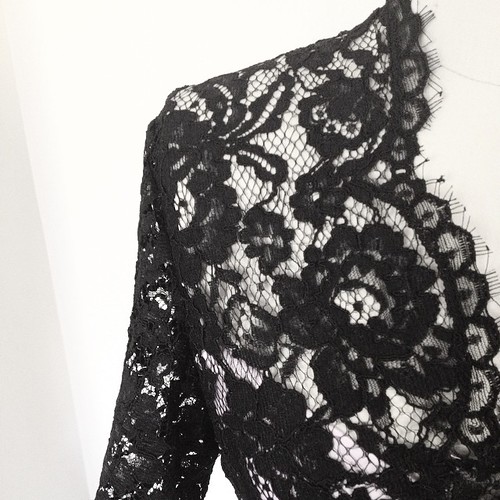
Pssst – here’s a sneak-peek of what I’ve been working on over the last few weeks. When I decided to make a dress completely out of lace fabric for a friend’s upcoming wedding this weekend, I didn’t anticipate the challenges that would come along with working with such a, well, see-through and airy fabric!
Ladies, there’s a reason why those lace wedding dresses on “Say Yes To The Dress” are wicked expensive – sure, the name on the label inflates the price of a wedding dress, but working with lace is very time and labor-intensive, and to achieve a seamless-looking garment, there’s a lot of couture sewing techniques that need to be used. Of course, none of this occurred to me until I sat down with my sewing books and did a little reading about how to work with lace fabric. Here’s what I learned and how I made my dress.
Lace needs to be cut in a single layer
To get a seamless look, each pattern piece needs to be a full pattern piece (no half pieces) and cut on a single layer of lace. This allows you to match up motifs when planning out how to cut out your garment so the lace pattern can continue through the garment without any interruption at seam lines. Then, cut around the motifs that extend beyond the edge of the paper pattern, which will be appliqued on top of the joining garment piece at the seam line (this only needs to be done on the garment front pieces, not both front and back. You’ll see why later when we sew the seam). My lace pattern was so busy that I didn’t need to worry about matching up motifs.
Also, did you know that lace doesn’t have a grainline?
Mark all seam lines and notches with silk thread
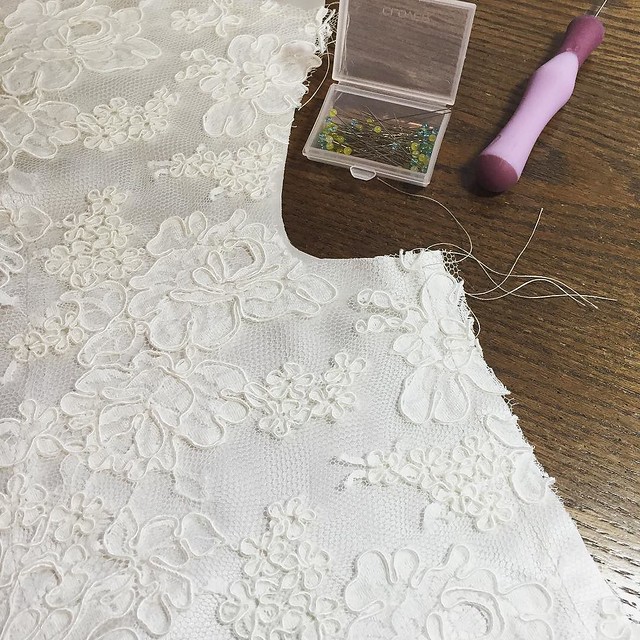
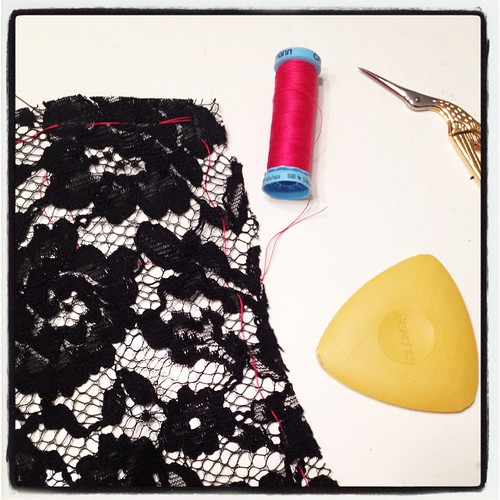
After the garment pieces are cut out, seam allowances need to be thread-traced. For my dress, I used hot pink silk thread and basted the 3/8″ seam allowance line. Silk thread is great for lace since it slides smoothly through the fabric and is easy to remove after the machine stitching is in place. I also used tailor’s tacks to mark darts and notches. I tried to use tailor’s chalk, like in the picture above, but it was too difficult to accurately mark where I needed to mark because of the openness of the fabric.
Are you with me so far? All of this prep work took about two nights to complete, whew!
Applique seams for a seamless garment
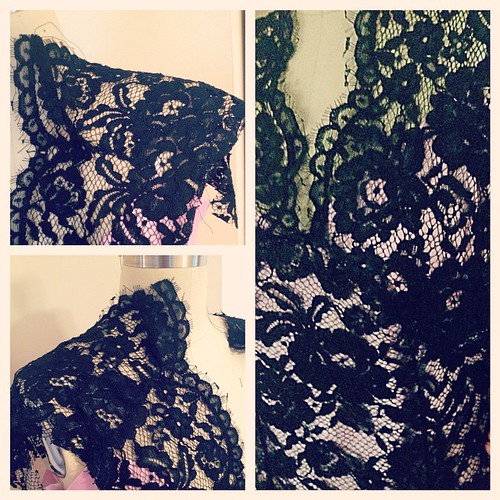
Since lace is see-through, seam allowances showing through is not the most ideal look. You could sew French seams, but the seam will still be visible through the lace, and some lace is too bulky for that kind of seam treatment. To get the illusion of a seamless garment, like in the photos above, I used applique seams.
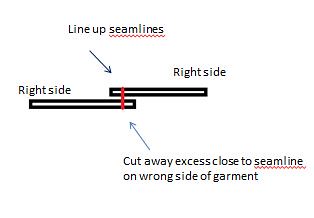
To explain, I’m going to reference sewing a side seam in a dress. Layer the right side of the dress front over the right side of the dress back, lining up the seam lines – this is where the thread tracing comes in handy! There will be excess extending from the seam allowances on the top layer because of the motifs that we cut around beyond the seam allowance. Then, using a narrow zig zag, sew around the motifs along the seam – you may end up sewing pretty far away from the original seamline, but that’s ok. When you’re finished sewing the entire seam, use your applique scissors to cut away the excess fabric underneath on the wrong side, close to the seam line. Voila – seamless looking seam! I also needed to cut away some of the fabric on the right side of the garment, close to the stitching. If you’ve ever appliqued in quilting, sewing applique seams is a very similar technique.
I found this video really helpful when I tried to wrap my head around applique seams. The only seams that I didn’t applique for my dress were the sleeve seam, because it was so short and no one will see it unless I lift my arms up, and the armhole seam…because that would be way too hard. If you don’t want the armhole seam to show through, you could bind it with a bias strip of silk close to your skin color.
Applique seams also helped me out of a bind – I thought my muslin for the dress fit me fine in the hips, but when I sewed the side seams in my lace garment, it was too tight. Like, I couldn’t sit down! I have my theories on why this happened (I think it had something to do with a tuck of fabric I took out in the bust/waist), but I cut open the side seam where I had fitting issues and appliqued what was essentially a lace gusset to get more room in the hips:
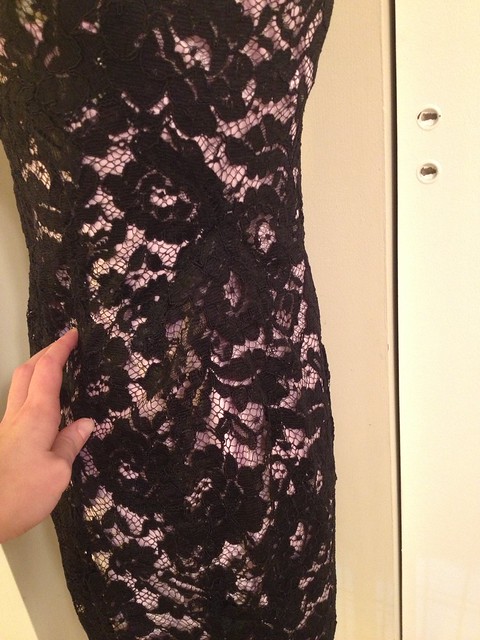
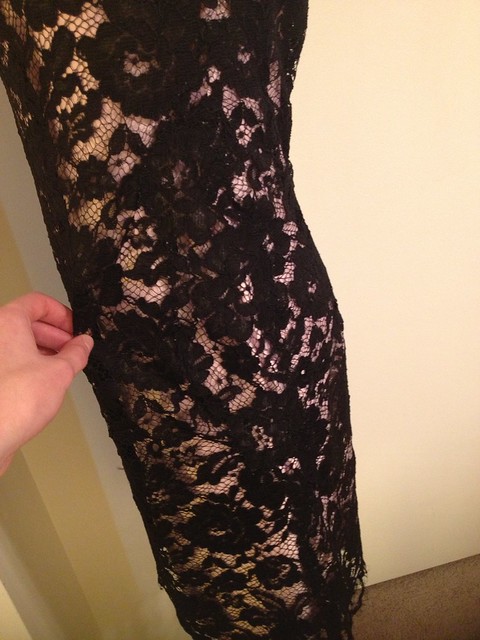
I can tell where I inserted the gussets (and maybe you can, too!), but you have to admit, it’s pretty tricky to see where the seams are. Applique seams totally saved this dress from being a tragic disaster.
Yes, you can insert an invisible zipper in lace
Don’t get me wrong, I was sweating bullets and so nervous when I sewed my invisible zipper in the back. I mean, what if I screwed up and got the zipper twisted? Spoiler alert: I did! What saved me was that I basted the zipper in first and used a contrasting thread so it would be easier to see the stitches if I needed to rip them out. Just taking some simple precautions beforehand makes it possible to sew a zipper in a lace garment.
Here’s the big question: would I ever sew with lace again? Well now that you mention it, I have some lace in my stash for two simple blouses, but I don’t think I’d jump at the chance again to make a lace garment like this knowing all of the labor and time that goes into constructing a lace garment. Lace is not for the faint of heart, my friends!
Have you ever sewn with lace?
