Wedding Dress Update – We Have A Bodice!

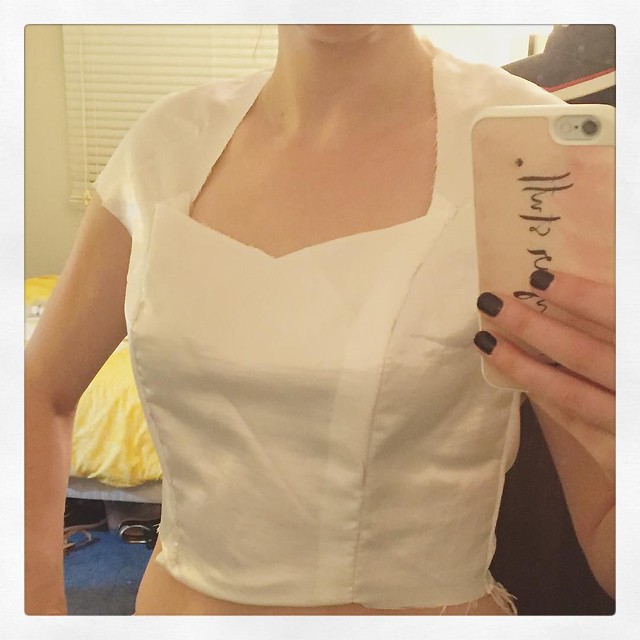
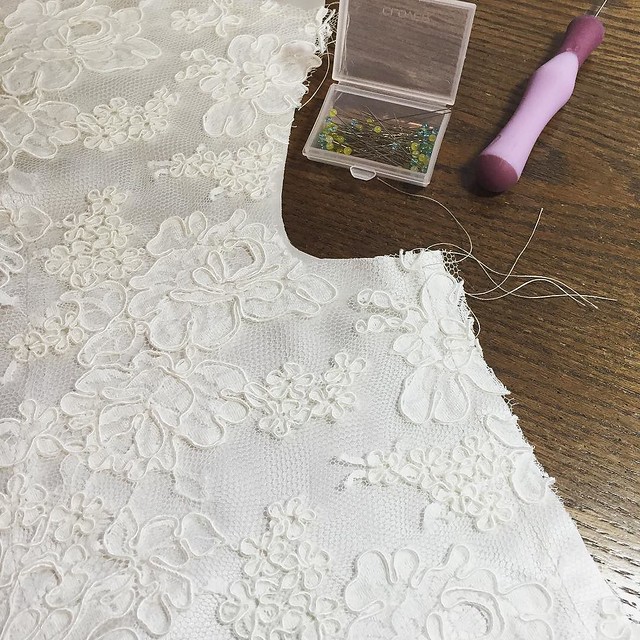
Underlining in progress...a little more finicky than I thought it would be. Gotta stay-stitch silk! #sewing #weddingdress
Tomorrow is five months until the wedding, and I can confidently say that I am making progress on sewing my wedding dress.  Finally, right?  I’ve only been talking about making this dress for, oh, I don’t know, the last eight months or so.  HAH!

A good chunk of my Christmas vacation was spent carefully cutting out single layers of silk, silk georgette, and lace on top of my parent’s ping-pong table, which was the perfect surface for spreading out all of this fabric and just wide enough for my fabric to fit.  I realized after I started cutting out the silk that there was no way possible that I could have cut this out on the floor at home and have everything nice and smooth.  I even had an earlier crazy idea to go into the office on a weekend and use the long conference tables pushed together in a meeting room to cut out all of my fabric, but the tables wouldn’t have been wide enough and I would have run out of time.

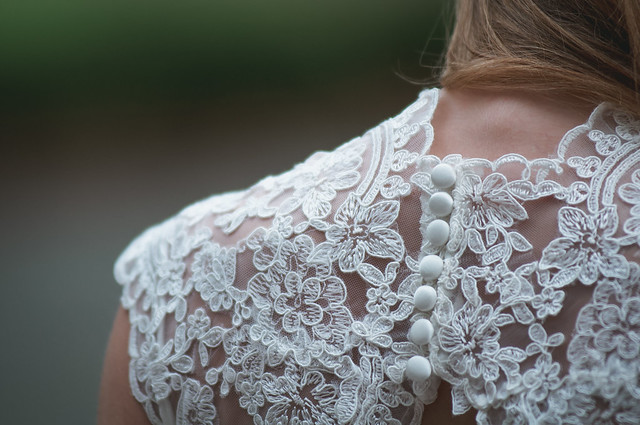
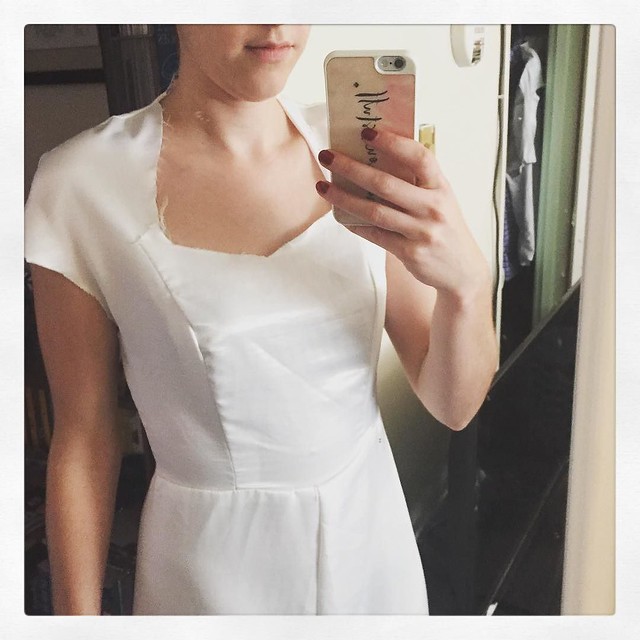
I’m happy to say, after many hours of careful pattern placement and cutting with my Gingher shears, I have all parts of my wedding dress cut out and ready to sew.  I even went ahead and underlined and assembled the bodice while on vacation – that lace gave me a bit of a panic attack when I started to underline it with the silk because it ended up growing slightly, but after some careful pinning and stitching, everything went together just fine.

Here’s a little video of how my dress is coming together – I also talk about how exactly I cut out my silk and silk georgette, the problem I ran into with my lace, and some thoughts on the oh-so-coveted book Bridal Couture by Susan Khalje:
 

Click here to download my Wedding Dress Sewing Resource Guide
 

Follow:

A Video Update of My Wedding Dress

I got the base of the dress to fit - 181 days to go #weddingdress #sewing #diyeverything
Hooray for productive weekends!  I got so much done – unpacking from a trip, laundry, groceries, cleaning…oh yeah, and getting my wedding dress pattern to fit.  OH YEAH.

That’s right my fellow readers, I am now ready to cut out my wedding dress from the lovely silk, lace, and silk georgette I bought in September.  Good thing too, because tomorrow marks 180 until I need to wear this dress for the big day.

I thought it would be fun as I go through the creation process to share some videos of the different stages I’m working on – I think it’s a lot easier to show the whole dress and details through video since I can’t capture everything in a photo, like how the fabric drapes and behaves.  Here’s my second entry in my “Wedding Dress Diary” (the first one was a Periscope, which you can view here).


Follow:

First Wedding Dress Update

Today, November 17, marks 200 days until the big day.  That means there’s 200 days left for me to get my wedding dress made.  Ahhh!!!  I wrote in my newsletter (psst you should sign up!) a few weeks ago that I needed to buckle-down and fully commit to getting this dress made – I’ve been thinking about it so much to the point that I’m having dreams of showing up to my wedding and not having anything to wear.  That’s my sub-conscious for you…no more “sew-crastinating” with other projects.

This past weekend, I pulled out my dress muslin I made back in August and noted what needed to be fixed in order to get the fit right.  The neckline needed to come up at least an inch, the princess seams had too much fullness through the bust, and the waist of the bodice and skirt were too big.  After some fiddling around with pattern alterations, I’m really happy with the fit of the bodice.  It’s fitted, but not so tight that I won’t be able to sit down, eat, or dance.

The only problem I ran into this weekend was the time I had to sew vs what I wanted to accomplish on the dress…I  just couldn’t get everything done that I wanted to, and I’m not going to hit my self-imposed deadline of cutting out the real dress fabric this weekend.  On top of that, I discovered a mystery waistband piece that I didn’t use when I assembled my muslin, and it threw a wrench in my fitting plans.  More on that for another time when I figure out what’s going on with the skirts of the dress!

Are you on Periscope?  It’s pretty fun to see snippets of other people’s lives from around the world, and I’m enjoying sharing my sewing projects and what I’m working on with other fellow sewists.  The only downside is that the broadcasts are only good for 24 hours, and then they disappear (kind of like Snapchat).  However, my broadcast from Sunday was automatically saved to my camera roll on my phone, so I decided to upload it to Youtube and share it here! The screen grab below is oh-so-flattering…and if it appears like I’m reading something off of my phone, it’s because people watching the live broadcast can post comments and questions, so I was responding to some of those as I went.

Check out my video below to get a good look at my dress muslin and also see the fabrics I’m using for my final version – I also have some tips on working with Marfy patterns.

BONUS: Get my free guide on Wedding Dress Sewing Resources and learn about where to buy your fabric, books to read, and classes to take for making the perfect wedding dress
Click here to get the free download
Follow:

3 Things To Consider Before Sewing Your Wedding Dress


wedding buttons

It’s been a while since I wrote a wedding dress update on the blog, so I thought I’d share a little bit of the progress I made so far and what I’m learning along the way.  First things first – yes, I bought the fabric for my wedding dress!  My trip to NYC was successful and I came home with just about everything I need to get cracking at stitching it up, just a few detail elements that I’m going to wait on figuring out (embellishments etc).  The goal is to start the actual cutting out and construction next month, probably around the Thanksgiving holiday.  I need to get a move on it soon, so many people are asking me how it’s going so far and I haven’t started yet!  I blame the Halloween costumes…

There’s a few things I realized so far during the process of planning my dress that I wanted to share, in case anyone else out there is thinking about making their own dress.

1. How much time you’re willing to devote to this HUGE project? Of all of my DIY ideas for my wedding, this one is hands down the most important to me – it’s the only element of my wedding that I thought about before I was engaged. If I end up needing to farm out some projects to my bridesmaids, or if it looks like I can’t make that giant photo booth backdrop of white paper flowers, I need to be OK with that because my dress trumps all. Don’t underestimate the amount of time it’s going to take to make your dress — like I said, I’m starting mine soon to make sure I’m not sewing under (too much) pressure.

2. Understand Your Dress Style It wasn’t until I tried on dresses at David’s Bridal (which was as un-magical an experience as possible, btw) that I felt confident in the wedding dress I wanted to create. It’s one thing to picture how something will look on you in your head, it’s another to actually put the dress on and really see how the silhouette looks on your body in the mirror, how the train moves, etc. From this appointment, I learned that a sweetheart neckline and cap sleeves were something I wanted to recreate in my dress, but didn’t feel comfortable in a sheath-type of fit. Bring on the empire waist, Marfy Patterns! 

3. Respect Your Sewing LimitationsHow confident you feel in your sewing capabilities will ultimately determine the type of dress that you’ll sew and wear for the big day. If you’re relatively new to sewing, it may be beyond your skill level to recreate a fitted strapless ballgown complete with boning and layers of poofy tulle. If you’ve been sewing for a while, maybe you can tackle a dress with couture handwork and intricate draping. Sewing with silk and chiffon also present their own fair share of sewing challenges. At the end of the day, make sure you set yourself up for success with choosing a sewing pattern as well as fabric that will allow you to achieve beautiful results with your current skill set. It’s going to look great!


BONUS: Get my free guide on Wedding Dress Sewing Resources and learn about where to buy your fabric, books to read, and classes to take for making the perfect wedding dress

Click here to get the free download
Follow:

Mission: Wedding Dress Fabric in NYC


Untitled

Obviously an old photo, there’s snow on the ground…

Hey NYC, I’m headed to you tomorrow!  I’m on the hunt for wedding dress fabric and I gotta find it this weekend.

I made a preliminary list of must-visit stores to hit Friday and Saturday before I head back to Boston Saturday evening, but I’m looking for input from anyone else on other stores I should try to visit as well.  For my dress, I’m looking for bridal lace (you know, embellished with beads and stuff), silk georgette or chiffon, and silk crepe-backed satin.  Here’s the stores I have lined up so far:

  • Sposabella
  • Fabrics and Fabrics
  • NY Elegant Fabrics
  • B&J
  • Mood (duh)
  • Metro Textiles (my fave)

…and then M&J Trimmings, Pacific Trimmings, and Sil Thread for embellished appliques that I can add to gathered fabric at the waist and other notions.

Any suggestions of stores I’m missing that I really should visit for wedding dress fabric?

Wish me luck!

UPDATE: Success! I found all of the fabric I needed in NYC and want to share everything I learned with you.


BONUS: Get my free guide on Wedding Dress Sewing Resources and learn about where to buy your fabric, books to read, and classes to take for making the perfect wedding dress

Click here to get the free download
Follow: