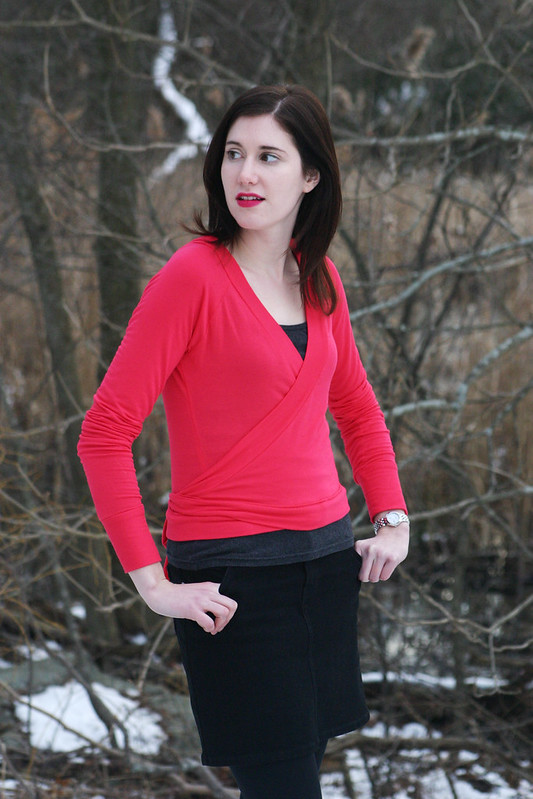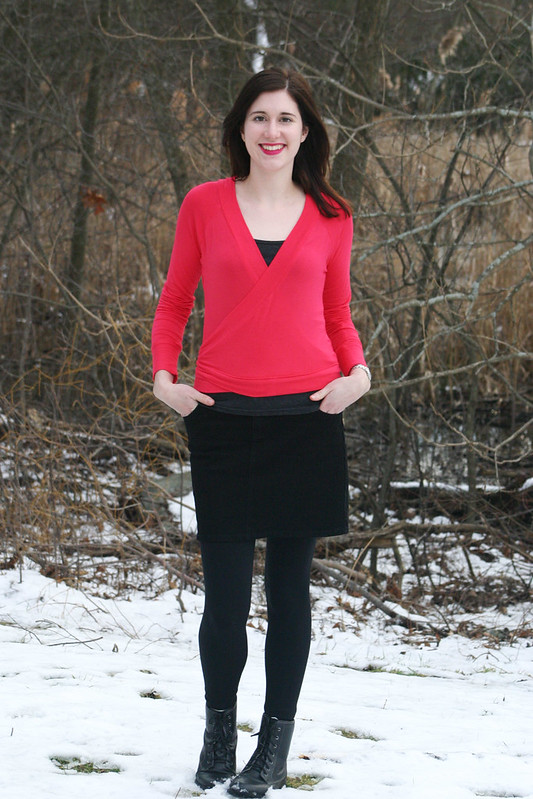

Pattern: Coppelia Cardigan from Papercut Patterns
Fabric: Rayon jersey from Metro Textile in NYC
Size: XS with modifications
Tank: Old Navy
Skirt: Tommy Hilfiger
Leggings: Guess
Boots: Sporto
Lipstick: NARS Funny Face
Lauren beat me to it, but here’s my rendition of the fabulous Coppelia Cardi by Papercut Patterns. For those of you not familiar with Papercut Patterns, it’s an indie sewing pattern line based out of New Zealand. The designs are fresh and modern without being too trendy – a lot of the patterns remind me of pieces I covet in the upscale boutiques on Newbury Street in Boston. I can see these patterns getting a lot of rotation in my closet since they’re great wardrobe staples and beyond.
As a side note, when I asked my boyfriend to take pictures of my new cardi, he was confused because he thought I bought this. Yesss, mission accomplished!

Explained in a post earlier this week, I needed to make some size modifications after I finished the cardigan and tried it on for fit. It didn’t fit anywhere as closely as I wanted it to, even though I was making an XS, and I ended up shaving off about two inches from the raglan length and tapered in the sleeve and side seams quite a bit. I could have shortened the sleeves as well since they’re on the long side, but I don’t mind the pushed-up sleeve look. Plus, they keep my hands warm! Lauren mentioned that she took out an inch in the width of the back piece of her cardigan, and I definitely think I could have benefited from doing that alteration as well since I have a small back. For future cardis, since I have a nice white jersey that would be perfect for this pattern, I’ll cut out the XXS and go from there with any pattern alterations.

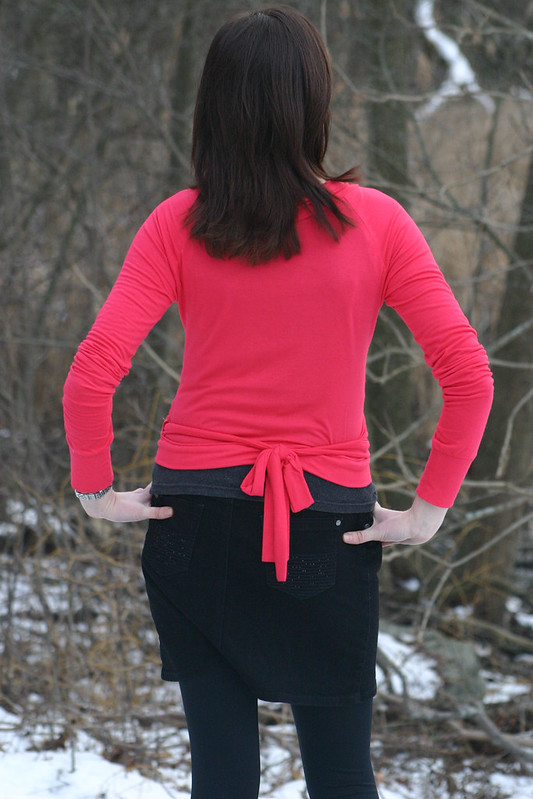
My favorite way to tie this cardigan shut is by wrapping the ties around the back, like how the model is wearing it on the Papercut Patterns website. I don’t know why it’s so hard for me to understand how to tie wrap tops/dresses/anything, but this was the only way I could get the cardigan to look ok. I don’t really notice the knot in the back when I sit down either, which is a plus.

The pattern was easy to sew together even though the fabric I worked with was fluid and didn’t have a lot of body. I stumbled at the hem facing section of the instructions because a) I was tired and b) logic was not on my side at the time, so if it wasn’t for those two factors, I could have finished this project in an afternoon.
All in all, get this pattern! It’s definitely a “cake” piece and will get lots of wear in your closet with dresses, skirts, and jeans.
Looks awesome and very RTW! Shame about having to do such alterations for an XS.
Thank you! I'll probably still have to alter the XXS too, I think.
Вы такая хорошенькая! и цвет "фуксия" очень к лицу )
You're so pretty! and the color "purple" is a person )
Aww, this looks great on you! What a fun color!
Thank you! I'm so glad it worked out. Nothing like a pop of color in the wintertime
Looks awesome! I have mine half finished, bit can't figure out the part where you attach the ties then turn inside out. Also, I made the Xxs, and its too big, especially in the upper sleeve (armpit and back of arm) area. Extra fabric is bunching there. So if you have a chance to post more details on the facing and your alterations, I'd love it!
The ties are the section I got stuck on as well, it wasn't very clear to me. I'm planning on making a white version, so that's a great idea about posting a detailed how-to on the alterations I made, it didn't even occur to me at the time.