Leather Cross-Body Bag and Clutch


cross body 5


cross body 1


The leather-working bug is highly contagious – after making my backpack I last month, I couldn’t wait to get started on my next leather project!  Especially because I have access to industrial sewing machines at my job, there was no reason to not give leather handbag making another try.

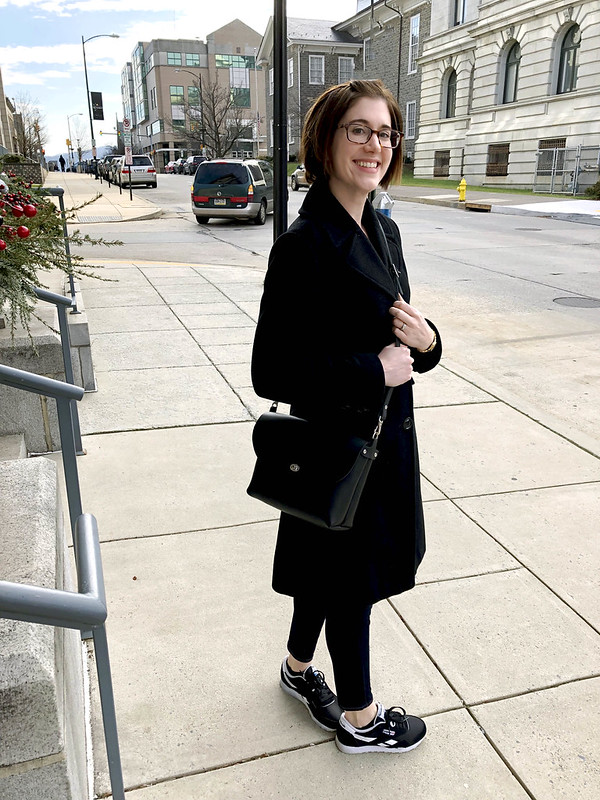
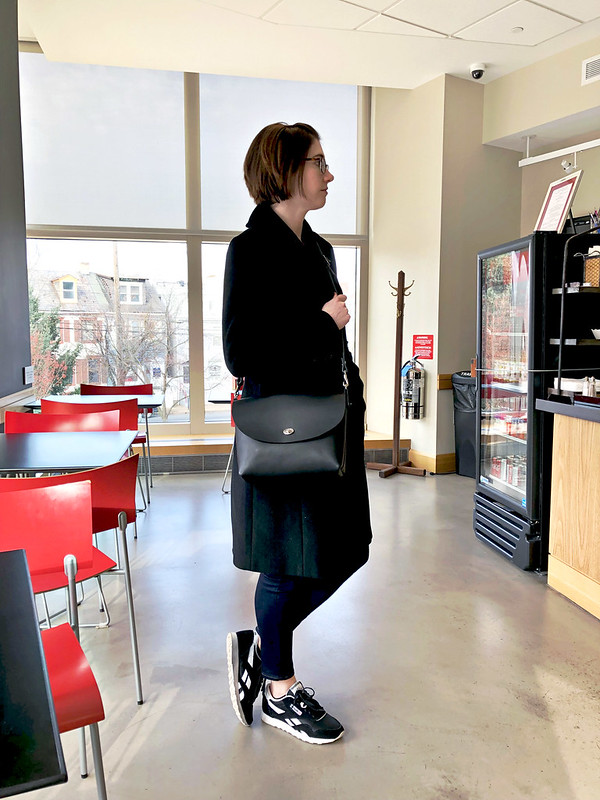
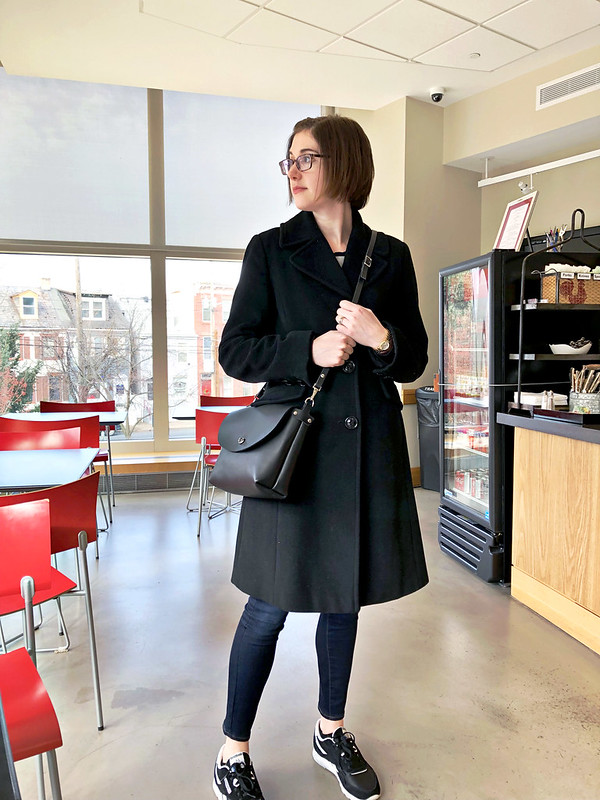
For my next project, I wanted to make a “wear with anything” black leather bag that was a simple shape but could hold a lot when running errands or travelling. I scoured patterns online and available on Etsy and stumbled across this shop, which offers a lot of very simple but classic patterns.  All of the patterns are designed to be hand-sewn, which is a great option if you don’t have an industrial sewing machine that can power through thick leather.


cross body 2


Over the past year I collected a few pieces of leather as I dabbled in sandal making, and had just enough of a black piece of 5oz cowhide left over to cut out the main body of the bag in one piece instead of two and needing to sew a seam in the bottom of the bag. It’s a firm piece of leather that’s thick enough to hold the shape of the bag nicely without being too soft.


cross body 9


I followed the instructions for the pattern for the most part, but they were a bit on the vague side of things and didn’t properly explain how to finish the raw edges of the leather, what size hardware to buy, etc. I found all of my hardware at my local Tandy Leather: turn lock, d-rings, halter snaps, and rivets. I also picked up a piece of leather strapping for my bag instead of cutting out a strap from my leather, but I think I’m going to replace it with something else because the leather is a bit on the thick side and I’d rather use something that is a little more flexible. Plus, the raw side is exposed underneath and unfinished, which is starting to wear.

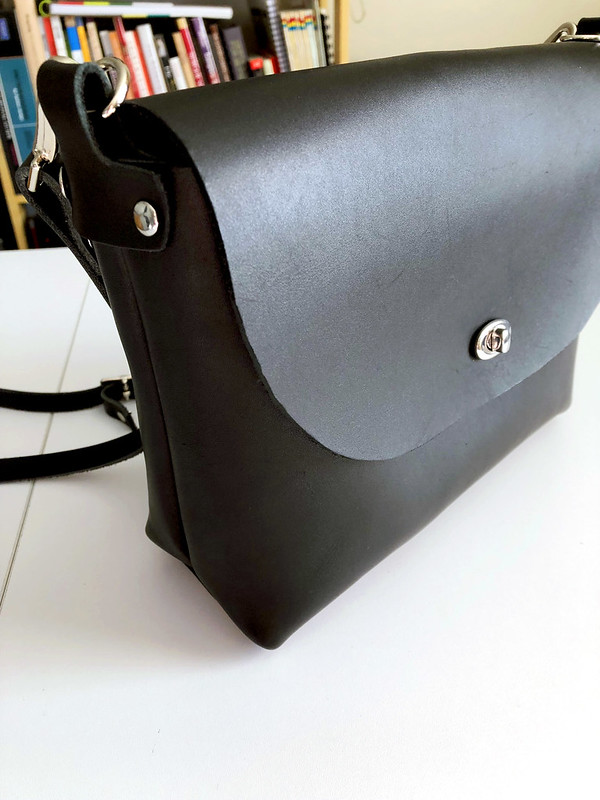
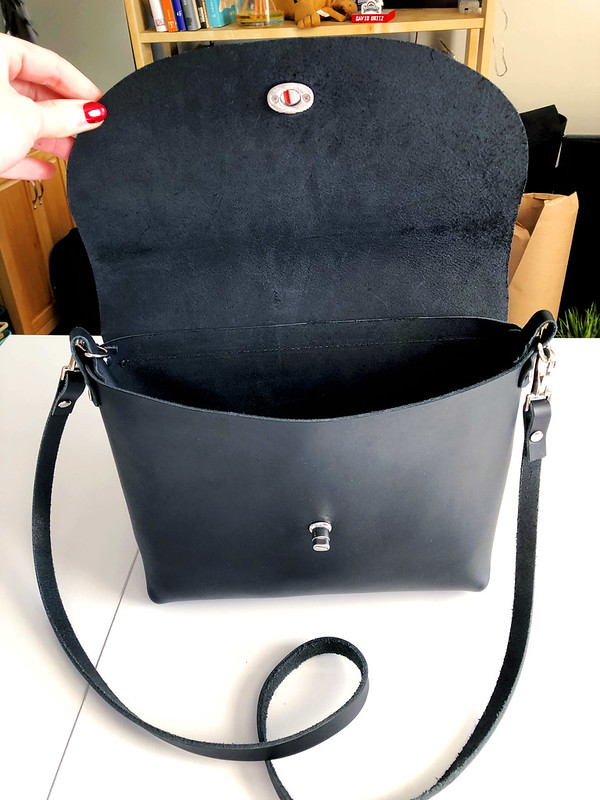
Installing the turn lock was a bit challenging since I don’t have a nice punch to cut out an even hole, so I had to use my utility blade and a bit of trial and error with inserting the lock to make sure enough of the leather was removed for the post to go through the opening and close properly.

For the flap of the bag, I used two coats of Fiebing’s Edge Kote to give the leather a bit of a more polished look. For whatever reason, I thought to only do this on the flap but not the rest of the leather pieces that have exposed raw edges, like the d-ring carriers, top edge of the bag, and the outside pocket on the back of the bag. Oh well, live and learn! I’m also not 100% sure if this was the best type of edge paint for this leather, or if I should have used something like Vernis edge paint to get a more “finished” looking edge. Will have to play around with that and experiment! After finishing the edges of the flap, I sewed it on to the back of the bag.


cross body 8


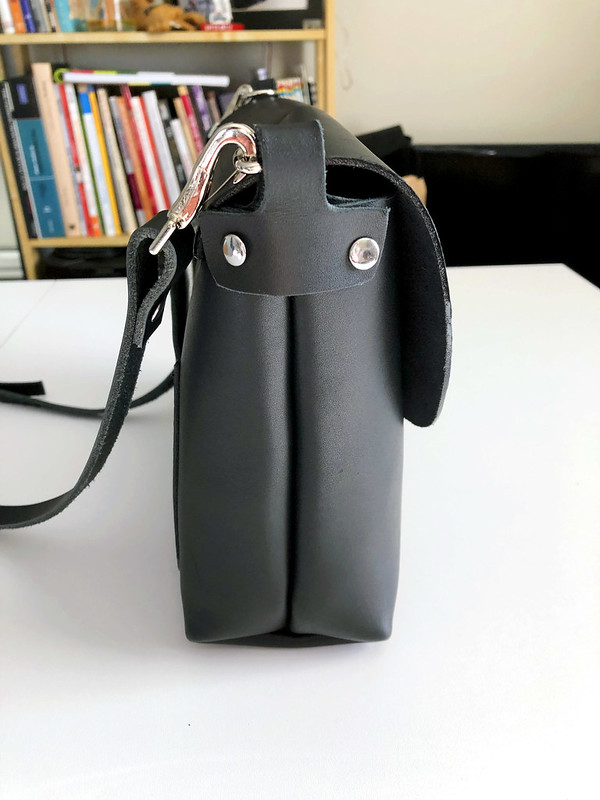
The body of the bag was assembled wrong side out and then flipped out after the sides and corners were sewn. Boy, it was a wrestling match to get this leather flipped right side out and the corners pushed out. In retrospect, I should have skivved the edges of the bag before sewing to reduce the bulk, but the skivving machine wasn’t functioning properly when I had sometime to use the machines at work so I had to forgo using it. I was so nervous that I wouldn’t be able to power through two layers of 5oz leather and intersecting seams with the Juki industrial machine, because I didn’t skive my leather, but that baby sewed right through it like butter!


cross body 7


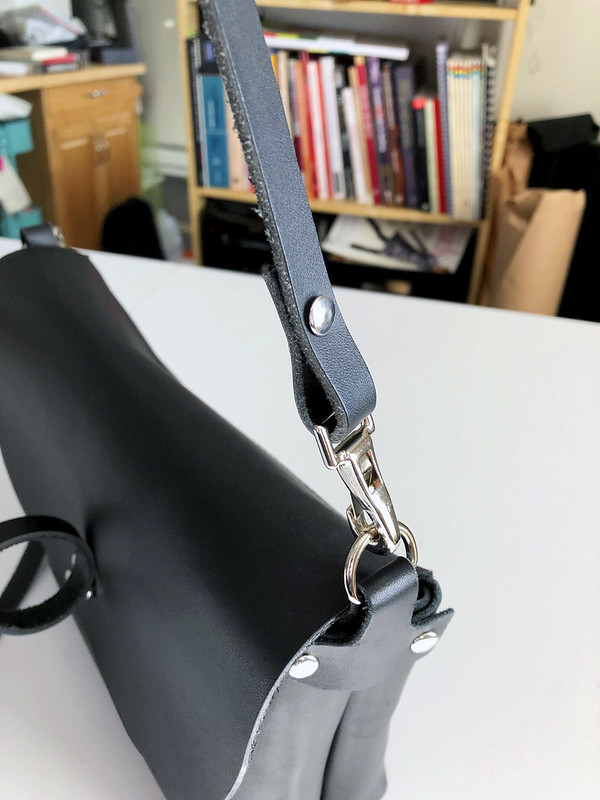
After work that night, I assembled the d-ring carriers and the strap onto my bag. Truth be told, my rivets are a bit on the wonky side – the posts were too long and I didn’t realize it when I bought them. This meant that when I hammered my rivets into the leather to hold the d-ring carriers and the strap ends together, the metal post bended and they don’t go through my bag or strap straight. I bought these rivets purely based on the size of the head of the rivet and not the post length, d’oh! Again, leather working newbie mistake.


cross body 6


cross body 3


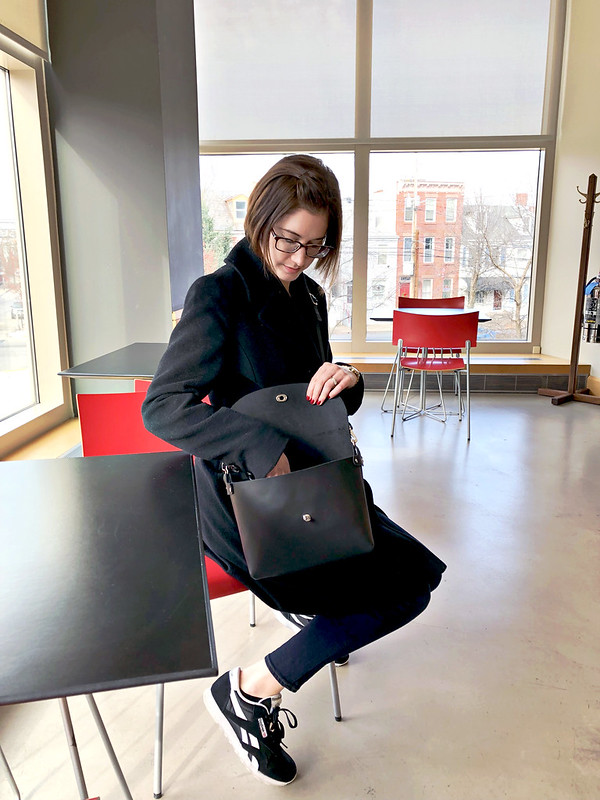
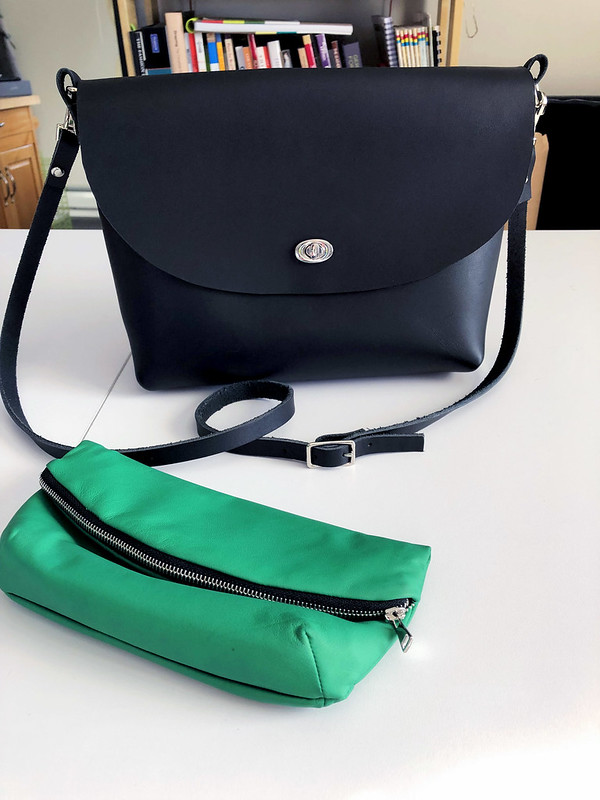
I love how roomy and spacious this bag is – I had my wallet, leather clutch with my makeup, gloves, keys, and a Kindle inside the bag with no problem during my trip to PA to visit my family for Christmas . It’s a great bag for traveling.


ida clutch 1


ida clutch 2


I also made an Ida Clutch out of a green Italian lamb hide the day before we left on our trip. It’s such an easy sew, I whipped it up in a couple of hours in the afternoon. The only issue I had was inserting the zipper, the leather stretched out a bit since I couldn’t use my walking foot to get close to the zipper and had to use my zipper foot. I also didn’t have any snaps handy like the pattern calls for, so I used a magnetic snap instead for the closure.


cross body 4


Next up I have a soft brown leather tote bag in the works and I’m planning my next shoe designs – I’m heading to London in about a week for a 3-day shoemaking workshop!


Leather: Cross-Body – cowhide, Ida Clutch – lamb
Patterns: Cross-Body, Ida Clutch
Hardware: Tandy Leather
Sewing Machine: Juki LZ-2280A

Follow:

Back From Barcelona

me and the city
 

park guell
 

Beach view
 

It’s been a week since I flew home from Barcelona and I am glad to be back!  Three weeks is a long time to be away from home, but it was a great few weeks setting up for an event for work and I even got to sneak in some touristy site-seeing (except for the Saturday I spent in bed with a stomach bug – yuck!).  Waking up with a view of the Mediterranean each day did not get old.


ribes y casal fabric1
 

It didn’t seem likely that it would happen, but I got a few hours free one afternoon and darted over to Ribes y Casals!  I love looking for fabric when I travel to cities and this was a store several of you recommended to me – it did not disappoint!  I only snagged this one photo inside the store since I wasn’t sure if it was ok to take photos, so I covertly took this one and went on my merry way.  What a wonderful store!  Everything was organized on tables in large rolls by fabric type and there were so many bold prints and bright colors.

What was different about this store compared to others I’ve been to, since I’ve never been to a fabric store outside of the US, is that you need to wait in line for a store clerk to come over and help you with your fabric selection, and you take them around the store and they cut out what you want.  I kept trying to get someone’s attention to help me with cutting my fabric, but then I noticed the looooong line everyone was standing in and put two and two together.  There’s no rush either if you need help, which is nice; I noticed a group of ladies running around with a clerk trying to find different kinds of fabric for their projects the whole time I was there.


ribes y casal
 

With my very limited Spanish, I found two beautiful poly crepes that were bright and colorful, like the city itself.  I’m thinking these will make some great dresses for summer!  Not pictured is a navy poplin I found with little white seahorses printed all over, perfect for a sleeveless Alder shirt variation.


Back at the machine
 

It felt good to sit down at my machine yesterday after no sewing in the past month.  I finished a Driftless Cardigan I started before I left, cut out a new project that should be done this week, and I jumped right in to Me Made May on Instagram.  Happy to be back home and in the swing of things again!

Follow:

Navy Lonetree Vest

lonetree vest
 

This Lonetree Vest feels like the most RTW garment I’ve made so far in my sewing career.

When I made my wish-list of garments I wanted to sew for fall, I craved some type of utility jacket with pockets and a drawstring, but nothing existed.  It was almost as if Allie Olson read my mind and released her very first sewing pattern at just the right time.


lonetree vest


I didn’t set out to make a navy vest at first, I originally planned in making a black jacket.  However, I realized after cutting out the jacket from fabric I ordered that the quality of the fabric was absolute crap –  into the trashcan it went.  I then decided to switch gears and went on to make a navy twill jumper dress for Thanksgiving (to go with the striped shirt I’m wearing above), but I was sad to discover that I bought yardage for the tunic view of the sewing pattern, not the jumper view, and was short about a yard of what I needed!  I guess all of the above was a comedy of errors, and this navy twill was destined for a vest instead (and Abbey inspired me as well with her navy version!).


lonetree vest
 

Hat’s off to Allie, this lady has some serious pattern-drafting chops.  Everything came together so smoothly and the directions really walk you through the steps in a clearly illustrated way, the vest looks more complicated than it really is.  The most time-consuming part of making this vest were the pockets and the top-stitching – lots and lots of top-stitching!!  I ran out of thread, which delayed my finished of this vest until right before Christmas.  After attaching the pockets to the front, the rest of the vest went together fairly easily.  I wish in retrospect I top-stitched a little closer to the pocket edges instead of 1/4″ away from the edge to get a bit of a cleaner look.


lonetree vest
 

I also top-stitched the cording channel with two rows of stitching instead of just one row.  The fit is great, I like the snugger fit around the armholes and across the back.  If it wasn’t for the fit up top, the vest would end up looking a lot baggier and not as chic.


lonetree vest
 

I wanted so very much to use a Hong Kong finish on the inside seam allowances with bias tape.  Being the lazy sewist I am, I ordered some pre-made from Etsy, but sadly I underestimated how much I needed and couldn’t use it for all of my seams.  Here’s a shot of a side seam, the bias tape is from Bessie Pearl Textiles and made out of the Cotton + Steel/Rifle Paper Les Fleurs collection.


lonetree vest 6
 

It’s really the accents that make this look and feel RTW, so if you’re thinking about making the vest or jacket, I highly recommend seeking out some quality hardware.  Both the cord stops and cord ends are from Pacific Trimming, the buttons are from Joann Fabrics (shocker!  The button dept in my store is abysmal), and the zipper is from Zipper Stop on Etsy.


lonetree vest
 

This is my first time taking blog photos inside!  It was 20 degrees outside when I took these photos on Sunday, and I wasn’t about to brave the weather in just a shirt, vest, and leggings (my husband didn’t want to go outside either and play photographer).  I got this backdrop for Christmas from one my brother-in-laws, used the DIY PVC backdrop frame from our wedding, and set up my tripod and umbrella lights in the living room.  Presto!  I just need to smooth out the fabric a little more at the top next time and steam out some more of those stubborn wrinkles.


Pattern: Lonetree Vest by Allie Olson
Fabric: Theory cotton twill from Mood Fabrics
Hardware: Pacific Trimming, Zipper Stop, Joann Fabrics
Shirt: Simplicity 1325
Legging Pants: Uniqlo

This post is part of the Indiesew Blogger Network – pattern or fabric may have been provided by Indiesew, however all thoughts and opinions are my own 

Follow:

McCall’s 7058 | Polka Dot Coat

polka dot coat
 

It only seems fitting that I post about a coat that I started, well, a year ago, on the first day of the new year! Last year, I had an idea to create a course on how to make coats and this was the coat pattern I was going to use as my example through the course.  I cut this pattern out in January, but by the beginning of February, I began panicking because I hadn’t started the sewing on my wedding dress.  So, I put aside the pattern pieces and the idea of making a course, and worked on my wedding dress up until May.  With my first semester of grad school winding down earlier in December, I needed something new to work on.  Well, I dug this out of my closet and got right to sewing everything – all of the pieces were cut out, interfaced, and interlined!

polka dot coat
 

I had a close call with this almost not fitting and turing into a disaster.  Like, it barely met in the center when I tried everything on with the lining installed!  I made a muslin previously and made some adjustments to the fit in the hips since McCall’s describes this coat as fitted and it was a little snug on me.  Heck, when you look at the model wearing this coat on the McCall’s website, it’s pretty tight on her!  Even when I tried on the wool shell of the coat, it fit.  I believe what caused the issue was that I didn’t think that the lambswool interlining I added was going to take away that much ease since it seemed so thin.  Plus, I used a double-face wool that was a bit thick.  After assembling everything, this is how my coat fit:

This coat barely fit!
 

Eeeek!!  To fix this, I ripped out all of the seams up to just below the armholes in the wool and lining and restitched all seams with a 3/8″ seam allowance.  This gave back about three inches around the circumference of the coat, which allowed me to properly close it.  Whew!  I also intentionally tried to fit this coat wearing something a little bulky like a sweatshirt since I always wear something like that in the wintertime, not a thin t shirt.  That ensured that the fit of the coat would accommodate at least some layers underneath.

I mentioned earlier that I interlined this with lambswool – it’s good stuff!  I bought it from Steinlauf and Stoller over the phone – all I did was call them up, tell them what I was looking for, and I received it in the mail from NYC in a few days.  They’re great to work with if you need to order tailoring supplies like hymo that aren’t readily available locally.  The lambswool interlining is attached to the all of the lining pieces except the sleeves, and let me tell you, it really makes this coat warm and doesn’t weigh anything.

polka dot coat
 

Because the coat is so fitted, I changed the type of pockets.  The in-seam pockets at the side seams did me no favors and bulged open at the hips.  Instead, I took a patch pocket pattern from McCall’s 6172 (a blazer I still need to make!) and spent quite a bit of time with my dress form trying to figure out a good placement on the front and making both sides symmetrical.  It’s a great patch pocket size for a coat, I can fit my iPhone 6 in them comfortably.  The pockets are lined with flannel to keep my hands nice and toasty.

polka dot coat
 

I used hymo interfacing (aka horsehair canvas) for all of the interfacing in the coat, it’s really my favorite for coat making since it shapes so nicely with steam.  Per the recommendation of my beloved tailoring book, I opted to add top stitching along the collar and the front edges of the coat instead of top stitching down the center front of the coat like the directions called for.  I also opted to hand sew all of the hems on the sleeves and bottom of the coat, it looks much nicer that way than by machine.

polka dot coat
 

Sadly, when ripping out all of the stitching in the lining to let it out, I got all sorts of pulls along the old seam allowances.  At least it’s a fun purple color!  The pattern has a pleat drafted into the lining pattern piece, but in my opinion, it’s not generous enough of a pleat to allow for movement of the lining and wearing ease.  If I made this again, I’d go back and redraft the center back piece with a better ease pleat.


polka dot coat
 

How I love big buttons!  The pattern calls for 1″ buttons, but the ones I bought seemed kinda weeny down the front of the coat, especially since there’s only supposed to be four total.  I found these 1.5″ buttons at Pacific Trimming earlier in December that were exactly what I was looking for for this coat.  However, my automatic buttonhole feature on my machine only goes up to roughly 1.25″ buttonholes, and I wasn’t about to try and manually make the buttonholes (I’m truly terrible at doing that, and the automatic buttonhole feature on my Bernina was a big selling point).  Plus, after doing some reading on buttonholes, the bigger the buttonhole, the more prone they are to stretching out and looking wavy.  The only solution seemed to be sewing on giant coat snaps to close the coat and sewing the buttons to the outside of the coat.

I mentioned earlier that this coat is more of a “coat-igan” than a coat because since it’s so tight, the snaps at the bottom pop open when I sit down in the car or bend over to pick something up, rendering this more of a super-warm cardigan.  I think if I made buttonholes, there would have been a lot more strain on the coat closure and seat, so at least the snaps allow the coat some ease even though it means my coat popping open at the bottom.


polka dot coat
 

Here’s a view of the back – it’s a little roomy in the back waist, but if you look at the photos on the McCall’s website, it looks like there’s some ease with the way the belt cinches in at the waist (I opted to not make a belt, obvs).  I can move ok through the back and shoulders of this coat, but if I was to make this again, I’d cut a larger size in the back to allow for better range of movement.

Now I’m working on – surprise – another coat!  I’m about 50% of the way through making up a blue wool melton Cascade Duffle Coat and I’m thrilled with how it’s turning out (I’m obsessed with coats, if you haven’t guessed.  It’s the one good thing about New England winters).  I also have some videos I made for my coat course last year that I’m thinking of releasing in chunks throughout the month – I want to get back into making videos for Youtube like I did last year for my wedding dress, they were a lot of fun!  Maybe doing some pattern reviews and actually wearing the garment so you can see how it moves etc.  Depends on how crazy I am next semester with school, I guess!

Pattern: McCall’s 7058
Fabric:
Marc Jacobs double-face wool from Mood Fabrics
Poly lining from Mood Fabrics
Lambswool interlining from Steinlauf and Stoller
Buttons: Pacific Trimming
Coat Snaps: Dritz
Sweatshirt: Linden from Grainline Studio (not blogged)
Jeans: Paige Denim
Boots: Nine West

Follow:

Finished Project: Butterick 6292 | Jacket With Detroit Cuffs

Butterick 6292
 

I mentioned in my last post how limited my sewing time is now that I’m going to grad school part-time.  To illustrate how slow I am: I started planning this jacket at the end of August, bought the fabric in September, started sewing in October, and didn’t finish until November.  Part of that is, like I mentioned, because of starting school, but the other part is that I needed to redraft the sleeves.  You see, this is a complete knock-off of the jacket featured on the cover of Thread’s November 2016 magazine!


The fabric I used is exactly what was stated in the article – a double-face cotton serge twill from Mood Fabrics.  I searched the site and ordered a swatch – it’s such a nice weight, perfect for a fall jacket, and has nice stretch and recovery.  It does wrinkle a bit as you wear it, especially in the sleeves, but that’s what happens when we wear cotton I guess!

Butterick 6292
The original sleeve of Butterick 6292 is a single seam set-in sleeve.  In the Thread’s article, they show you how to re-draft the sleeve into a two-piece sleeve in order to make a Detroit cuff, an adjustable cuff finish used on workwear such as Carhartt jackets.  It’s a pretty looking design element on this jacket that has a functional purpose – the cuff can be rolled up when it’s nice out, or buttoned closed when its breezy outside.  Hard to see in the photo below, but there’s two buttons on the cuff that can adjust how tight to close the cuff.

Butterick 6292
 

The pattern itself was pretty straightforward, but redrafting the sleeve and adding the cuff made the pattern a little more challenging.  My stitching isn’t perfect and I ended up getting a small tuck when I attached the cuff, maybe I was off with some of my drafting.  And oh boy, the top stitching on this!  Definitely something I need to work on and take my time doing.

I also had a bit of  hard time with the button placement.  When I tissue-fit the jacket, I thought it was going to fit just right (my standard grading out of a size 10 to a size 12 from waist to hips).  Once I sewed it together, I realized it was too big and needed to take it in.  Then, when I marked the button hole placement, the fit was still off.  So, I improvised with the button placement and made it work with how I wanted the jacket to fit overall.  I also wasn’t that crazy about the buttons I used, they’re pretty boring and not as fun and fancy as the buttons on the original jacket.  The selection at my local Joann Fabrics is so limiting!  Maybe I’ll order some buttons online from Pacific Trimming and swap them out for these boring black ones.

Butterick 6292
 

I used a new-to-me interfacing from Fashion Sewing Supply – I read so many good things about their interfacing from other sewing bloggers, and since I couldn’t find any more of my Touch of Gold interfacing that I love, I ordered some medium weight fusible.  I didn’t completely read the instructions though, and the bond of the interfacing to the jacket isn’t 100% as you can kind of see in the photos above.  Oh well!  Definitely a user-error, I used it correctly for another upcoming project and it looks much better.

Butterick 6292
 

Jackets and coats are so much more fun when there’s a surprise “pop” with the inside lining!  I just love this floral poly fabric from Mood.

Would I make this pattern again?  Maybe in a wool tweed, but I have so many other jacket and coat patterns on the brain I want to sew.  This project was an example of how you can take an easy pattern and make it more challenging by customizing different design elements.  My red jacket is now tucked away in the closet until next year because winter is here and there’s snow on the ground!

Follow: