I Made a Yona Coat!


yona 1

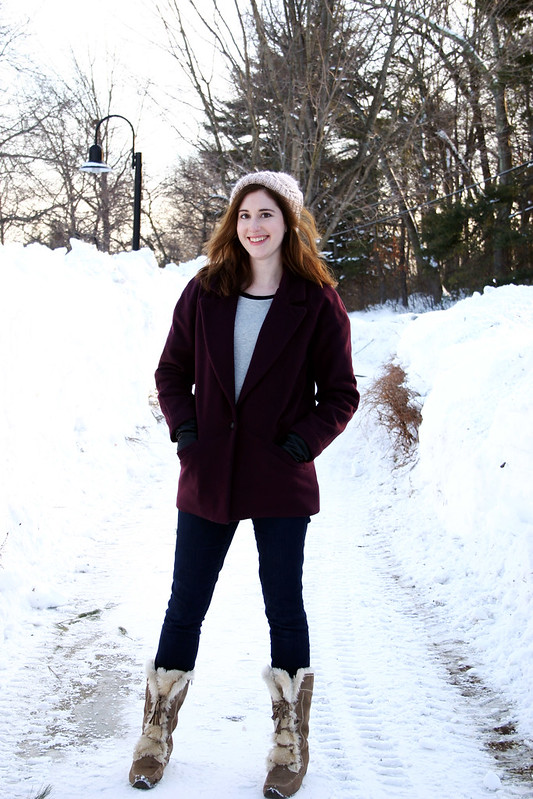
Pattern: Yona Coat from Named Patterns, c/o Indiesew
Size: 6

All Materials For This Coat:

  • Outer fabric – cashmere wool from Metro Textiles
  • Lining – coat-weight lining from Fabric Place Basement
  • Diaper Flannel Interlining – Fabric.com
  • Interfacing (hair canvas, sew-in) – Steinlauf and Stoller
  • Fusible weft interfacing – Fabric Place Basement
  • 1″ Button – Fabric Place Basement

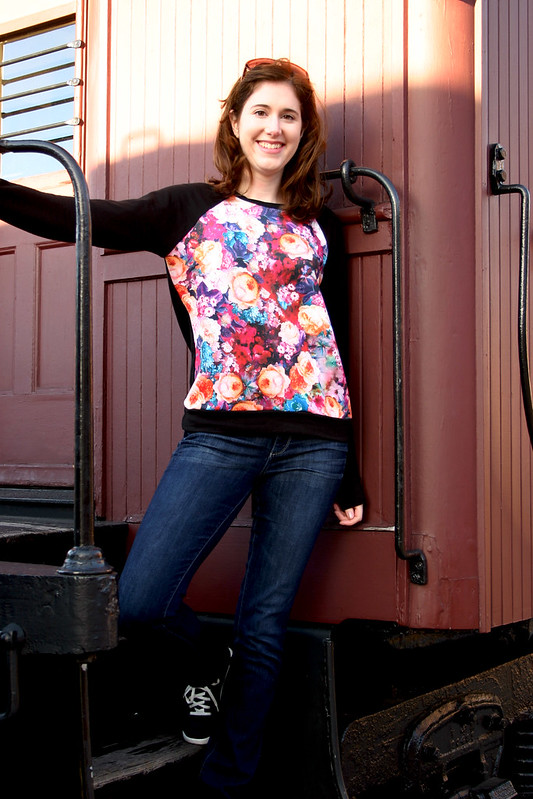
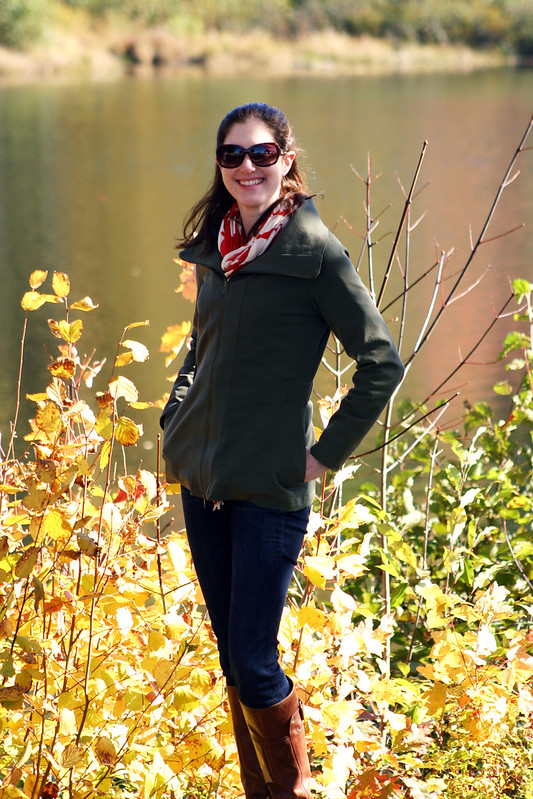
Sweatshirt: Linden (just made, unblogged)
Jeans: Gap
Boots: London Fog
Hat: Topshop

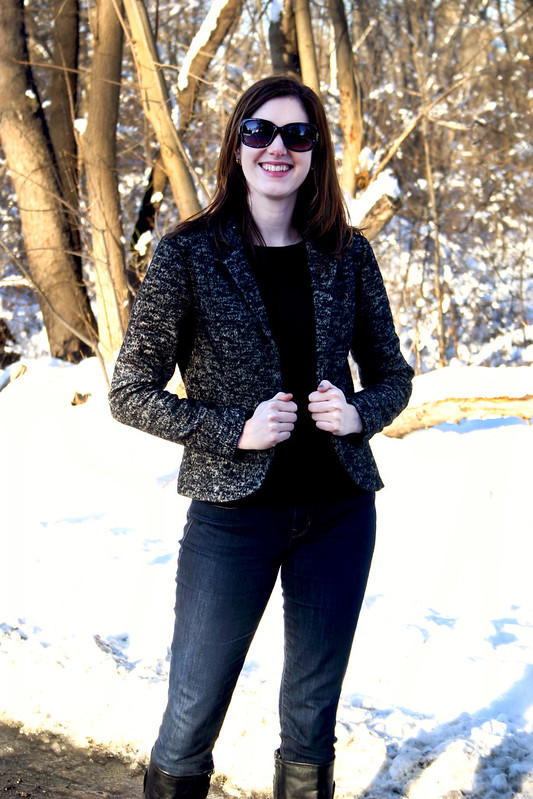
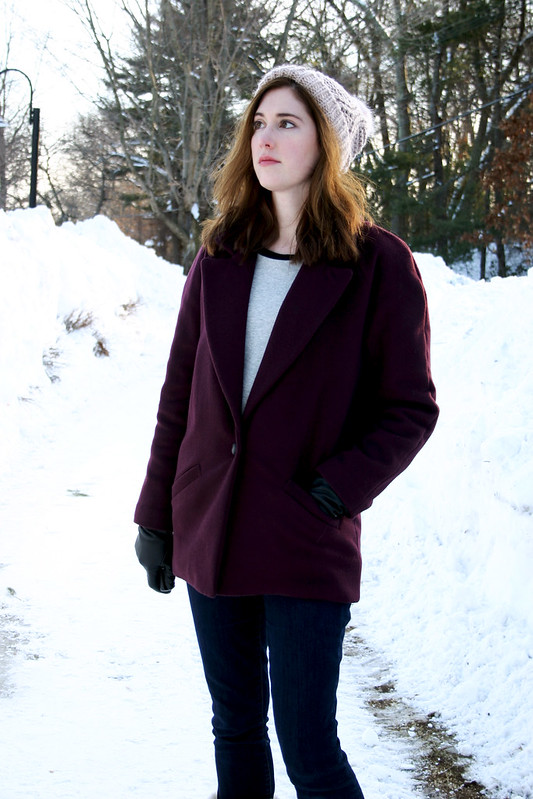
To quote Led Zeppelin, I come from the land of ice and snow…no really, we have seven feet of snow here in the Boston area after this weekend’s little Valentine’s Day storm (10″ more, woof) and there’s major icicles of doom hanging off of every single building.  I had a fear that once I finished this coat, which I’ve been chronicling since early January, the weather would turn and it would become too warm to get some wear out of it this year, kind of like what happened when I made my Anise wool jacket last spring.  Seeing that we’re going to have the coldest temperatures of the season this week (it was 16 degrees in these photos) and there’s, of course, more snow on the way, I don’t think it’s going to turn spring-time with daffodils blooming anytime soon.


yona 6

This is my “I’m tired of this winter shit” face…seriously.

Even though I went through the whole “how to tailor a wool jacket” thing last year with Anise, I still learned a ton more this year making this coat.  I pretty much threw away the instructions after I glanced through them to get a general idea of construction, and exclusively followed my tailoring book for every step of construction.  Sure, you can make the coat following the included instructions, but it may not drape how you want it to, the collar may not roll right, and the lapels could flop around instead of staying put.  There’s really a lot more to making a coat than just sewing the seams together – there’s a lot of secret engineering inside the coat that gives it shape and makes things lay just right.


yona 3

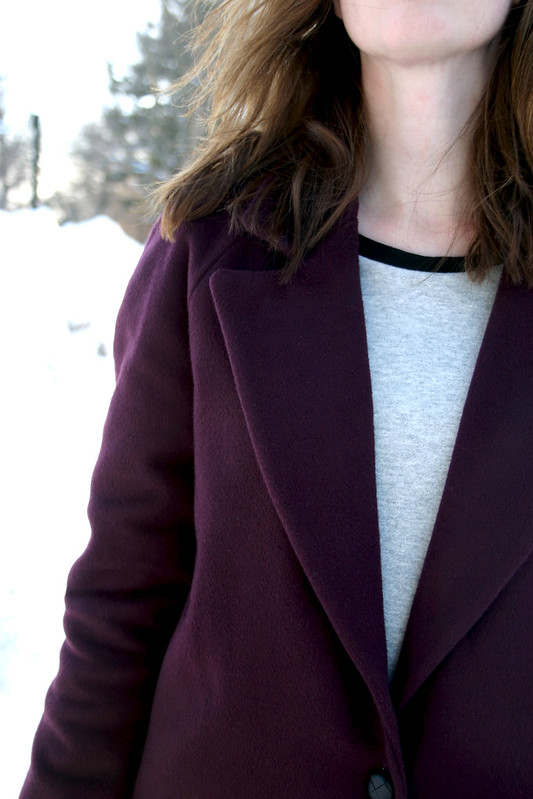
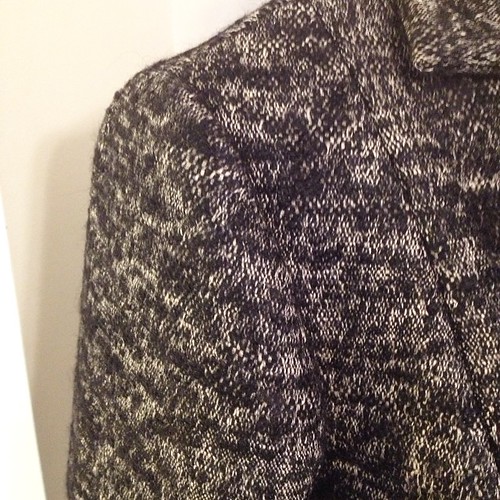
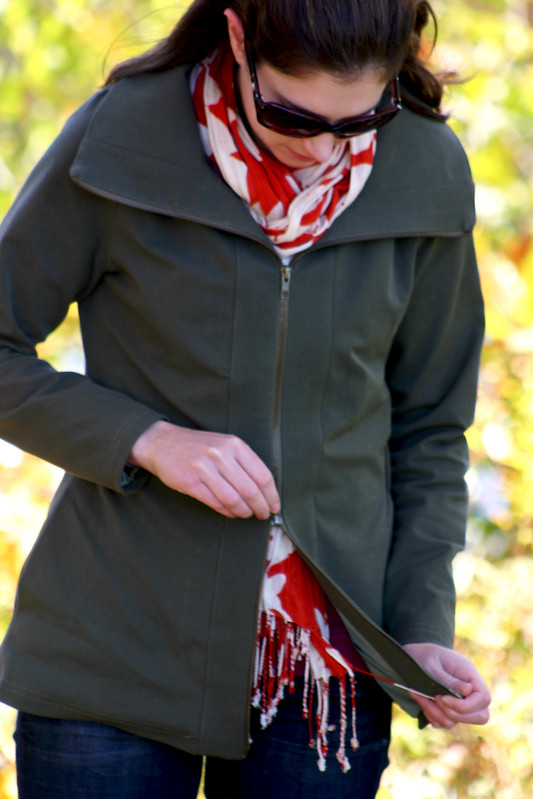
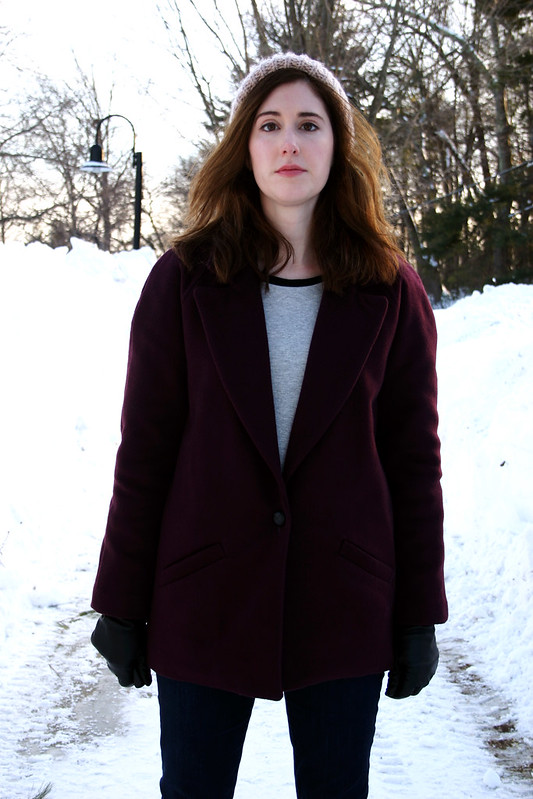
I am so damn happy with the lapels and collar, especially since this is the first time I used hair canvas and padstitching.  Taping the roll line made a world of difference with the lapels laying flat – it’s a little puckery underneath, so I may not have adjusted the ease as best as I could, but you can’t see it so it’s ok.  Adjusting for the turn of cloth of the collar ensured that the seam line doesn’t roll out in the back.


yona 2

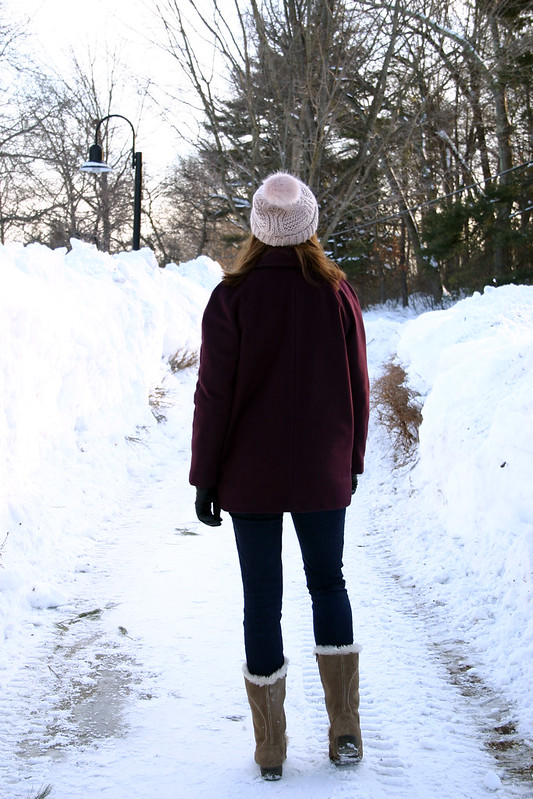
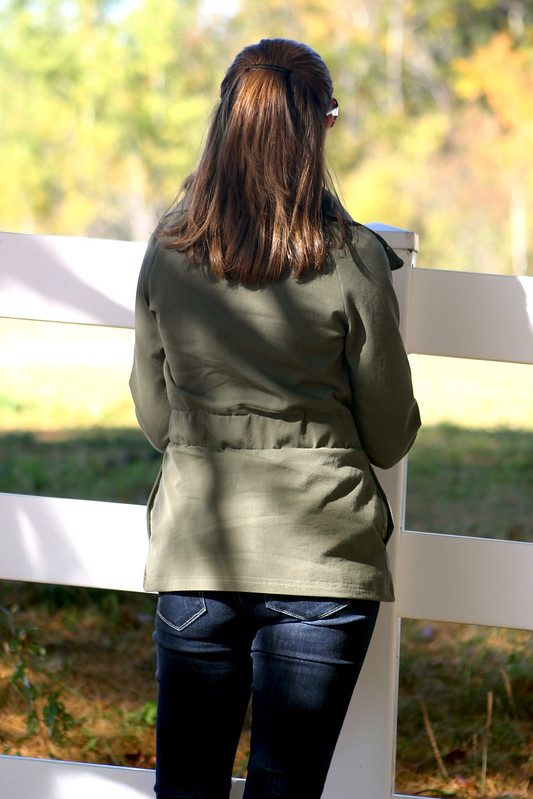
With the drape factor of the cashmere, it was definitely a good move to add a back stay and shoulder stays for the raglan sleeves.  The sew-in interfacing didn’t make those parts of the coat too stiff, but there’s noticeable, light support through the back and no sag lines.


yona 5

I drafted welt pockets in place of the patch pockets, since welts are a lot easier to sink your hands into when it’s cold, or for stashing  your keys and phone.  Kinda wish I placed them a bit higher, since the pocket bags are about six inches and hang down very close to the hem.

Yes, let’s talk about the length…it’s three inches shorter than it should be.  This is due to the fact that I didn’t notice that the facing piece wasn’t drafted long enough for the front of the coat…grr.  Because I didn’t want any exposed raw edges inside the coat, and I didn’t want to bag the coat lining, I had to shorten the length of the coat by quite a bit to finish the lining correctly by hand.  It’s not ideal, but at least the coat still keeps my behind covered and warm.

Edit 2/20/15Allie from Indiesew contacted Named Patterns about my feedback – apparently, the coat has a wider turn-up at the hemline than what I used, and that the pattern drafting was intentional.  Good to know if you plan and finishing the hem by hand vs bagging the lining. 


yona 4

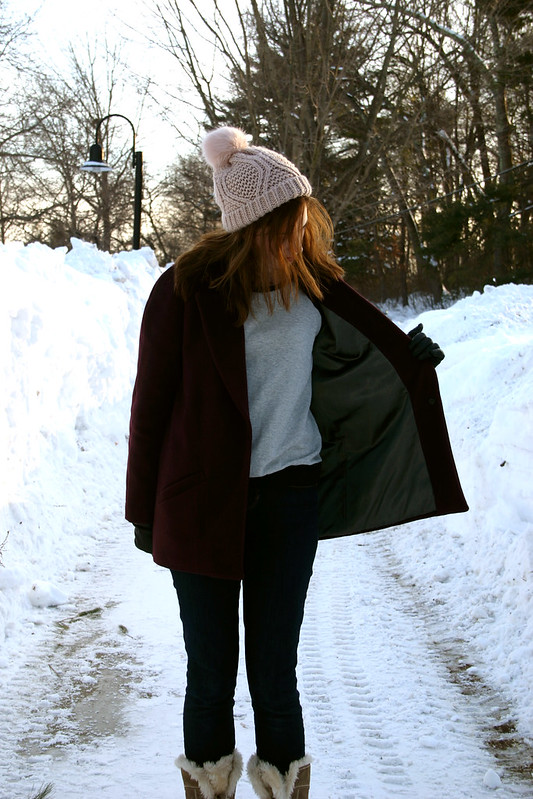
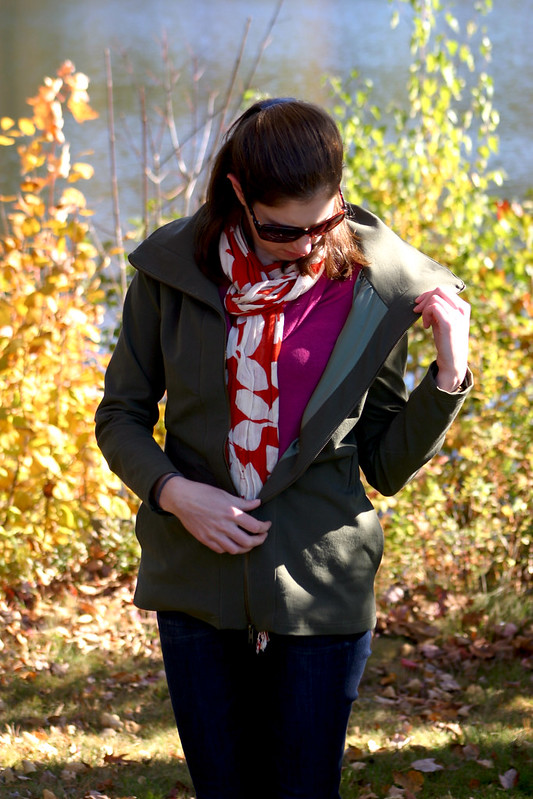
For the lining, I called B&J Fabrics in NYC to get some purple samples of their Sunback lining fabric (it’s a rayon lining backed with flannel), but when they arrived, the samples seemed so flimsy and I didn’t think I’d get the level of warmth/insulation I wanted.  Instead, Fabric Place Basement had coat linings that were a thick, heavy rayon fabric with a brushed back that seemed like a good option if I interlined it with diaper flannel.  Testing this coat out yesterday in 16 degree weather with a windchill of -1 confirmed that yes, this is indeed a warm coat!  However, it’s also a really heavy coat because of the weights of all of the coat layers combined.

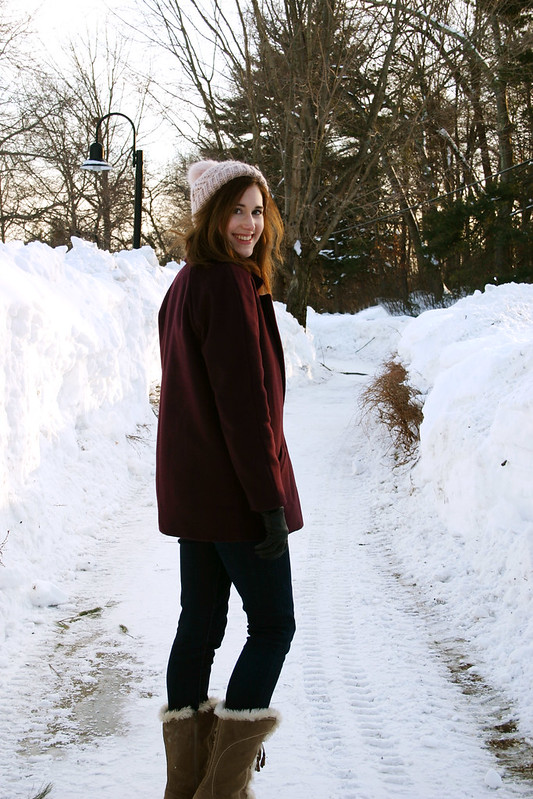
Something I didn’t take into consideration was the design of the coat vs. the drape of my version of the coat.  Using all of these layers (diaper flannel, heavy coat lining, cashmere wool) made the coat a little thick and fairly structured.  The bulk of the coat didn’t lend itself well to wearing it closed with a belt, as it’s designed – it just looked really awkward and made my midsection look chunky.  Had I known this beforehand, I would have redrafted the front overlap to be wider than 1″ to better accommodate the button closure I had to end up using (I originally wanted to use coat snaps, but they were too big).


yona 7

This pattern has some definite flaws that weren’t apparent when I made my muslin, but if you like the shape of the coat and have a couple of blazers or button-down shirts under your belt, it’s do-able to work through some of the issues.  Morgan wrote a great post on all of the changes she made to the pattern, it’s a great reference that I wish I could have used when I made my coat.

So yeah, I made a winter coat!  Now I can look all cool and stylish like the street-style city girls on Pinterest in their oversized coats, skinny pants, and Stan Smith sneakers (I’ll sub in my Classic Leathers instead).  I also had plans to make the Grainline Cascade duffle coat this winter, but for my mental health, I think I need to start thinking warm thoughts and work, optimistically, on my spring wardrobe.  Thank goodness Chris and I have a trip to Florida coming up in two weeks, we gotta get out of here!

Be sure to check out my other posts for coat construction details and tips:

Disclaimer: I received this pattern from Indiesew as part of being an Indiesew Blogger Team member, but all views and opinions of this pattern are my own
Follow:

Pattern Review – McCall’s 6711 Wool Blazer


wool blazer 1

Pattern: McCall’s 6711, view A
Fabric: Italian wool from Mood Fabric
Size: 10

Shirt: Gap
Jeans: Gap
Sunnies: Tommy Hilfiger

Remember my post from November about this fabric?  I originally slated it for a Gerard Coat, but when the fabric arrived, I realized it was much too lightweight for a coat and more suited for a blazer.  Then, I thought about using Vogue 8887, but the muslin I made had some fitting issues in the back I didn’t want to deal with, and the entire front and back was cut on the bias – something else I didn’t want to deal with.

The blazer from McCall’s 6711 was on my sewing list from fall, and seemed like a good alternative pattern.  It has simple princess seams and a one-piece collar that would be easy to fit and sew, so I decided to take a stab at it – the muslin was perfect!  Not a thing to alter.

With beautiful wool fabric like this, I wanted the blazer to turn out looking like a well-tailored, high-end blazer worthy of a designer label inside.  If I do say so myself, I think I did a pretty good job!  I owe all of it to Pam Howard’s tailoring classes on Craftsy, which I’ve been watching obsessively (and highly recommend!).  A lot of the extra steps I took elevated this blazer from a quick-and-easy sew to a in-depth project with nicer, more professional results – here’s what I did.


wool blazer 2

Interfacing

Modern tailoring really comes down to choosing the right weights of interfacing in a jacket – you don’t use the same weight throughout.  There’s a great article from Threads Magazine dissecting the innards of an Armani jacket and the different types of fusible interfacings used throughout.  For the jacket front/lapel and collar, I used a weft-insertion fusible to give the front more structure, and a fusible tricot for the jacket side front.  Typically, sewing patterns recommend that you only fuse the fronts and not the sides, but it’s necessary to fuse the entire front to get a nice shape and support the jacket.  I noticed a big difference in the body the interfacing gave the wool after fusing the whole front.

Also, I steamed the crap out of the lapels to shape them and get them to lay as flat as possible instead of flopping around.  The design of the pattern is pretty casual and there isn’t a roll -line (heck, the model has her lapels “popped” on the envelope…is that a thing?), but I wanted this jacket to be more structured.


wool blazer 3

Tailoring the Sleeves

When I made my Anise jacket last year, I was disappointed by the dent that formed at the top of the sleeve cap when I moved my arm, and also how the sleeve hung from the sleeve cap. This was probably cause by a few different factors, but it made me aware of the importance of supporting the sleeve cap in a jacket and masking the look of the jacket innards (sleeve seams, shoulder pads, etc).  To solve this for my wool blazer, I interfaced the sleeve from the sleeve cap down to about two inches below the underarm with fusible tricot interfacing.  This gave the sleeve a nice shape and supported the fabric beautifully:


Damn fine set-in sleeve. #tailoring #blazer #wool


Isn’t that a yummy set-in sleeve??  It hangs absolutely straight with no dents or divets.  I also eased the whole cap instead of just the section notated between the small dots on the pattern, and I think that helped me get a better result.


wool blazer 4

The Back and Hems

In retrospect, I should of used a back stay to get better support in the upper back since the fabric is floppy, but ahhhhh whaddayagonnado.  Interesting fact:  the more pieces in a jacket, the better the tailored result.  Why?  There’s more seams to tweak to get a better fit.  A jacket pattern with a back like this that’s cut on the fold will not be as fitted as a jacket with a back center seam – there’s no way to really adjust the fit other than tweak the darts, which can be limiting.

The jacket and sleeve hems are all interfaced with a 1 1/2″ wide strip of weft-insertion interfacing cut on the bias.  The bottom hems really keep their shape with the interfacing and it add a bit of weight, causing the hems to hang better.


wool blazer 5

The Lining

And just to show you the last, final shot – the lining!  I love color pops and surprises with my linings, so why not make that functional part of a garment a little bit more fun?  When I was researching jacket patterns to sew, it was very hard to find a pattern out there that included a lining.  Why guys, why?  Linings really aren’t that hard to sew, I swear.  And they make it so much easier to wear the finished jacket, they protect the inside and prolong the life of the jacket etc.  Anyway, this was a well-drafted lining with a center back pleat, and I sewed a jump-hem in the bottom by hand.

Well, that’s my first project of 2015!  It was definitely a good project to make as a way to ease myself into the coat project I’m up to my eyeballs in right now.  Hands down, this is the best/nicest garment I’ve made thus far in my sewing career, and I can’t wait to sew more blazers and jackets.

PS:  the snow in these photos is from the storm that hit Boston this past weekend…I’m bracing for #snowpocalypse #BOSnow right now!

Follow:

Living in Lindens


floral linden1

Pattern: Linden from Grainline Studios
Fabric: floral scuba knit from Metro Textiles, black fleece from Fabric Place Basement
Size: 4

Jeans: Paige Denim
Sneakers: Reebok

Happy New Year!  It’s the first Monday after the holidays and the winter “blahs” are setting in for me…temps are dipping waaaay low this week (12 degrees tonight, brrr), the snow we’ve avoided in New England so far this winter arrived last weekend (with more to come this week), and spring feels very far away.  So what’s a gal to do but hunker down with some tea and whip up some cute sweatshirts!


floral linden2

As the title of this post suggests, I’ve been living in a couple of new Linden sweatshirts I recently made over the past few weeks.  At first I wasn’t sure about the pattern – the fit is much boxier than garments I usually wear and felt like I was wearing a big, shapeless sack for a top.  But since I kept reaching for my first version over and over again, made out of a navy striped double-knit, I knew that the style grew on me and I really liked how easy it is to wear!


floral linden3

Like a lot of Jen’s patterns, the Linden is versatile and can change in look and feel depending on what kind of fabric you use – heck, I wore my gray version for New Year’s Eve with some sparkly necklaces and skinny black pants.  For my third version, my favorite, I paired a floral print scuba knit (aka neoprene) for the front with a super soft black sweatshirt fleece for the rest of the sweatshirt.  I like that the floral makes it a little dressier and special than a regular sweatshirt, sort of unexpected.  When I was sewing this, I kept getting flash-backs from the 90’s of a floral shirt and leggings set I wore in elementary school!

I made all of my Lindens on my serger, which made them a fast sew.  Like, criminally fast, even for someone as slow as I am.  The only change I made was to lengthen the neckband pattern piece by about 5/8″ since it was too difficult to stretch correctly on my first version.  The longer length fit better around the neckline, and I didn’t get any puckering as a result.


floral linden4

I never miss an opportunity to take a cheesy photo.

In all honesty, the Lindens I’ve been making are just “sewcrastination” – I keep putting off prepping for my Great Coat Project of 2015.  I have one more project that I’m just about finished with (which will be my first finished garment of the year!) and then I’ll start.  Pinky swear!

Follow:

Pattern Review: Butterick 5454 [DVF Dress]


DVF Wrap 1

Pattern: Butterick 5454, view B
Fabric: ITY knit from Fabric Place Basement

Watch: Michael Kors
Boots: Bandolino
Lipstick: Nars Funny Face (my fave color!)

I wanted to call this post “flat girls can wear wrap dresses, too!” because yes, with a few alterations, it’s possible to get a wrap dress that fits and doesn’t gape open.  Originally, I attempted to make a version of this dress back in 2012 with no success and a lot of gaping – I just didn’t have the energy or motivation to fix yet another dress that was too big in the bust for me.  I wrote off wrap dresses as one of those cute dresses that only girls with a chest could wear and would never grace my closet.  However, after getting sucked into a marathon of “House of DVF” reruns and seeing all of the beautiful wrap dresses gracing the contestants, the idea of making a wrap dress consumed my sewing thoughts
and I needed to conquer my fitting challenges.


DVF Wrap 2

Ladies of the small-busted variety, here’s our fitting challenge when it comes to wrap dresses: the surplice length of the wrap is usually too long.  We don’t need a lot of fabric to cross over and cover our chest, which leads to the excess neckline length and extra fabric drooping near the tie.  Sure, we can try and tie the dress tighter, but we still don’t get the secure fit of a neckline laying close to the body, or we have to wear a cami underneath the dress for modesty.

Threads Magazine #168 from September 2013 is a great resource for fitting wrap dresses and really helped me get the fit of my dress correct.  Here’s what you do: on your pattern, make a small tuck along the neckline above the bust, and another small tuck below the bust – I made two 1/2″ tucks for a total length reduction of 1″.  That’s it – excess length is reduced.  For more modesty, I also gradually raised the neckline 1/2″ to ensure better coverage and that this dress would be work-appropriate. 


DVF Wrap 4

Bias can be tricky to work with, but when you have bias with a knit fabric, watch out – chaos can quickly happen if that sucker isn’t stabilized asap.  To get a stable neckline, I used a technique from Sandra Betzina’s Power Sewing book – 1/4″ twill tape.  I measured the neckline length on my altered pattern piece and cut two pieces of twill tape that exact length for each side of the neckline, plus one for the back neck (note: she recommends different lengths depending on your bust size).  Then, with the knit fabric against the feed-dogs of the machine and the twill tape on top, I eased the neckline onto the length of the twill tape on the wrong side of the bodice front.  I was pleased as punch when I tried the dress on, wrapped the neckline, and had zero gape.  I feel like I achieved the impossible!

The other part about this pattern I liked, versus other wrap dress patterns that are out there, is the fact that there are no pleats underneath the bust near the ties like with Vogue 8379 or Vogue 8784.  With pleats comes extra volume and fabric, and I’m not sure how easy it would be to get that design element to fit on a small bust and not cause gaping.


DVF Wrap 3

The skirt on this dress has a slight flare, but is more of a straight skirt style than an A-line skirt seen on some other wrap dresses.  There’s some pleats in the skirt in the front and the back, which I didn’t mind since you don’t see them with the pattern of the fabric.  Now that I got the bodice to fit, I want to try to match different wrap skirt styles to get different looking dresses – maybe even turn the pleats in the skirt and bodice into gathers?


DVF Wrap 5

There’s a whole world of dress options open now, this is just the beginning of wrap dress sewing!  I immediately earmarked some jersey fabric that’s been in my stash for a while as new wrap dress projects, and I cut out a turquoise merino wool knit fabric the other night for a winter-ized version.  Wrap dresses are like secret PJs: polished looking, but so comfy and easy to wear.

Follow:

Pattern Review: Minoru Jacket [Sewaholic Patterns]


minoru 1

Pattern: Minoru from Sewaholic Patterns
Fabric: Theory stretch twill from Mood Fabrics
     Zipper: Pacific Trimming
Size: 2

Jeans: Paige Denim
Boots: Nine West

Finally, I now have the jacket everyone has already made – the Minoru jacket!  After seeing some versions in person this past March at the NYC Blogger Meetup, the idea of making one of these jackets this year was solidified in my mind.  Plus, have you seen Lauren’s fantastic orange version?  Yeah, I definitely needed to get on the Minoru bandwagon asap, don’t know what took me so long.

Throw in a last-minute trip to NH and I had even more reason to crank out this jacket in time for the cool fall weather.  These pictures were taken on our last day in the mountains at a place called Castle in the Clouds – we went horseback riding!  It was a great way to take in all of the fall foliage.


minoru 2


I like my outwear to be versatile and neutral enough that I can wear it with a lot of different clothes in my closet, so crazy colors or prints were not an option for the fall jacket I wanted to make.  Colors like black, grey, or brown would have been good picks, but too boring…something about the styling of the Minoru made me think of military jackets, so I settled on finding on olive green color at Mood Fabrics.  Plus the fact that it was a Theory stretch twill didn’t hurt either, I knew it was going to be great quality fabric for my jacket!


minoru 5

I made a few changes to the jacket, one being the double zipper I found at Pacific Trimmings.  I didn’t originally intend to use a double zipper for the jacket, but it was the zipper that matched my fabric the closest.  It’s really handy when I’m sitting (like on a horse!  Haha!) and makes it more comfortable instead of my jacket bunching up around my hips.

You may notice that my jacket is shorter than other Minorus…well, that’s due to the zipper being cut shorter than I asked at the store.  I had no idea it was too short until I began to install it in the jacket front and saw I was short about two inches.  So, the only real solution was to shorten the jacket so it wouldn’t look weird.  Also, I opted for no cuffs and lengthened the sleeves instead.

Which presented another problem: the pockets I added to the side seams became too long when I shortened the length of the jacket.  Once I sewed the lining shut it wasn’t a problem, they just bunch up a little.  In retrospect, had I known this was going to happen, I would have made the pocket bags shorter/smaller.  Also, how does this jacket pattern not have any pockets?? A little patch pocket in the inside (which I didn’t make) isn’t going to cut it, you know what I mean?


minoru 3

I cut this jacket smaller than the typical 6 I usually cut for Sewaholic Patterns – this is one of those instances of how picking out a size based on finished garment measurements is better than going by body measurements.  Had I picked the size 6 to make, I would have wound up with a very roomy, boxy jacket, and that wasn’t the look I was going for.  Also, I made the mistake of trying to pull the elastic too tight around the waist to make the jacket even more fitted, but ended up getting diagonal pull lines around the waist in the front.  After I cut a longer length of elastic and adjusted the fit, the lines went away.  So, if you’re experiencing that with your Minoru, the elastic length is probably why.


minoru 6

See? Fitted, but still room to wiggle around.  I wore this jacket at the driving range a few days earlier and hit two large buckets of golf balls and had no problem swinging my driver.


minoru 4

A quick peek at the lining – I ended up bagging this lining instead of however the instructions tell you to line the jacket.  The stretch in the poly charmeuse made it pretty challenging to hem the lining, and truth be told, I need to go back and fix how I sewed it.


We went horseback riding in the NH mountains today #latergram #longweekend #NH

I’ll leave you with a photo of Chris and I on horseback!  One of the guides was nice enough to take photos as we went along the trail.

 Well that’s two jackets I made now for fall!  I’m currently working on a fancy lace dress for a wedding in less than two weeks (more on that to come later this week) and then I’m back on to sewing for fall.  My latest idea – an oversized leopard print wool coat.  Does fabric like that even exist?

Follow: