Wrap Dress Fitting for Small Busts


Wrap Dress SBA

Up until a few months ago, I couldn’t wear anything with a wrap, or surplice, neckline.  Being of the small-busted variety (and damn proud I might add!), wrap dresses and tops would always sag or dramatically gape open, exposing my bra (eeek!), due to the length of the wrap being too long.  After searching all over the internet to find ways on how to make a wrap neckline fit and having no luck with the results, I pretty much gave up on ever being able to make or wear a wrap dress or top.

Then, I put together techniques I found from two sewing resources and hit the wrap-dress-jackpot: Power Sewing by Sandra Betzina, and Threads #168 September 2013.  Both cover different ways to alter wrap necklines, but combining elements from both articles gave me the winning combination for my first wrap dress I ever made at the end of last year – I highly recommend checking out both for more information on wrap dress fitting techniques.


DVF Wrap 1

There’s some good info out there on how to do a full-bust adjustment for wrap necklines – if you’re looking for a great post on how to make this alteration, Ann from Gorgeous Fabrics wrote an informative tutorial on how to do a FBA for a wrap dress for the McCall’s sewalong recently.

SBA Bodice Pattern Alterations

Before cutting out your fashion fabric that you plan on using for your final dress, use a knit fabric with comparable stretch/weight as your final fabric for a test bodice.  I also recommend trying out all of the below steps on a test bodice to make sure you get the fit you want before committing to using these techniques on your final wrap dress.
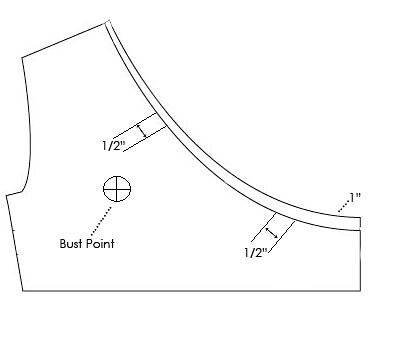

bodice diagram


Original diagram from Sofilajantes


If you’re small-busted like me, and have tried on a wrap dress in a store, you’ve probably noticed that the length of the wrap is too long, since we don’t need as much fabric to cover our bust line.  To solve, that, we’re going to take some length out of the neckline above and below the bust point by pinching out extra length above and below the bust point.  This will vary from person to person, as well as pattern to pattern, so make up a test bodice to try on and play around with.  For me, I ended up needing to take out 1″ of length total: 1/2″ above the bust point and 1/2″ below, illustrated above.  If you need to take out more length, try to evenly distribute a series of small tucks above and below the bust point.

As a personal preference, for more coverage, I also raised the neckline.  At the waist I added 1″ to the neckline, and blended it out to about a 1/2″ at the neck.  This also affected the shoulder seam, which needed to be extended 1/2″.


SBA 1

Here’s what  the pattern piece looks like after my alterations – the tucks are circled in yellow.  I taped the tucks in place with scotch tape, and the tucks gradually tapered out from the tuck point.  The white paper is the new drafted neckline.


SBA 2

Here’s another angle so you can see the tucks in the tissue a little better.  The bottom tuck, on the left-hand side above, was tricky for me since it intersected with the grainline.  So, I tried to keep the grainline as straight as I could while smoothing out the tissue from the tuck point.

Fixing the Wrap Gap

With the pattern alterations done, now we can move on to solving that annoying gaping problem and create a bodice that stays snug and close to the body.  If you don’t have that problem with your pattern, then great!  You’re ready to get sewing!  If not, try out this method using 1/4″ twill tape – I like it better than using clear elastic for stabilizing a wrap neckline.
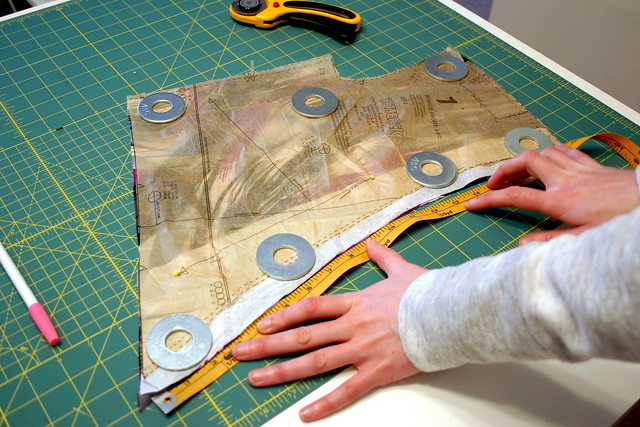

SBA 3

Using a tape measure or your preferred way of measuring (flexible rulers are great for this), measure the length of the neck for the front bodice piece and the neckline of the back bodice piece.
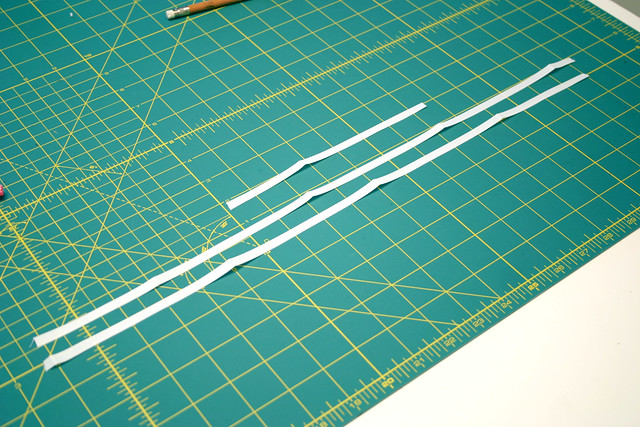

SBA 4

Using those measurements, cut one piece of 1/4″ twill tape that corresponds with the back neckline measurement, and two pieces of twill tape that correspond with the front neckline measurement – one for each side of the wrap.  In Power Sewing, it’s recommended that if you have a B cup to cut the front strips 1/4″ shorter than the neckline measurement to draw in the neckline better.  If you’re an A-lady like myself, cut the pieces out as the neckline measures.
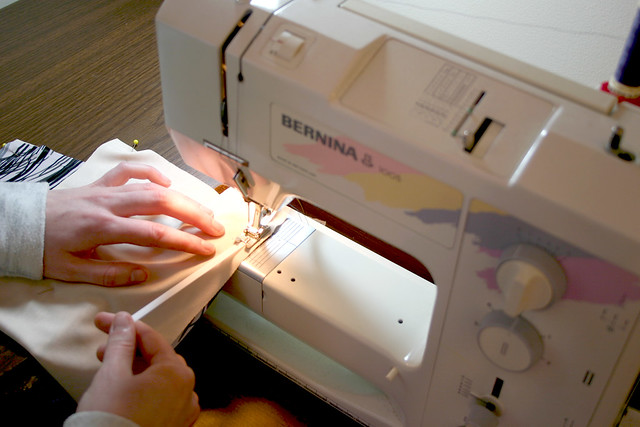

SBA 5

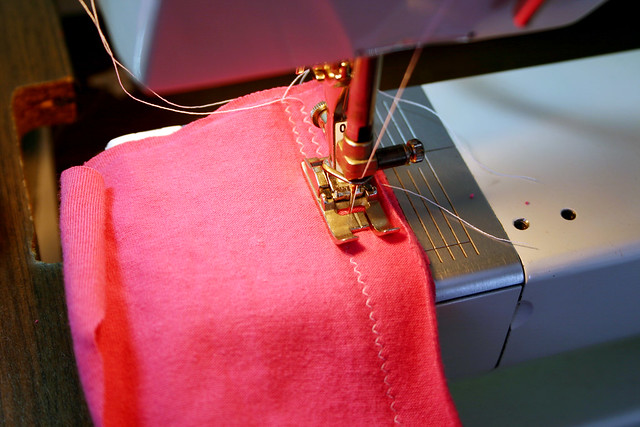
Bodice wrong side up, pin the twill tape with the edge of the tape 1/4″ away from the edge of the neckline.  Using a straight stitch, sew the tape to the neckline.  The feed dogs will ease in the bodice as you go, but I find stretching ever so slightly on the twill tape helps with this step.  Repeat for the other side of the front neckline and the back neckline as well.


SBA 6

This is what one side of my front neckline looks like after stitching the twill tape.  Gently press out any puckers with a cool iron.


SBA 7

As a personal preference, I serged the neckline edges for a clean finish after stitching all of the twill tape.  When you’re at the part during dress construction where you’re ready to hem the neckline, simply turn in the neckline 5/8″ and stitch in place.

*You may have noticed in the above photos in the tutorial that the wrong side of my garment fabric looks different than the right side.  Since my knit garment fabric is so sheer, I underlined the bodice with nude-colored swim tricot, so my bra won’t show through.  I like the body the underlining gives the fabric as well!

There you have it – I’m now on wrap-dress #4 (and have yet to post #2-3!) using this method, and each time I’m thrilled with how the neckline turns out.  If you’re small-busted like myself and have yet to successfully make a wrap dress because of how the neckline fits, I hope this opens up a world of wardrobe opportunities to you.  Let me know!

Now, to finish making my dress for the sewalong…

Follow:

Sewing With Knits – McCall’s Wrap Dress Sewalong


sewing with knits guide

Hey there, sewing lovelies! Today I’m going to take you through how to sew with knit fabrics, regardless of what kind of sewing machine you’re using. This is a guide I’ve been meaning to write for a long time, and I’m so glad to have an opportunity to do so for the McCall’s Wrap Dress Sewalong. Having a serger is nice, sure, but you can still get great results with a regular ol’ sewing machine – I did so for many years until I bought a serger.

I’m going to cover the basic stitches in this post: straight stitch, zig-zag, and also using a serger.  I sew on a Bernina 1005 and don’t have some of the fancy stretch stitches on newer models, so you may want to reference the manual for your machine to see if you have some other stitch options to use.

If you’re new to sewing with knits, I highly recommend sewing some test seams with the fabric you’ll be working with, to get an idea of what stitch length/width to use, and to become familiar with the characteristics of the knit fabric you’re using.  In the samples for this tutorial, I used a contrasting thread so it would be easy to show what the stitches look like, but of course you’ll want to use a thread that matches your fabric best.

Tools of the Trade


Ball-Point Needle

Ballpoint needles are made for sewing knit fabrics. They have a rounded tip which prevents the knit loops from splitting and breaking. Universal needles are made for sewing either woven or knit fabrics, but may not provide the best results with knit fabric like a ballpoint needle would.

Presser Feet

I use my regular zig zag foot for sewing with knits. I know some say that a walking foot is key for sewing with knits, but I’ve never had an issue.

Ok ready?  Let’s grab some fabric and start making some test samples!

1. Straight Stitch


straight stitch

This was my preferred way of sewing knit fabric until I bought a serger – yes, you can sew with a straight stitch on knits!

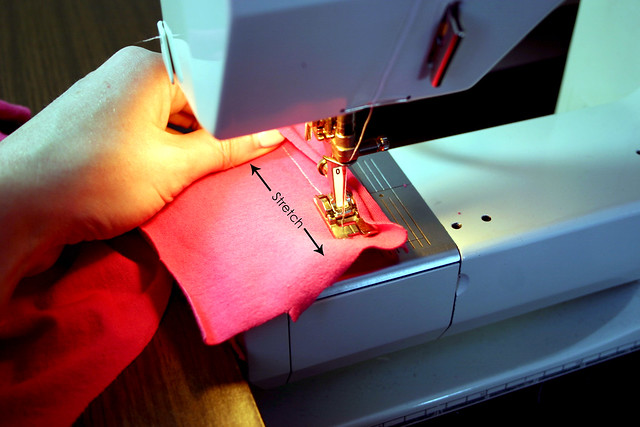
The key to doing so is while sewing the seam, the fabric needs to be stretched gently in both directions, front and back – this will prevent the stitches from popping in high-stress stretchy seams like waistbands and necklines, or any type of seam that needs to stretch.  In the photo above, if I had two hands available (which I couldn’t because of holding the camera!), you’d see that I’d be stretching both the front and the back of the fabric, with equal tension, as I sewed the seam through the machine.  This builds stretch into the stitching, which you can see below:


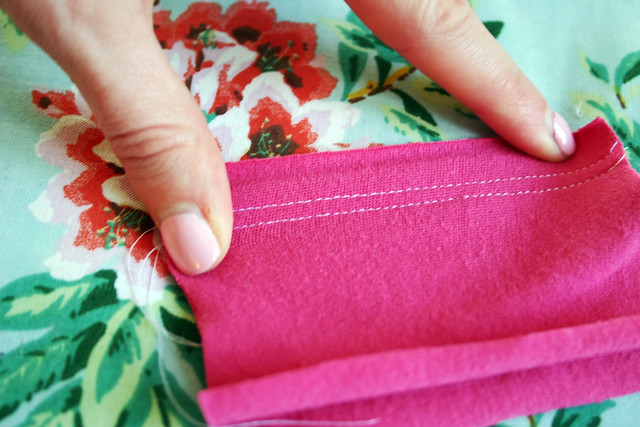
straight stitch seam

The stitches look kinda tiny and scrunched in the finished seam. .


straight stitch seam stretched

And now you can see the stitches expand as they stretch with the knit fabric.  Easy-peasy and no popping!  Oh yes, and make sure to sew double-stitched seams for extra security – about 1/4″ away from the original stitching will do


straight stitch seam rightside

Looks pretty good from the outside, too, when stretched.

2. Zig-Zag Stitch


zigzag stitch

Zig-zag stitching is probably the easiest way to sew knits on a traditional sewing machine – the zig-zag stitch by nature builds-in stretch to the seam you’re sewing, no fabric-stretching necessary.

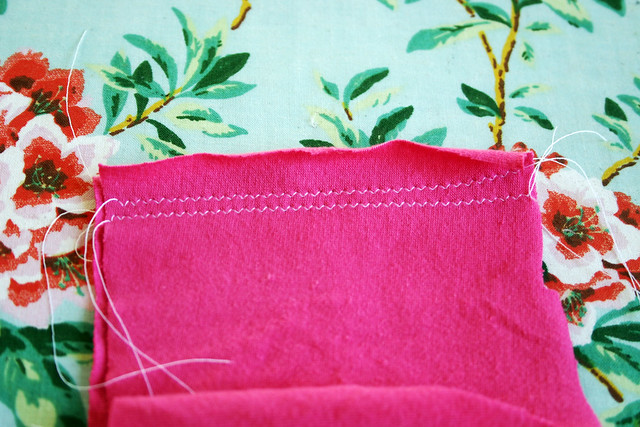
After stitching your seam, stitch 1/4″ away from seamline in the seam allowance, just like with the straight stitch above.


zigzag stitch seam

This is what the seam will look like when you’re finished with double-stitching the seam.


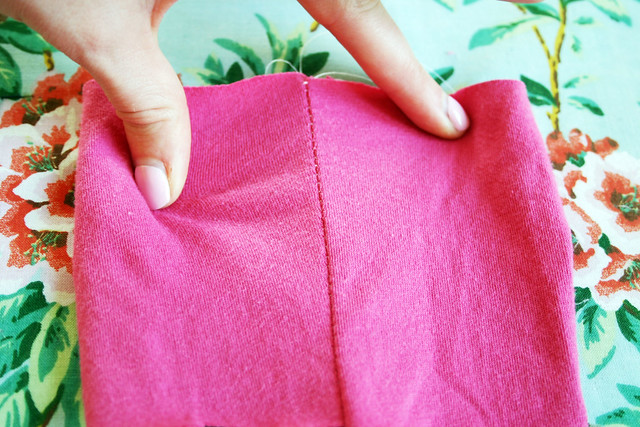
zigzag stitch seam stretch

And here’s what your zig-zag seam will look like from the outside when stretched.  The reason I don’t care for this type of seam is that no matter how small I make my zig-zag stitch, I can see the stitches from the outside.  To each his own though, if you like how this seam looks then go for it!

3. Serger Seam


serger setup

This is the easiest of the bunch!  Hopefully you’re familiar with using your serger, but if not, it’s not hard to get started – I whipped up a tshirt the day I bought my machine without a problem.

I keep my serger set to “M” (which is standard) for the stitch width, and the stitch length I tinker around with until I get a good look when I stretch my seam from the right-side – between 2 and 3 works for most of the knits I sew.  Not pictured here, but I also keep the differential feed at N.


serger stitch

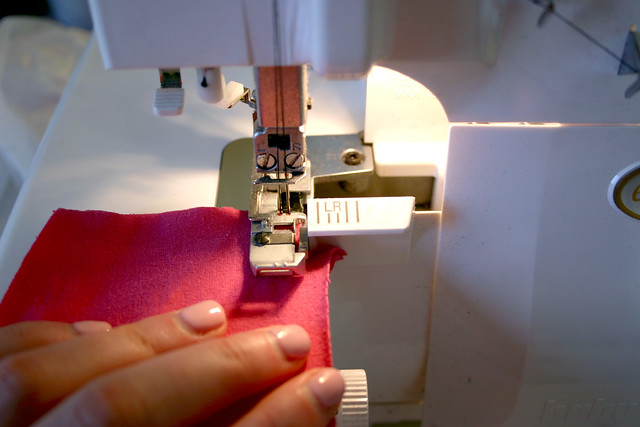
Just like how we sewed double-stitched seams on the sewing machine, you’ll want to use two needles in your serger (ball-point needles of course) – this means four-thread serging.  I first started serging garments with only one needle/stitched seam, but the extra security on a stretchy garment is really important, so ideally knit garments should be sewn with two needles.

Also, since I’m using two needles, I line my raw edge of my fabric up with the “L” or “Left Needle” mark to the right of the serger bed – this will give me an accurate 5/8″ seam allowance.  If I was using only one needle, I’d line my raw edge up with the “R” mark.

Now serge away!!  I love how fast sergers sew, it’s pretty gnarly. Do people even say “gnarly” anymore?


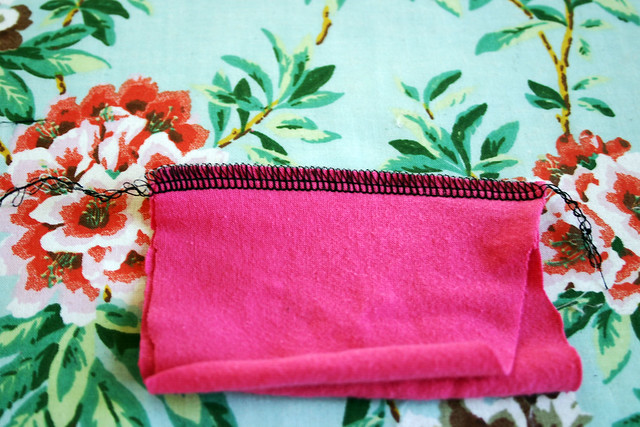
serger stitch seam

You should end up with a pretty, serged seam like the above, with even tension and the looper threads hugging the raw edge of the seam.


serger stitch seam stretched

If my thread matched the fabric, you wouldn’t be able to see the stitches at all with the fabric stretched!

Those are the three basic ways I’ve sewn seams on knit fabrics for all of my knit garments.  Working with knit fabrics can be intimidating at first, but the more familiar you become with handling the fabric and working it through whatever machine you use, you’ll wonder why you waited so long to try sewing with knits!  It will revolutionize your sewing world.

Of course, there’s more to sewing knits than what I could cover in a single blog post.  If you’re looking for even more info, I highly recommend the Colette Guide to Sewing Knits that came out last spring – it’s the book that I wished existed when I was figuring out how to sew knit fabric.

Follow:

Selfish Sewing Week at Indiesew

senna tote

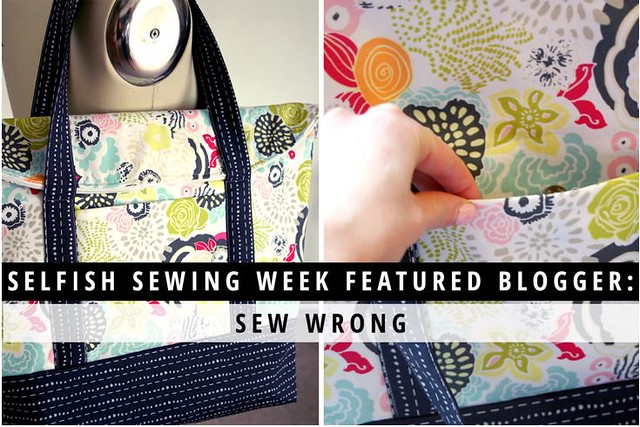
Hey guys! Did you know this week is Selfish Sewing Week?  Every week for me is selfish sewing week, haha, but the awesome folks at Indiesew, Kollabora, Imagine Gnats have put together a great themed week of sewing inspiration and great prizes you can win.

My project for Selfish Sewing Week, as part of the Indiesew Blogger Team, was the Senna Tote by LBG Studio for Willow and Co, and the lovely folks at Art Gallery Fabrics provided the fabric for my tote.  Now that I have a new job that will be even more travel-intensive than before, I know this pretty lady will be quite handy when travelling via planes, trains, and automobiles.

More info and photos of my tote on the Indiesew blog!  Are you making anything this week just for yourself, a la Selfish Sewing Week?

Follow:

My Handmade Wardrobe Just Got Cooler


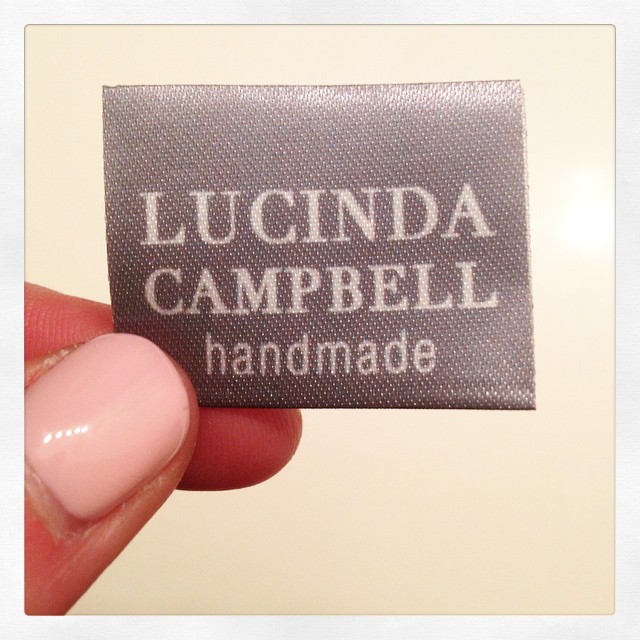
Sewing just got 100x more exciting #customlabels #houseofcampbell #fancypants

That’s right guys, I now have my own custom labels to sew into my handmade garments!  My sister was nice enough to create some different design options for me, and this grey one was my favorite.  Fleur shared with me where she got her labels made for her pop-up shop event – Custom Couture Label Company, a small printing company based in my backyard in NH.  These labels are digitally printed satin labels that are loop-folded and heat sealed on the edges.  I was really happy with how quickly they created the proof before sending my order to be printed, and the labels arrived in my mailbox about two weeks later.  If you’re looking for custom labels to sew into your handmade clothes, I highly recommend them, the quality is great – they can do batches as small as 100 labels for about $45.


This guy ❤ thinking warm thoughts on our flight from sunny Florida back to snowy Boston


View from our beach chairs today #vacation #neverwanttoleave

In other news, I was off the radar for the past two weeks with travel for work and vacation…Chris and I just got back from a few days in Florida, and let me tell you, we did not want to leave.  It was 80 degrees, sunny, and just wonderful to unplug and chill for a few days by the pool with a book and a margarita.  And now we’re back to reality, but at least it’s starting to feel a little more like we’re closer to spring – today it hit 40 in Boston!  Heat wave!

Tonight I’m going to start planning out my attack plan for spring sewing – I got a big box of fabric shipped to me from Metro Textile and I’m in desperate need of some new clothes for the warmer weather that hopefully will be here soon…exciting Saturday night, I know.

Hope you’re all having a good weekend!

Follow:

McCall’s Wrap Dress Sewalong!


wrap-dress-sewalong-badge

What an exciting week – I finished my coat and McCall’s Patterns also announced their newest sewalong: The Wrap Dress!  What’s so exciting about a wrap dress sewalong, other than the fact that a wrap is the greatest wardrobe staple ever?  I’m co-hosting the sewalong with McCall’s Patterns and another blogger, Ruqayyah Davis of ReDpants Designs!

Wrap dresses are easy to make, now that I understand how to adjust them to fit my chest and not gape, and I have quite a few in mind to make for the spring and summer weather that will eventually (hah!) arrive here in Boston.  Here’s an overview of the sewalong schedule:

2/16: Announce sewalong
2/23: Try before you buy: Do wrap dresses work for you? Social media: hashtags, Flickr, Facebook, badges for blogs
3/2: Choosing your fabric. Cutting and working with slippery/rolling fabrics like ITY, silk jerseys, etc.
3/9: Making a muslin if necessary; how much ease do you want?
3/16: Sewing and working with knits. Finishing seams with and without a serger
3/23: Sewing the neckline area and preventing gaping
3/30: Making the sleeves; hemming the skirt; finishing up
4/6: The Big Reveal!

It’s a long timeline, but that way it’s easy to fit it in to your busy sewing schedule and make it a stress-free sewalong.

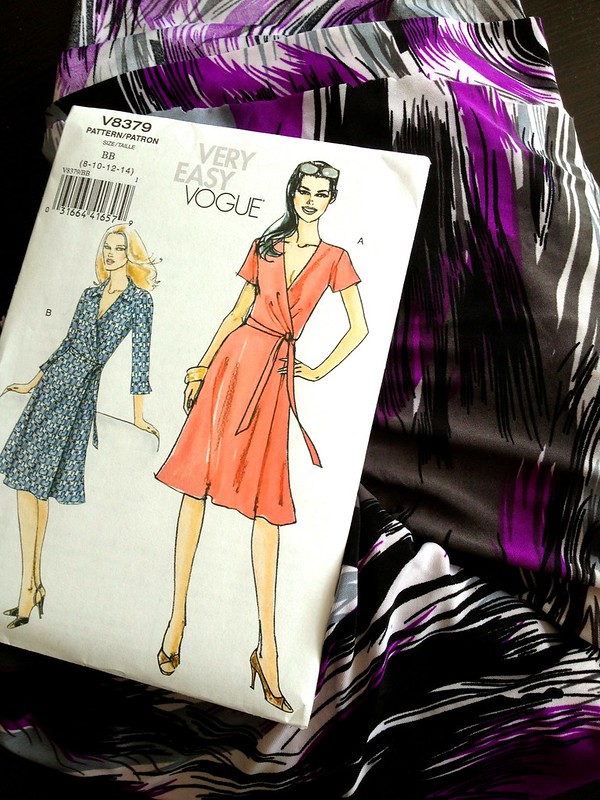
For patterns, it’s really up to everyone individually on which Vogue/McCall’s/Butterick pattern you want to use, as long as it’s for a knit dress – those are the easiest to fit, and the closest to that classic DVF wrap dress look.  They all pretty much have the same fundamental construction steps.  Last night I went “fabric shopping” through my stash and discovered I had enough yardage to make a full-skirt version out of this fabric:


Wrap dress sewalong plans


This is an ITY knit I bought from Metro Textiles a few years ago because it was so pretty, but didn’t have a plan in mind on what to make with it.  Luckily, I bought 2.5 yds, which is just enough to use for a swishy-skirted wrap dress.  I’m planning on blending the bodice of Butterick 5454, which is what I used for my first wrap dress and fits me well, with the skirt off of Vogue 8379.  Why, you ask? The bodice of Butterick 5454 doesn’t have gathers around the bust, which would be difficult to fit on me since I have a small chest and gathers create extra fullness I don’t need.  I love the flare/a-line shape of the skirt of Vogue 8379, so I’m going to try to pattern-Frankenstein the two together to make a new dress pattern!  This fabric is also a little on the sheer side, so I’m planning on underlining the bodice with a swimsuit lining tricot leftover from swimsuit sewing last year.  I’m very excited to get started on this and to share some tips and tricks along the way!

Are you planning on participating in the new sewalong?

Follow: