Pattern Review: Vogue 1020

Vogue 1020

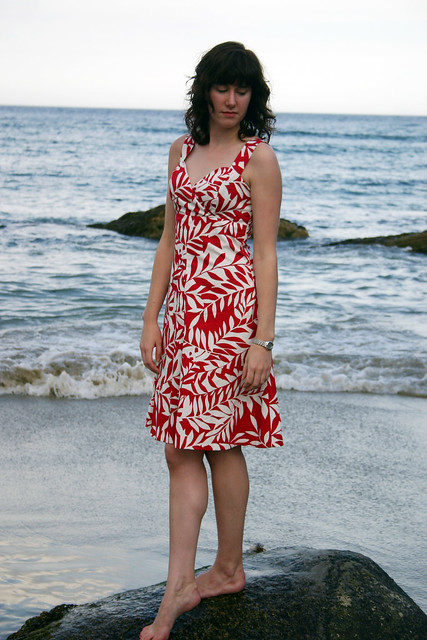
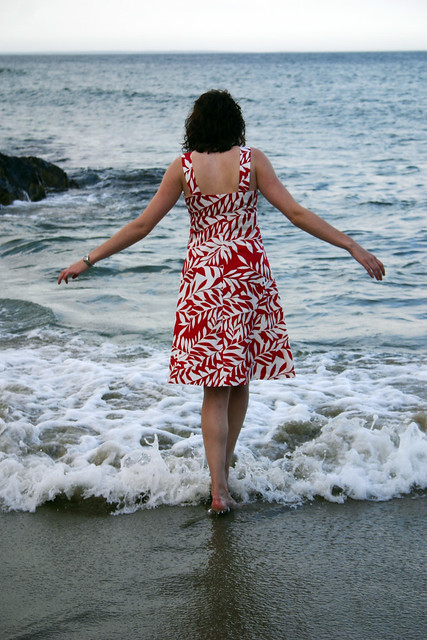
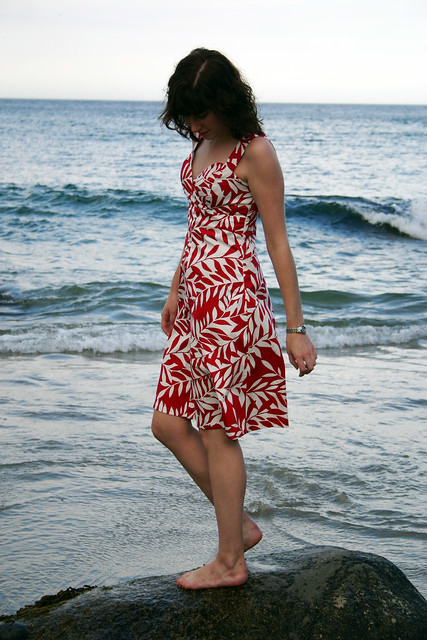
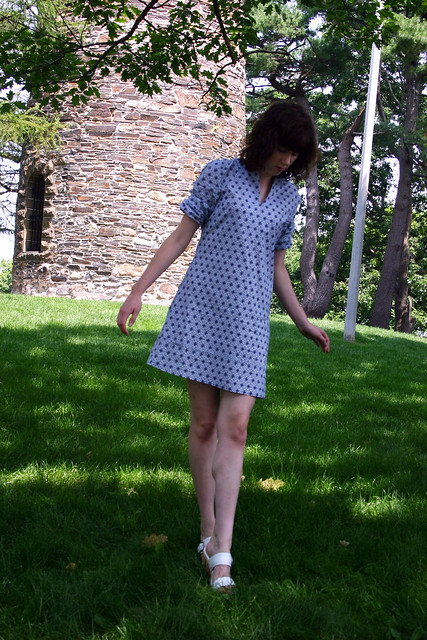
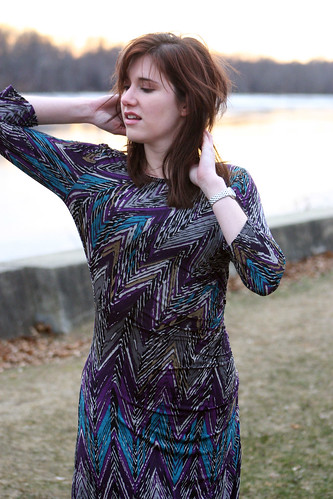
Pattern: Vogue 1020, View C (OOP)
Size: 10 bodice graded to a 12 skirt
Fabric: Rayon jersey from Gorgeous Fabrics

I did the unthinkable.  I swore I’d never do it again.  But I did: I sewed a pattern that I already sewed three years ago and failed miserably at.  The reason? It fit terribly and I hated how I looked and felt wearing it.

So why in the world did I try it again?  This was the right fabric for it this time around.

Vogue 1020

1) The Fabric

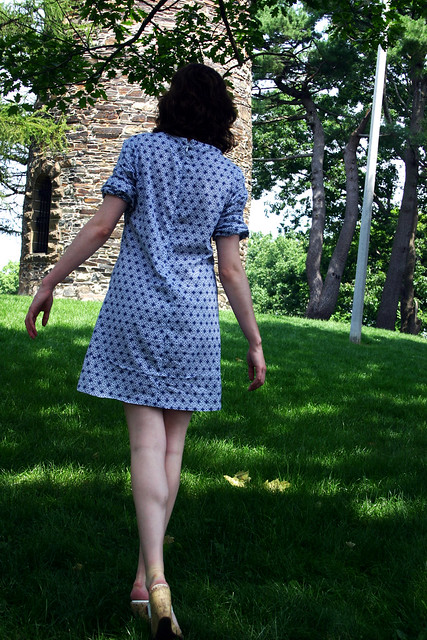
I mean come on, this is a pretty funky fabric.  And I felt that the print was so crazy-wild, it would distract from any fit issues I had around my stomach.  I loved that the pattern layout created a bias across the bodice and then caused the print to straighten out at the skirt – this was a design element of the pattern that would be missed if I decided to use another plain knit this go-around.  The weight of the fabric was perfect for this dress too; it was lightweight but draped well and had the right amount of stretch to it.

Vogue 1020


2) Grading

I’ve learned over the years of sewing how my body is proportioned and what works and doesn’t work.  Learning from what I did before on this pattern, I didn’t cut a straight 12 – I cut a 10 for the top, guessed where the waist was (it’s really not clear on the pattern where the waist is located because of the side gathers…the left side is super long), and graded it out to a 12 to where I believed the hip started.  It worked much better this time and I ended up being a lot happier with the fit.

Vogue 1020


3) Construction

The directions were straightforward and I think I referred to them once or twice, but pretty much did things based on instinct.  I opted to use clear elastic at the shoulder seams and at the left gathered side seam instead of seam tape – much more RTW looking.  No zipper used either since this fabric is so stretchy it’s not necessary.  And thank you to whoever invented the twin stretch needle because for those of us who don’t own a serger, it’s a miracle.  I used it to hem the bottom of the dress and sleeves as well as the neckline, and it looks so much more professional than a regular straight stitch.

4) Proper Undergarments

Don’t get me wrong: this is still a really tight dress and I have to remember to not slouch when I’m wearing it.  But I found that wearing something underneath, like my DKNY Smoothies Leggings, really helped to smooth out my stomach and prevent bumps from my underwear from showing (I told you, it was a lightweight knit fabric!).  I wore them the first day I wore this dress, which was to give a presentation at Ignite Craft Boston, and it helped to control everything all day and I felt good.

Now that I’ve finally conquered this pattern, I’m looking forward to tackling that top again.

Updated: I’ve mentioned this particular pattern in a new blog post about Vogue’s “Figure Flattery” guidelines here.

Follow:

Simplicity 2657 – Sew Stylish Sundress

Simplicity 2657 - Sew Stylish Sundress

Pattern: Simplicity Sew Stylish 2657, View C

Size: 8/10 for the bodice, graded to a 12 in the skirt

Fabric: Cotton Twill from Joann Fabrics (an awesome find)
This pattern has been in my stash for two years since it was the feature pattern in the Spring 2009 issue of Sew Stylish Magazine, a younger and hipper version of Threads Magazine geared towards the sewing newbie. When doing research on this pattern before I committed to making it, I was surprised on how few people had made this pattern. There were the few sewers who made alterations to this pattern for maternity wear, which wasn’t exactly a turn-on, but I decided to give it a try. I figured once I mastered the fit on this dress, I’d have a great base for a sundress for future dress projects.

Simplicity 2657 - Sew Stylish Sundress


1) The Bust
If you’ve been reading my blog, you know that I’m challenged when it comes to fitting the bust in any type of top/dress pattern. This pattern was featured in the issue to show how to fit a bust using princess seams. Amazingly, the bust fit perfectly on my muslin and I didn’t have to do any type of alteration to the curve of the seams. Instead, I added on to the bodice pieces for more coverage; I added about half an inch on to allow that I can wear a regular bra and not a strapless. Somehow when I widened the front, and consequently the straps as well in the same amount, it created a different neckline than the original pattern, which I like better. The points at the top of the bodice pieces create an unintentional retro look. I swear I did my math right; I have no idea how it happened!
I also need to tack down the surplice, it’ll make the top more smooth looking than in the pictures and prevent it from gaping open slightly.
2) The Straps
Because I widened the front pieces, I had to widen the straps as well. I’m glad I did so since I can wear my normal bras with the dress and not worry about an strappage peeking out. If I really wanted to, I could have made lingerie straps to secure my bra straps in place. Of course, I was too lazy to do so.

Simplicity 2657 - Sew Stylish Sundress

3) The Back
I’ve never had this happen before: the back piece was almost two sizes too large. Like I said, it’s always the front that is an issue to fit, not the back. Solution? I cut an 8, instead of a 10, for the back piece. Plus, I had to grade it in slightly as I got to the waist seam where the skirt joins the bodice. But after I did so, it fit perfectly.

Simplicity 2657 - Sew Stylish Sundress

4) The Zipper
A side zipper – yikes. I’d never put one in before until this dress and wasn’t a fan of the fact that it was a standard zipper the pattern called for, not an invisible zipper. Side zippers seem to be really popular now on RTW dresses since they’re hidden in the side seam and don’t destroy the continuity of a pattern’s design; it’s a hidden construction element. I disregarded the instructions for the regular zipper and assembled the front and back skirt and bodice pieces to each other, installed the invisible zipper, and then sewed the side seams. I also made sure that the zipper stop went all the way to the top of the side seam so I wouldn’t have to sew a hook and eye (dislike), and tacked down the facing in the inside to the side seams.
So summer is coming to an end, I’ve already started thinking about my fall sewing wish list, and I probably won’t look at this pattern again until next year. I can definitely see myself making this pattern again, either as a maxi dress or as a cute tunic top. Once I got the fit down, this was a breeze to sew.
(Pictures are at Ogunquit Beach in Ogunquit, ME)
Follow:

Last Days of Summer

Crashing waves - Ogunquit, ME

Rocky rocks - Ogunquit, ME

Walking along the Marginal Way - Ogunquit, ME


I was lucky enough to escape to Ogunquit, ME this week for a two day mini-vacation with my boyfriend’s family, who rent a beach house for two weeks at the end of August every year. I visited Maine about eight years ago with my family during a car trip up to Price Edward Island and we were very underwhelmed; we thought that the coast of Maine would be more stunning and dramatic than what we saw. Clearly we should have visited Ogunquit! So beautiful and picturesque, calm and tranquil, and a whole bunch of other adjectives that describe this town. The beach was neat and clean and not at all rocky/gravely as I expected, but the water was on the cold side both days I was there (plus we got rained out one of the days and stayed inside playing games all afternoon). It was sad leaving Friday to come back to work, it was like leaving the last bit of summer behind. I know I can’t wait to go back and visit again next year.

And of course, I used the opportunity to take some pictures of a dress I finished during my last vacation in July. Here’s a sneak peek:

Simplicity 2657 blog sneak peek


More pictures and details to come next week, that is, if I still have power after Irene hits New England. Bracing for the weekend ahead…

Follow:

Vogue 1224 – Tracy Reese Dress

Vogue 1224 Tracy Reese Dress

Had to take these pics before a potential rainstorm!

Pattern: Vogue 1224

Fabric: Rayon Jersey from Metro Textile in NYC
Size: 10 graded out to a 12 at the waistline
Shoes: Target (Merona brand)
Bangle: H&M
I knew as soon as I saw Erika B’s Tracy Reese dress posted on her blog, that pattern would be at the top of my sewing queue. So cute, flattering, and simple to sew: three elements that equal “yes” in my book!
I was lucky enough to be sent to NYC last month for a business trip and squeaked in some quick shopping in the garment district. Usually when I go to New York it’s on the weekends, so I don’t get to frequent a whole lot of places since they’re closed; usually I hit up Mood and Paron’s. I did do some damage at Mood this trip (found some turquoise eylet for a knock-off CK top and a pretty orange gauze), but I also had the opportunity to visit Metro Textile. It’s my favorite place to buy jersey – the selection is amazing, the quality is great, and it’s a source that Ann at Gorgeous Fabrics uses for her business (I can always spot fabrics on her site there). Plus, the service is great and prices can’t be beat. I could go on and on about how great Metro Textile is, but let’s get to the review of the dress!
Vogue 1224 Tracy Reese Dress

One of the quickest sewing projects I made…I literally cut this dress out one night after work and stitched it up the next night to wear to a party the following day. I’m glad that I read some reviews on this dress before I made it – seriously, what did we do before the internet? Trial and error I guess!

1) The Length
Boy is this dress short! I’m pretty leggy so dresses and skirts seem shorter on me, so I lengthened the dress two inches and put in a very narrow 5/8″ hem. I think the original length would have hit on me at mid-thigh, totally not my style.
2) The Skirt

The pattern envelope shows the skirt being pretty tight on the model. That’s fine for her, not for me. I probably could have gotten away with the whole dress being a 10 taking into account the stretch properties of the fabric I was working with, but I knew I wouldn’t be comfortable in a tight skirt. I graded it out from the waist to a 12, as I usually do with dresses, and it worked well.
3) The Neckline
The neckline is pretty cool: it’s elasticized, and the elastic is joined to decorative drawstring ties. Me, being always impatient and not wanting to deal with the tediousness of turning the ties inside out (really need a tube-turner), opted to not use the ties. Plus, I didn’t want to make a buttonhole on a knit – I didn’t have any Sulky tear-away stabilizer to reinforce the buttonhole. I think my neckline resulted in being more gathered since I used a shorter piece of elastic, but I like it that way.
4) The Lining and Waistline
I really didn’t think it was necessary to line my skirt, like the pattern suggests, since my fabric had enough body to it. I used the technique I used with my jumpsuit to join the bodice and skirt together: the seam allowances created a casing for the elastic to go through. This created less bulk at the waistline and was a time saver.
Vogue 1224 Tracy Reese Dress - Closeup
Blurry photo, whoops…trying to show the print detail
I’m absolutely planning on making this dress again…I bought another knit at Metro Textile that’s really funky and has a lot of pattern and colors going on in the print. The design of this dress is simple enough that it’s a great pattern to showcase large or busy prints.
Follow:

Simplicity 2584 – Cynthia Rowley Tunic/Dress


Cynthia Rowley 2584

Pattern: Simplicity 2584

Size: 10 graded into a 12 from waistline to hipline
Fabric: Cotton lawn from the Lisette Collection at Joann Fabrics
Shoes: BOC Born Concept
I bought this pattern over a year ago, and when trolling through my stash last month, it stood out as something I had to make this summer. Lindsay T has made it several times in different variations/combinations and it inspired me to give it a go. I’m so glad several sewers have made this before me since their tips helped me to figure out the changes that I would have to make to this pattern to get it to work for me.


Cynthia Rowley 2584

1) The Bust Darts

I’m bust challenged, I admit that. From sewing, I’ve also realized that my bust is higher than drafted for RTW clothes as well as sewing patterns, which makes it difficult to find fitted dresses or tops in stores that have darts and shaping that hit at the correct bust point; they’re usually too low. Looking at this pattern I could see that this would be a problem for me and I was correct when I tissue fit the pattern on me. So using my handy dandy The Perfect Fit book (which is awesome for pattern alterations!), I moved the bust dart up to where my bust point was on the pattern. Tah-dah, no dart issues and I have a fitted top to a pretty shapeless shift dress/tunic.
2) The Neckline
After reading Lindsay T’s recommendations as well as from others on Patternreview.com, I realized the neckline slit would be waaaaay to long for me, like down to my diaphragm long! No thanks. Easy change, just didn’t cut the slit all the way down. I also didn’t make the yoke overlay since I figured with the busy pattern it would just get lost. Plus, it made it quicker to sew, yay!
3) The Length
This may be the shortest dress I own, and adding my “fake tall” platform wedges makes it seem even shorter. It was a risk to make it this length…but I’m glad I did it. I even added the tuck near the bottom, which isn’t noticeable except from the back since it gets all funky looking when I sit down.


Cynthia Rowley 2584

Whoops, wrinkles from sitting!

4) The Zipper

This cotton lawn fabric, which I absolutely love and is so breezy on hot days, is quite flimsy and concerned me when I wanted to install my invisible zipper. I used a technique from Sandra Betzina’s Power Sewing book: interface the seam allowance where the zipper is going to be installed to add stability to the seam. I think it actually makes the zipper open and close much easier now and the fabric doesn’t buckle or sag at the seam.
5) The Sleeves
I also read that there’s a lot of ease in the sleeve caps. I hate set-in sleeves, I always have a hard time distributing the fullness of the gathers around the cap. So again, I referred to Power Sewing and learned a new technique: Staystitch Plus. It made it so easy to insert the sleeve and I had no problem with the extra ease. I also decided to wear this dress with the sleeves pushed up like how it’s styled on the pattern envelope, but it also looks cute with the sleeves down. I can see this dress layered with a chunky cardigan or jacket for a spring/early fall look.
I definitely would make this pattern again, maybe using the yoke overlay the next go-round, but I have way too many things to make in my queue right now. Highly recommend if you’re looking for a simple, not too fitted, dress-like tunic for summer.
Follow: