Finished Project – Papercut Patterns Sweatshirt


papercut sweatshirt1

Pattern: Papercut Patterns Undercover Hoodie
Fabric: cotton sweatshirt fleece from Paron Fabrics
Size: XS

Shorts: J. Crew
Watch: Michael Kors
Sunnies: Tommy Hilfiger

No, it doesn’t feel like summer here yet, but it was a beautiful weekend last weekend, and Chris and I headed to the beach for our annual springtime beach walk.  This is the fourth springtime where we’ve spent a day at Hampton Beach in Hampton, NH, walking up and down the shore and feasting on fried clams (mmmm).  The weather was beautiful when we went – not a cloud in the sky and the temps were in the low 70’s, my fave.  Makes me wish it was a little warmer to go swimming., though…and it’s hard to believe that Memorial Day is coming up this weekend.


papercut sweatshirt2


Anyway, the beach seemed like a perfect setting to debut one of my new, favorite me-mades: a Papercut Patterns Undercover Hood, sans hood.  This is actually my second version of this sweatshirt without the hood, my first is made out of a coral Thakoon cotton fleece fabric from Mood.  I started making these around the time I became severely discouraged with my Anise jacket, and needed an instant gratification type project.  When I came to the step of adding the hood, I decided I liked the way the garment looked better without it.


papercut sweatshirt3

The neck edge, sleeve hems, and bottom of this version were turned under 5/8″ and stitched with a twin needle 1/2″ away from the edge.  On my coral version I sewed a hem band on the bottom of the sweatshirt, for this one I didn’t have enough fabric so I just lengthened it a bit.  This fabric was originally destined to be a Lola dress, but it turned out horribly – so not a good silhouette for my shape.  I’m glad I had enough of this yummy soft fabric for another garment.


papercut sweatshirt4

I’m practically living in this sweatshirt, I wore it all weekend long.  With the way temps have been this month, pieces like this have been my go-to items in my closet.  Hopefully summer weather will be here soon, but in the meantime, I’m glad I have a basic piece like this in my handmade closet now.

Follow:

DIY or Buy – Swimwear


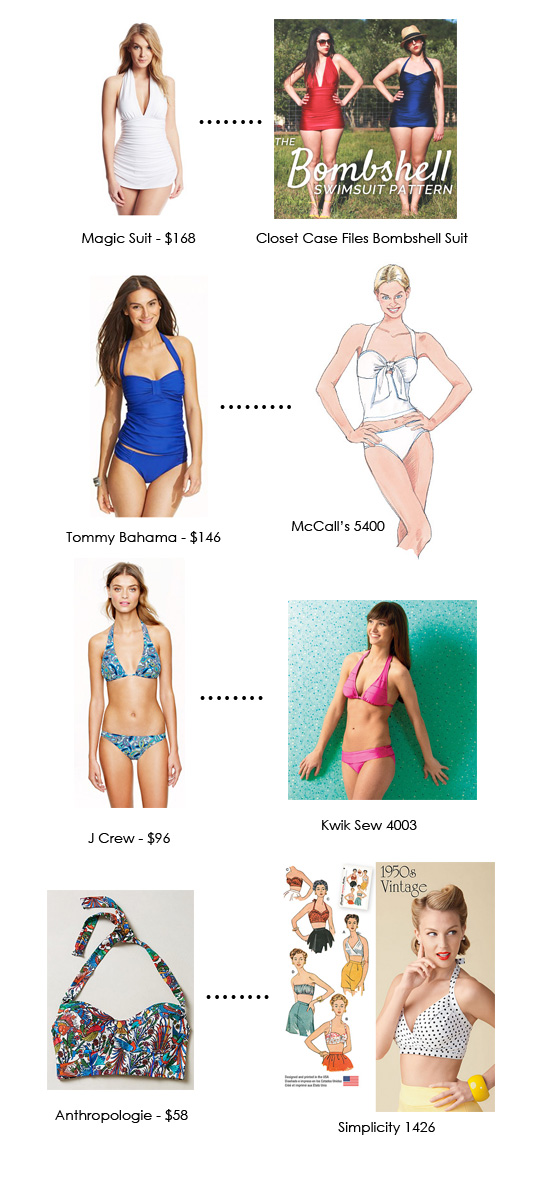
swimsuits

Last year, the whole online sewing community became more comfortable with sewing swimwear thanks to Heather of Closet Case Files and the launch of her Bombshell Swimsuit pattern.  I don’t know about you, but I have more confidence than ever now when it comes to sewing swimwear – heck, I made two new bikinis already this year!  They’re not as scary to sew as it seems, and it can be a lot cheaper than buying a new swimsuit off the rack at a department store…plus, you don’t get the “yuck” factor of trying on something a bunch of other ladies have squeezed into before you.

(Funny story – I used to be a merchandising manager for a department store, and would try on new swimsuits I liked as soon as they came off the truck before they hit the selling floor.  That way, no one else would have tried them on before me, they were fresh!  Once July 4 rolls around, the peak of swimsuit shopping season, I don’t recommend trying on swimsuits…if you catch my drift!)

Swimsuit sewing patterns are a lot cuter nowadays, and the styles are really on trend!  It’s easy to copy some of your favorite RTW suits for a fraction of the cost, as shown above.  Here’s the patterns:

1. Bombshell Swimsuit – two different versions, plus a high-waisted bikini bottom
2. McCall’s 5400 – also some cute bikini options
3. Kwik Sew 4003 – my go-to bikini pattern, you can leave off the ruffles
4. Simplicity 1426 – try converting the bra top into a retro bikini top!

Follow:

Finished Project: Anise Jacket [Colette Patterns]


anise 1


anise 2

You guys – I reached the finish line!  Seriously, this is the most time-consuming, difficult garment I’ve made in my sewing career.  But I did it!

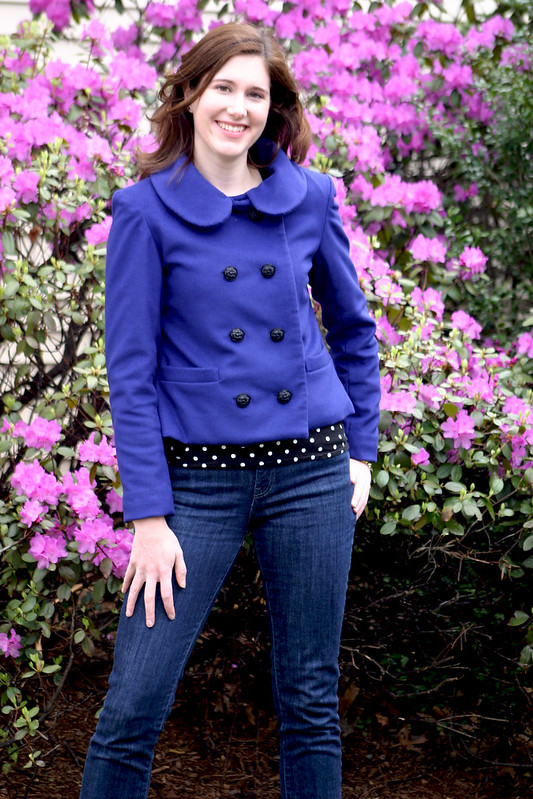
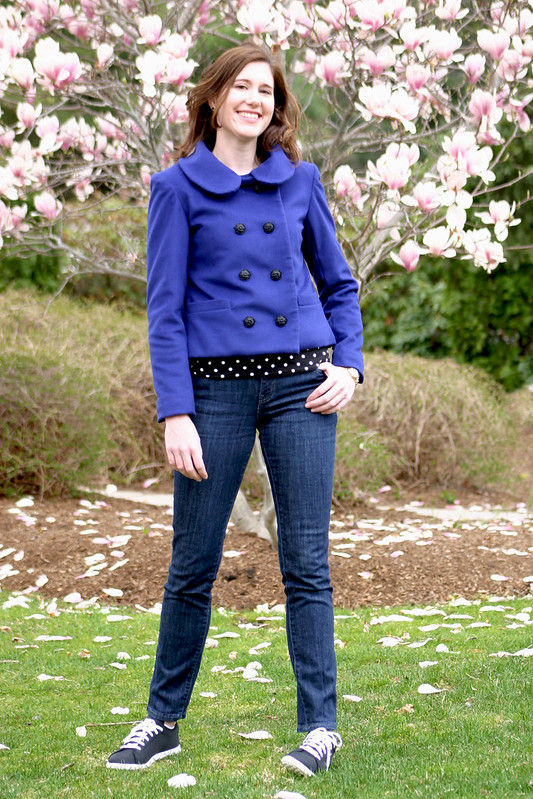
Pattern: Anise by Colette Patterns
Fabric:  main – wool from Metro Textiles in NYC; lining – stretch poly charmeuse from Fabric Place Basement
Size: 4 graded to a 6 at the hips

Shirt: Scout tee variation, unblogged
Jeans: Levi’s
Sneakers: Reebok

I want to thank everyone for their kind words and helpful comments as I struggled over the last month to make this.  Don’t get me wrong – I loved learning about the tailoring process, and I can’t wait to sew more tailored projects, but this pattern just didn’t work for me.  When I posted my last update on the jacket, I was actually 95% of the way done and too far beyond going back to fix some things that you all suggested, but they’re definitely worth exploring for my next go-round with tailoring.

So yes, this jacket isn’t perfect – but at this point, it really doesn’t matter to me.  I made a freaking tailored jacket, with welt pockets to boot!  I know my mistakes will be evident to experienced sewists looking at these photos, but I’m going to wear this jacket with pride, knowing that I learned soooo much doing this.


anise 3

1. I Have Narrow Shoulders – This is something I should have remembered from all of the blazers my Mom made for me for my first job.  She had to alter each pattern because the shoulder seams came way past where the shoulder seam needed to be.  This wasn’t evident when I made my muslin, but going back to try it on again, I could baaaarely see it.  Which also brings me to another learning – make my muslin in the same fabric weight as the final garment.  I’m sure if I had, the fit issue would have been more evident in a heavier weight fabric than light, flimsy cotton.

Having said all of that, I explored how to make my own shoulder pads, drafted sleeve heads for my jacket, and studied different kinds of shoulder pads for different types of garments (definitely need to give raglan shaped pads a try).  Maybe if I didn’t have this fit problem, I wouldn’t have learned all of these tidbits of knowledge.

Also, I could not for the life of me figure out why there was so much ease in the front of my sleeve cap.  No, it wasn’t inserted backwards.  I’m just…perplexed, and it’s not as smooth as I’d like.

anise 5

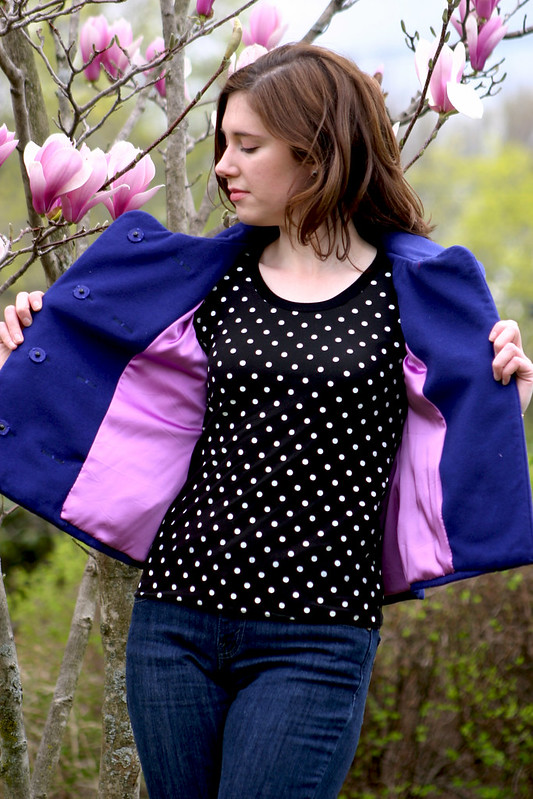
2. Stretch Fabric Isn’t a Great Idea For a Lining – but this one sure looks pretty!  The color is why I picked it, which is kind of silly, I know.  I thought the stretch would be an added bonus to give my jacket more movement and ease in the inside, but it ended up being more of a pain to cut out and stitch properly without getting runs in the weave.  It was anything but fun when it came to setting the sleeves in by hand, yuck!

However, this lining is an improvement over my original intended lining – a light gold acetate.  Acetate is a terrible idea for a jacket lining: it shows water marks and sweat stains (not good for my armpits, no way), doesn’t breathe well at all, and shouldn’t be used for garments with lots of wear.  I plan on wearing this jacket a lot, so no dice with the acetate.  I know poly isn’t a whole lot better in terms of breathability, but it was in my budget for this project.


anise 4

3. Press, Press, Press – I originally thought I did a great job taking my time when it came to pressing, really taking my time and pressing every seam like The Pressinatrix recommends, but I guess this jacket could have used a little more based on the above photo.  Having the right tools is imperative as well, I’m so glad I asked for pressing tools like a seam roll, clapper, and a tailor board last year for my birthday – they made getting to every area I needed to steam a lot easier.


anise 6

4. Creativity Is My Friend – you may have noticed in an earlier photo that I have snaps on the inside of my jacket.  This wasn’t the original plan, I had every intention of making buttonholes on my Mom’s wonderful Bernina (the automatic buttonhole feature is killer) when I was visiting a few weeks ago.  However, the bulk at the edge of my jacket front threw off the calculations of the machine and I ended up with some wonky looking, uneven buttonholes that wouldn’t pass muster.  That’s when the light bulb went off in my head that I could use snaps instead to close the jacket, and my Mom suggested covering the snaps in a coordinating lining fabric.  Problem solved, and a new technique under my belt.

anise 7

5. Perfectionism Is My Enemy – I was really close to not even finishing this jacket when I realized the problem with the shoulders, and the fact that how I made my welt pockets caused the front to pull.  There were tears, I threw the jacket in the corner, and I didn’t touch the project for over a week.  I wanted everything about this jacket to be crisp and perfect, I wanted people to ask me where I bought my jacket – I didn’t want it to look “home-made.”  But in the course of trying to achieve something “perfect” looking, I realized I needed to cut myself some slack – this was my first ever tailoring project.  How could my expectations be set so high for something I’ve never done?  I trudged on with the shoulder pads, the lining, the hand hemming.  There was way too much time invested in this project to give up – I steadily worked on this for a month, and to not have anything to show for all of that time would be sad.  From here on out, I need to chill and just enjoy the process of making clothes, and not get all hung up on details that will probably be evident to only me.

I’m so glad I didn’t let my perfectionist tendencies when it comes to sewing prevent me from finishing this jacket!  I wore it for the first time this past weekend, and it may be my last until fall since the weather is finally getting warm in Boston.  I never thought I would sew a project like this, let alone enjoy something that seemed so tedious to me like tailoring.  But now that I’ve taken my first step with this project, I’m determined to master the skills it takes to tailor well.

Follow:

Twenty Eight


Untitled

There’s something about getting older – birthdays just aren’t as exciting as they used to be when you’re a kid.  You wake up and meh, it’s just another day.  Nonetheless, I had a nice birthday, actually “week” last week!  Lots of coworkers wished me happy birthday at our sales meeting, I got a big birthday cookie from my manager, and Chris and I went out to dinner last night to a steak and sushi place I wanted to try – we got free ice cream on the house, too!

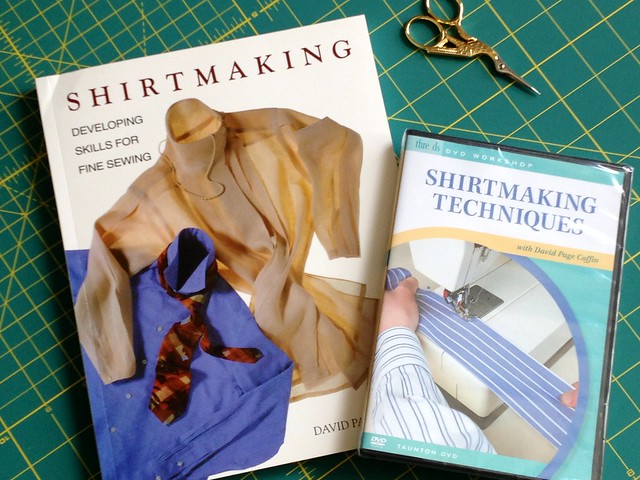
The above are gifts I got from my parents when I was home a few weeks ago (heck, it’s been a birthday month!!).  I think every birthday/Christmas in the past three years have all been sewing/knitting/crafting related – hey, it’s what I’m in to (however, Chris did give me a beautiful onyx jewelry set).  I got a giant rotary cutting mat for my cutting table, and now I can cover the entire surface with another mat I own and rotary cut out entire projects – score!!  David Coffin’s Shirtmaking book has been on my list for a while since I started sewing button-down shirts, and I’m excited to use the DVD to actually see the techniques in action.  And lastly, a new pair of Gingher snips – so much nicer than my little Fiskers.

Here’s to another year full of sewing goodness!

Follow:

8 Days to Anise: Well, Not Really…

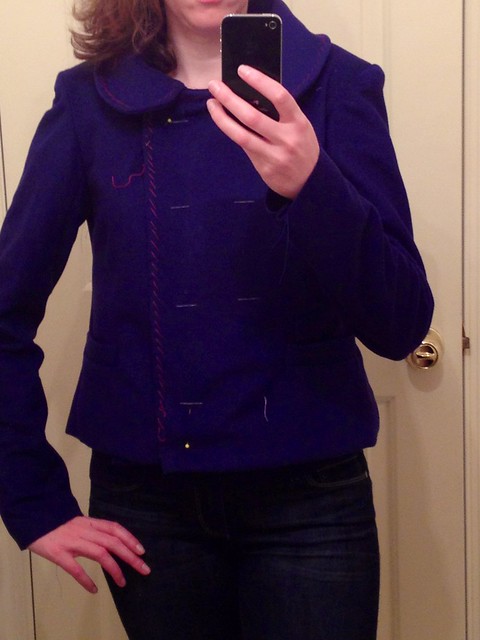
Things have been quiet here for the last week, mainly because I hit a major roadblock with my Anise Jacket, and there’s nothing I could do to fix it.  After getting over my initial disappointment, I picked it up and decided to sally forth – I’ve spent so much time on this, it would be a shame to not finish it regardless of the fact that it…doesn’t fit correctly.

Here, I’ll show you.


Untitled

It’s those damn shoulders.  And I should have known better, based on when my Mom made blazers for me a few years ago.


I just got out of the shower and my hair was wet in these pictures…

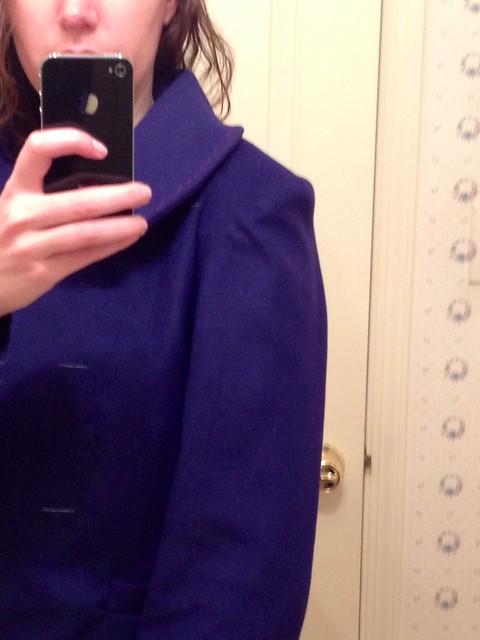
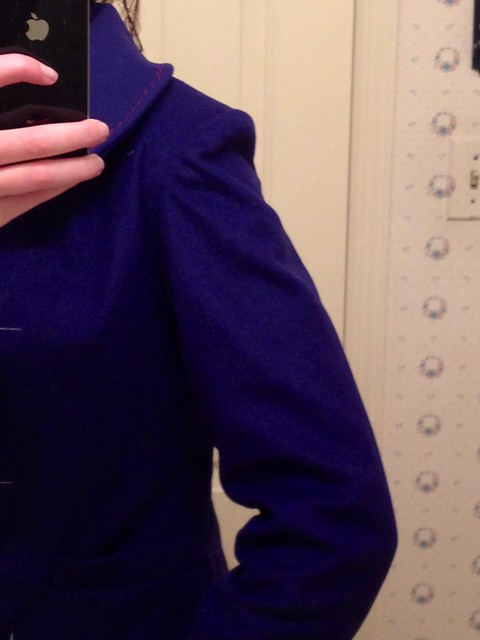
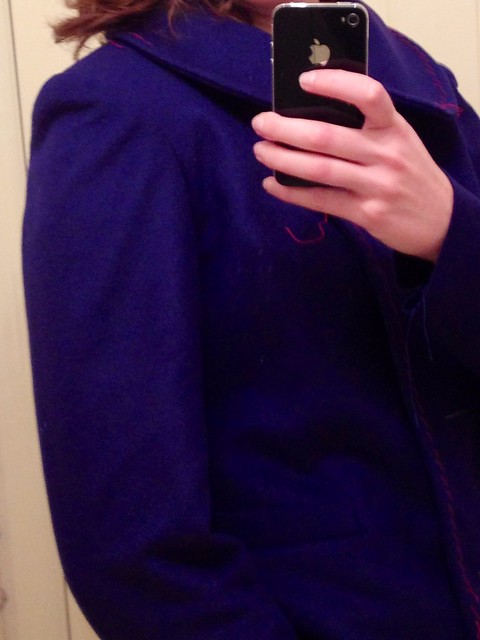
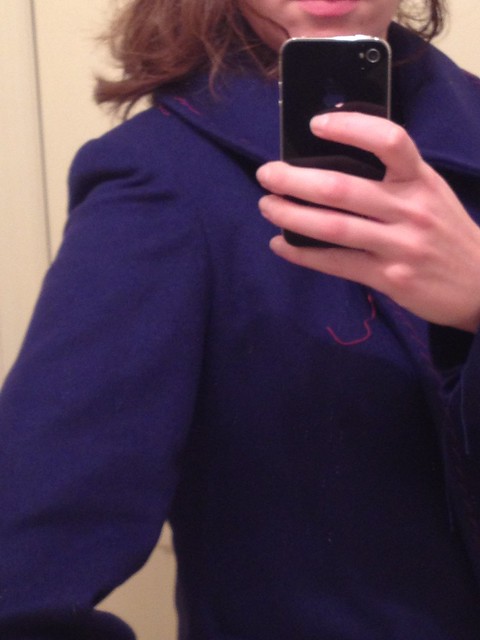
The shoulders of the jacket are too wide for my shoulders, which is why I’m getting a dent right below my shoulder pad…sigh.  When my Mom made blazers for me before, she adjusted the shoulders in since the sleeve seams were waaaay past where they need to fall on me.  I didn’t really notice this in my muslin, and when I tried it on again it was so slight and looked ok in the lighter weight fabric.  The effect is now emphasized in the heavier weight wool.

I tried using a 1/2″ shoulder pad instead of the 1/4″ pad, to see if it would help eliminate the dent, and it only made the dent more pronounced.

Oh, and I could never figure out that stupid ease in the front of the sleeve head.  Why in the world is there that much ease???  Ease like that should be in the back on the sleeve, not the front.  And yes, this is inserted correctly.


It looks even worse when I bend my arm, you can really see the shoulder pad.


Untitled


Same results on the other sleeve, too.


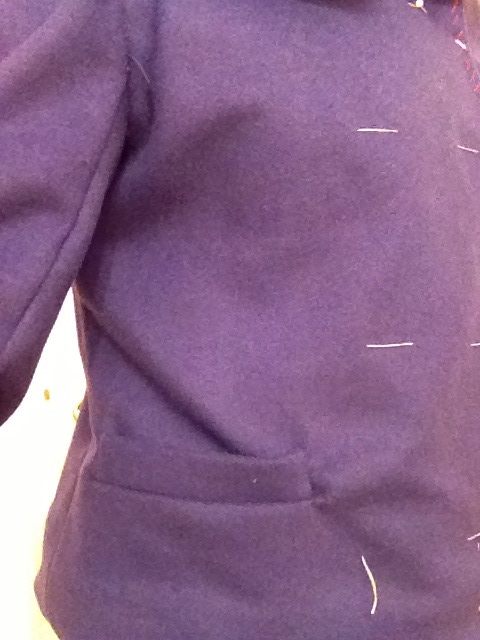
I think this pulling is the result of something that happened when I sewed the welt pocket, don’t think I can fix it either. 

Well, I learned a lot from making this jacket, and it’s by no means perfect.  There was a quote I saw somewhere recently that said “perfectionism is a disease,” and I have to agree – I was getting so hung up on having everything look just right, and I freaked out when I couldn’t get the sleeves to hang correctly..  As much as I’d like for this to look flawless, it’s my first tailored jacket and my skills will only get better the more I continue to practice and make more jackets/blazers/coats.  So for now, I’m finishing up this jacket and will wear it proudly when it’s finished.

Follow: