Portside Travel Set

portside set
 

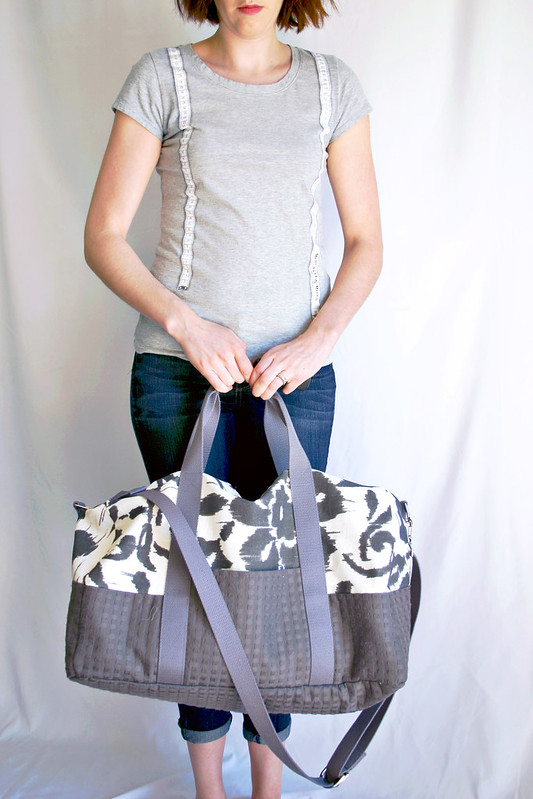
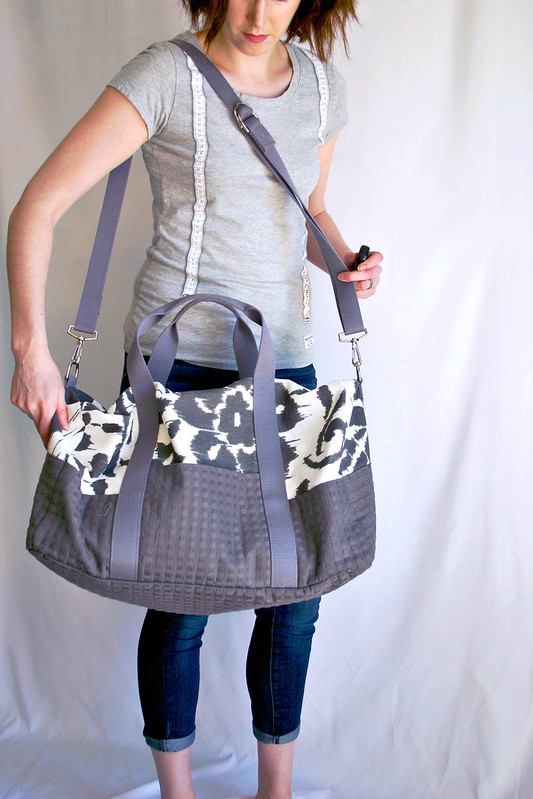
I don’t know what I would have done on my trip to Barcelona if I didn’t have this Portside Travel Set, what a lifesaver!  Packing for a three week trip isn’t easy, but let me tell you, this duffle bag fit everything but the kitchen sink.


portside set
 

I used the set as one of my two permitted carryons (the other being my backpack with work stuff in it), and here’s everything I packed in it: a full change of clothes, my trench coat, scarf, umbrella, a knitting project, two pairs of sneakers, a full dopp kit and cord pouch, slipper socks, sleep mask, toothbrush and toothpaste, and my pair of glasses.  I know I’m missing some other things that were in there, but there was still room to spare!


portside set
 

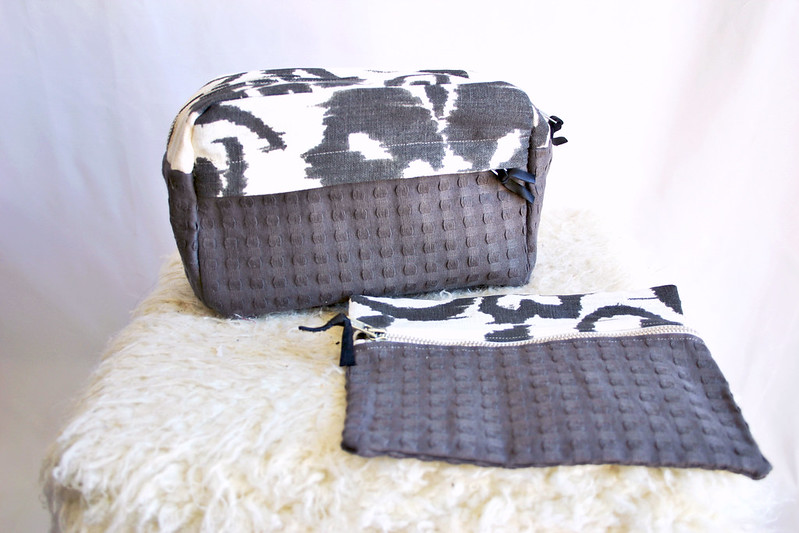
The dopp kit was especially handy, I fit my gummy vitamins, allergy meds, melatonin, ibuprofen, and some tea bags easily inside.  The cord pouch is the perfect size for holding all of the charger cords for my iPad, Kindle, and phone.  The pouch was a cinch to make, but the dopp kit was a little fiddly with the curved edges and there were a couple of colorful words used as I tried to get everything to sew neatly through my machine.


portside set
 

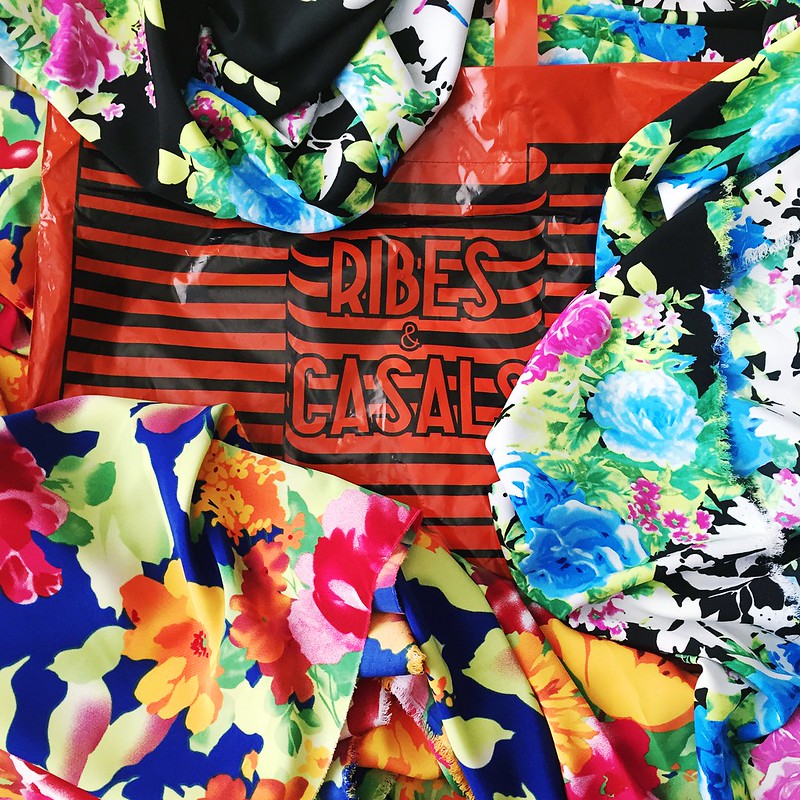
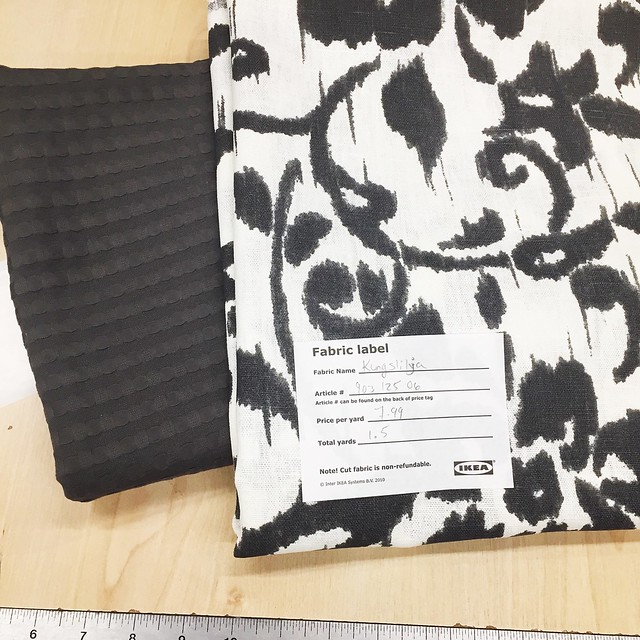
My fabric is from the home dec section of Ikea!  I toyed with the idea of using some Cotton + Steel/Rifle collab canvas from last year’s fabric collection, but I couldn’t bring myself to spend that much money on a bag that was going to get a lot of wear and tear (and dirt) as I toted it around on my travels.  Plus, the hardware and notions alone were a bit of an investment.

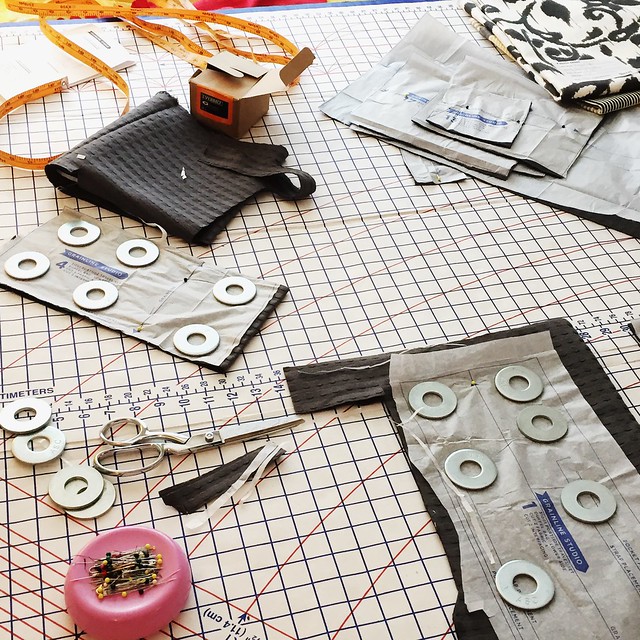
I opted to forgo the fusible interfacing, since I never have much luck with fusible interfacing when I make bags, and chose instead to use duck cloth as a sew-in interfacing (well, I spray basted it instead of sewing it, lol).  I like how duck cloth pairs with canvas, like with my clutches I made last year, and it provided enough body without the duffle bag being too stiff or “crunchy,” which happens sometimes with Pellon fusible interfacing.


portside set
 

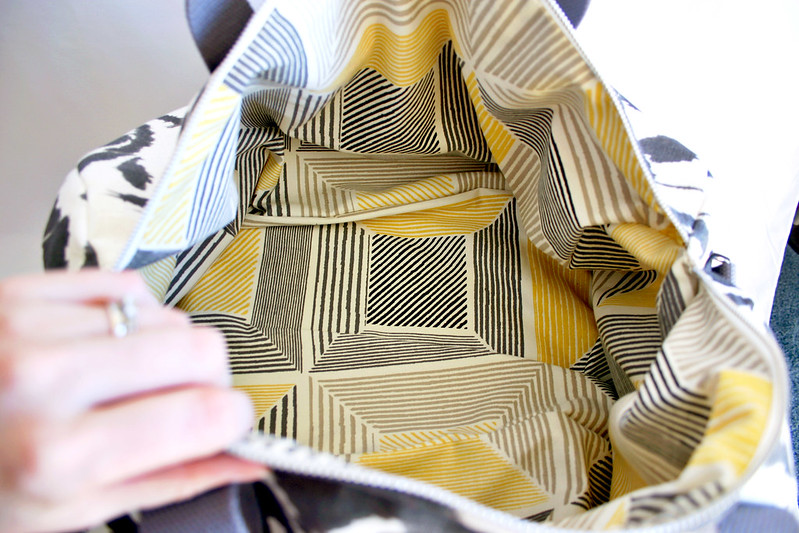
Nothing like a bright lining inside a bag!  Makes it easier to see things and find what you’re looking for.


portside set
 

My only complaint about this bag is that because it’s so big, and fits so much, it gets really heavy!  Which is really a problem that I caused with my packing, hahaha.  It was tough to wear this on one shoulder with my backpack and it kept sliding off, plus the weight didn’t help, so the best way to wear this was cross-body style with my backpack.  Especially when I had to hoof it and run through the Madrid airport to get to my gate in time!  I could see this being a great bag for a weekend trip via a car ride, but I’ll need to remember to be mindful of what I pack in this when I fly next time.


Pattern: Portside Travel Set by Grainline Studio
Fabric: Body, panels, and lining from Ikea
Hardware:
Buckles – Bagmaker Supply
Swivel Hooks – Bagmaker Supply
Webbing – AGraff Supplies
Zippers – Zipperstop

Follow:

Back From Barcelona

me and the city
 

park guell
 

Beach view
 

It’s been a week since I flew home from Barcelona and I am glad to be back!  Three weeks is a long time to be away from home, but it was a great few weeks setting up for an event for work and I even got to sneak in some touristy site-seeing (except for the Saturday I spent in bed with a stomach bug – yuck!).  Waking up with a view of the Mediterranean each day did not get old.


ribes y casal fabric1
 

It didn’t seem likely that it would happen, but I got a few hours free one afternoon and darted over to Ribes y Casals!  I love looking for fabric when I travel to cities and this was a store several of you recommended to me – it did not disappoint!  I only snagged this one photo inside the store since I wasn’t sure if it was ok to take photos, so I covertly took this one and went on my merry way.  What a wonderful store!  Everything was organized on tables in large rolls by fabric type and there were so many bold prints and bright colors.

What was different about this store compared to others I’ve been to, since I’ve never been to a fabric store outside of the US, is that you need to wait in line for a store clerk to come over and help you with your fabric selection, and you take them around the store and they cut out what you want.  I kept trying to get someone’s attention to help me with cutting my fabric, but then I noticed the looooong line everyone was standing in and put two and two together.  There’s no rush either if you need help, which is nice; I noticed a group of ladies running around with a clerk trying to find different kinds of fabric for their projects the whole time I was there.


ribes y casal
 

With my very limited Spanish, I found two beautiful poly crepes that were bright and colorful, like the city itself.  I’m thinking these will make some great dresses for summer!  Not pictured is a navy poplin I found with little white seahorses printed all over, perfect for a sleeveless Alder shirt variation.


Back at the machine
 

It felt good to sit down at my machine yesterday after no sewing in the past month.  I finished a Driftless Cardigan I started before I left, cut out a new project that should be done this week, and I jumped right in to Me Made May on Instagram.  Happy to be back home and in the swing of things again!

Follow:

Archer + Alder Shirtdress

alder archer dress
 

I pretty much live in Grainline Studio patterns these days.  Linden sweatshirt one day, Lark tee the next, I wore my Cascade duffle coat to death this winter, and I just finished sewing two other Grainline patterns (more to come on those soon).  I had a red Morris blazer almost done at the beginning of March but I put it away until the fall so I could start focusing on spring sewing.  Oh man, if there was a pants pattern in the line, I would be all set and never really need to sew from another pattern company again!

With all of that said, I present to you my newest creation: an Archer + Alder mashup shirtdress, my first garment of the spring season.


alder archer dress
 

To make this, I followed Jen’s second tutorial for hacking the Alder shirtdress by combining the top of the Archer shirt pattern with the skirt of the Alder dress pattern.  I agree with her that the bodice of the Archer shirt lends itself better to this kind of silhouette instead of adding on sleeves to the the Alder bodice, the Alder is too fitted up top and the proportions don’t balance out, in my opinion.  Her tutorial is spot-on-crystal-clear and the only change I made was grading the waist of the dress out from a 4 to a 6 since that’s how I fit in her skirt and short patterns.


alder archer dress
 

My personal preference is to wear this dress belted to give myself and the dress a little more definition at the waist (I need it!).  To make the belt, I cut two extra buttonhole band pieces and stitched them together.  It ended up being just the right length.


alder archer dress
 

(I have the worst resting-bitch-face in these photos, I was getting pissed off trying to get the lighting right so my camera would work!  Also, wish I could have taken pics with the camera further away so you could see the length of the dress better but my living room is too small to do that, boo.)

Here’s how it looks without a belt.  It’s okkkk….not my fave, I definitely like how it looks belted better.  Maybe it would look different if it was sleevless, like the original Alder pattern?


alder archer dress
 

Here’s a comparison of how it looks in the back, un-belted and belted.  There’s a good amount of ease in this dress (it’s really an A-line shape from the waist) and I like how it blouses out with the belt.


alder archer dress
 

The fabric is what made this project a little more challenging than I expected; I made the Archer pattern a bunch of times before and adding on a skirt wouldn’t make it a harder project.  I used a beautiful rayon denim from Indiesew that’s a dream to wear, but I had a booger of a time getting this fabric to cooperate.  It was super shifty, which made it tough to cut out on my cutting table, aka the cutting mat I put on top of my bed (oh how I miss the days of having an actual table to cut on!).  Cutting accuracy was not my forte in this project and my front button band is actually slightly longer on one side than the other at the hem – oops.  Something else happened with the sleeve that I can’t explain and I ended up not needing to ease in the sleeve cap to the armscye, but they seem to hang alright.  The pockets probably should have been stabilized as well to get a nicer result, but ehhhhh they’re fine.  The end result was worth it with this fabric (I think it looks like something from Madewell!), but it was a bit of a nail-biter to see if it was going to turn out nicely!


alder archer dress
 

Pattern: Archer and Alder patterns by Grainline Studio via Indiesew
Fabric: rayon denim shirting from Indiesew (sold-out but similar here)


This post is part of the Indiesew Blogger Network – pattern or fabric may have been provided by Indiesew, however all thoughts and opinions are my own

Follow:

I’m Headed to Barcelona!

Image courtesy of Vichaya Kiatying-Angsulee at FreeDigitalPhotos.net


Exciting stuff – I’m traveling to Barcelona next month for work!  For three weeks, I’m staying in the city and working my butt off to help set up an event for my company.  Spain never was a country on my list of “must-see” places, but I’m thrilled to have the opportunity to go and (hopefully) explore a new city and country for such a length of time.  I’m learning some key words and phrases as well with an app on my iPad and so far so good, there’s a lot of similarities between Spanish and French (which I majored in in college).


Untitled
 

Like any other sewist, I have a list of things to make for my trip (I know I’m not the only crazy one to do this, haha!).  First on my list is a Portside Travel Set made out of some home dec fabric from Ikea, and economical and stylish fabric source for this project.  I decided to use duck cloth for the interfacing and it’s working out pretty well, I liked the shape and body it gave to the clutches I made my bridesmaids for my wedding last year.


Untitled


It took soooo long to cut everything out, but at least the sewing is going together quickly.

Also on my sewing list is an outfit for the plane, a striped Inari Tee Dress with leggings and a pink Driftless Cardigan for layering.  Something loose and comfy that doesn’t make you look a rumpled mess when you get off the plane is key for a long flight.  On top of this sewing, I also want to make a birthday gift for my niece, who’s birthday is while I’m gone.  Ahh!!  So much to do 🙂


As I mentioned, I’m going to be working ’round the clock (nothing too glamorous about this trip, except maybe the hotel), but I’m crossing my fingers I can find some time to poke around the city, eat tapas, and maybe find some fabric stores to visit.


If you have any suggestions of places to make sure to see while I’m in Barcelona, and fabric stores to pop into, please leave a comment below!

Follow:

Toaster Sweater #1

Toaster One
 

Navy blue is slowly creeping into my wardrobe as my new go-to color over black, my usual everyday staple color.  It started with my Lonetree jacket and long-sleeve stripe top, and a lot of what I’m pinning these days on Pinterest for sewing inspiration is grounded in navy blue.  It’s a flattering color for pale people like me!

As a follow-up to the Toaster Sweater #2 I made at the end of last year, I decided to give #1 a try with some ponte I bought from Metro Textiles in December.


Toaster One
 

First off, this fabric is to die for – the ponte feels like a rayon blend, is incredibly soft after washing, and has a nice drape.  I love this fabric so much, I called up Kashi at Metro Textiles to order more!

The fabric isn’t very full-bodied, which is why the funnel neck collapses instead of standing up like in the pattern photos.  I was a little disappointed with that, but it’s so cozy to wear I got over that element pretty fast.


Toaster One
 

I actually tried this pattern out late last year and modified it to be a little longer in body length than what the pattern originally calls for – I thought it looked a bit cropped in the photos and was worried that the length of the sweater would hit right at the top of the waistband of my jeans.  Well, I should have just made the pattern as is, because the longer length threw off all the proportions of the sweater, it’s really perfect the way it’s drafted!  I don’t find it too short and can wear it with my high rise and lower rise jeans.  Maybe it’s the waist band that causes the illusion of the sweater looking short?  I also love the deep cuffs of the sleeves, they form a slight flare.


Toaster One
 

Like Toaster #2, this came together in a snap – it’s an easy-peasy instant-gratification project, perfect for a Saturday afternoon sewing session.  Everything was sewn on my serger.


Toaster One
 

I’m now in the process of wrapping up my “winter” sewing and shifting gears into projects for spring – especially for a trip coming up soon that I’ll share more about in another post.  Of course, as I type this, a blizzard is descending on Boston…but I know that spring weather will be here soon!


Pattern: Toaster Sweater #1 by Sew House Seven
Fabric: Viscose double-knit from Metro Textiles

Follow: